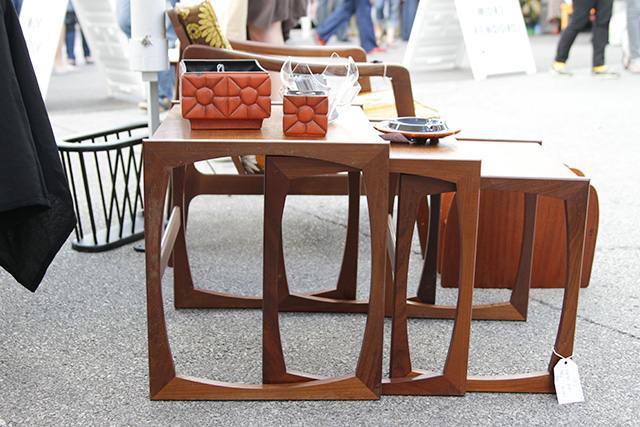
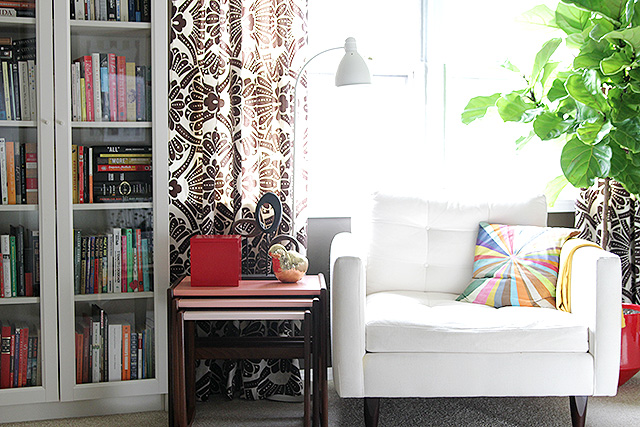
I found these vintage wooden nesting tables at the Renegade Craft Fair, here in Chicago, a couple of months ago. I loved the shape of them, and that they nested together, but they looked a little plain in my library.
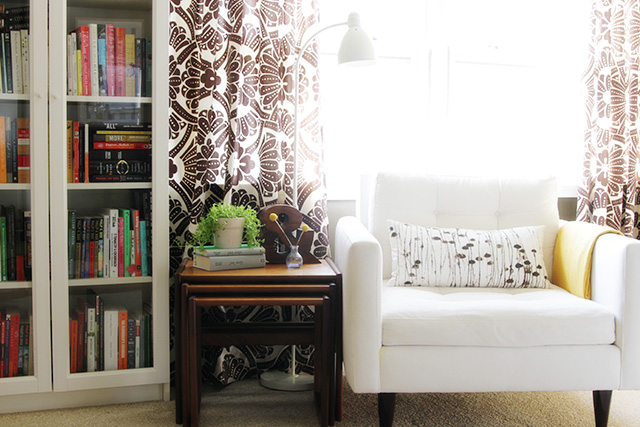
I decided to paint them in an ever-trendy ombré/gradient effect, figuring that when the trend moves on I can always repaint them again later. As I was preparing to paint, I look more closely at the tables and realized that someone had already painted them at some point, in a faux-bois effect. At least I didn’t have to feel guilty about being the first one to take a paintbrush to them!
I gathered everything I needed to get started: a lead test, sandpaper (150 and 180 grit), a mask, painter’s tape, paint and primer, a drop cloth, paint stirring sticks, and a good 2″ angled paintbrush. Below is a video showing the whole process.
I didn’t know how old that painted surface was, so I used a simple lead test to be sure that the tables were safe to work with. Then I sanded the tops with the rougher sandpaper, wiped them down, and taped off the edges. It would have been ideal to disassemble the tables and just work on the tops, but they were held together with a combination of dowels, glue, and magic. Prying them apart would have been difficult — possibly disastrous — so tape it was. Next I primed them, painted, sanded again with fine sandpaper, and applied a final coat of paint.
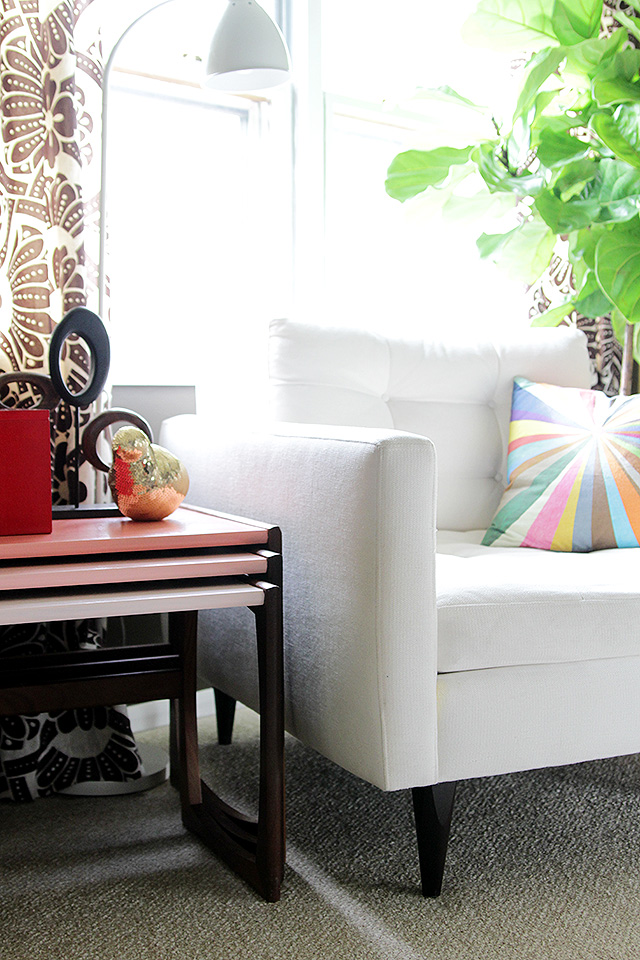
The three colors are Benjamin Moore’s Coral Gables and Petal Rose, and the third was a 50/50 combination of the two. I was careful to do a thorough job of sanding, and I made sure to abide by the recommended paint drying times (16 hours between coats because it was oil-based). I think that’s going to make all the difference when it comes to durability.
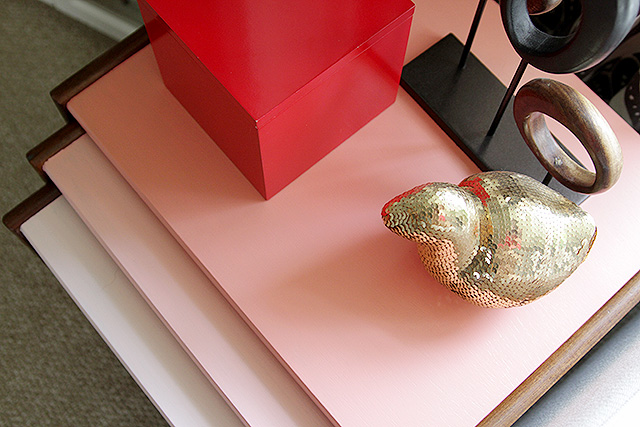
I love the way the tables play off of the new red pot of the fiddle-leaf fig tree, and the whole area feels a whole lot happier. Bringing that pillow up from the living room certainly helped too! It feels right to add a little more color to the area, since the kids play there a lot. August has already taken to using the nesting tables as stairs for his little animal figures.
This post is a collaboration with 3M DIY.
To learn more about safety and preparation, visit 3MDIY.com.

 ,
,  (150 and 180 grit), a
  ,
,  ,
, 


54 comments
Jeannette Holt
What a lovely transformation! Something so simple yet so effective! May I ask where you got the pillow? It’s just beautiful and exactly what I’ve been looking for. Thanks!
Making it Lovely
Thanks! The pillow is from Fine Little Day.
Amy @Five Kinds of Happy
This is amazing!! I love the happiness that colour can bring, especially in a space with such perfect proportions and details!
Sinea Pies
Absolutely love the contrasting colors. You are a daring lady but it sure did pay off. This post goes on my website’s Pinterest page! :)
mandy @ this girl's life
Ooh I loved these in their original state but the paint is just gorgeous!
Lindsay
At first I was dissapointed that you were going to paint those beautiful tables, but now… I’m obsessed with them :)
They are classy and cute, like all of your projects.
I’m also loving all the videos!
Lindsay
Alli (You have your blog, we have Aars)
Absolutely LOVE LOVE LOVE the colors you chose!
Patti Borrelli @BeSoStyle
Love this ombre diy… and love your blog! So glad i found you. i’m a newbee on the blogging block. Come visit me sometime… would love your words of wisdom. i’m originally a Chicago-girl too. Thanks for the inspiration!
Crystal
Very nice, I’m inspired! Thanks for sharing the tips
Heather - Girls Furniture
Oh my goodness! I just moved and I have been scrounging estate sales and flea markets for most of my purchases (cross-country moves can be rather expensive) and I love the end result of the tables! Then again, I love how they started out as too. Goes to show what a little paint can do for a room. :D
Natalie
Love love this (and your blog) can’t wait to find some tables to paint for the finishing touch in our living room!
Thanks again for the video and steps.
CJ Dellatore
Great tables, I certainly would have purchased them… I’ve seen similar ones in antique shops in Hudson NY near my home, but never in such good condition.
Thanks for sharing.
Lea
Wow, great video! Best yet I’d say. You seem much more comfortable and fluid in this video. Keep it up :)
Sasha
They look great! I’m curious, how do you keep your white chair looking so great? I have some four legged kiddos and my “white” sofa looks less than fab. What’s your secret?
Making it Lovely
I don’t know! We have two kids, three cats, and a dog (but the dog doesn’t sit on the furniture). That chair has held up really well over the last five years.
ryan
What a great find! Renegade always gives me an anxiety attack so I usually walk out empty-handed. We recently painted a vintage dresser for my daughter in the same style. You can see it here if you’re interested!
http://aforeverhouse.blogspot.com/2012/06/milas-subtle-but-sweet-ombre.html
Making it Lovely
So adorable! Perfect for a little girl’s room.
Christine Drumgoole
Great idea! So happy that you did this. I am always nervous to paint real wood that is lovely and in great shape, but this paint job is the best of both worlds: wood and paint. Or maybe three worlds, if you count ombre as another world. ;)
stephieZ
Where’d you get the great red pot from? i tried reading the other post and it either wasn’t mentioned or I am a terrible reader;)
Making it Lovely
I picked it up at Sprout Home when I bought the plant.
Debbie
Love this. Do you ever use the smaller tables?
Amy Kelly
What a great find and I absolutely love your idea of painting them in a gradient effect! Don’t you just love Coral Gables? I used it a few months back to paint a vintage campaign desk for my office. It’s the perfect pop of color! http://thatwinsomegirl.blogspot.com/2012/07/vintage-campaign-desk-reveal.html
I’d love to see more DIY project like this!
Making it Lovely
I love your desk! The color looks fantastic on it.
Allison
Wow, they look amazing! I love the ombre. Would you mind sharing how much the tables were originally? Thanks!
Making it Lovely
The seller wanted $250 for the set, but I talked them down to a little under $200. That’s probably still a bit overpriced (they are British G-Plan nesting tables), but I loved the lines of them.
Allison
Thank you! I never know what’s a reasonable price for things on CL or flea markets so I appreciate having a frame of reference. I love the tables, and even better with your beautiful paint job.
Bethany
great video! I like your videos… keep ’em coming?
Tables look fantastic. Just the right amount of colour.
Amelia @ House Pretty
Oh, I love, love, love this! You. are. brilliant.
Catherine
Sigh, I’m in love.
julie
Super cute. I LOVE nesting tables and have some cute faux lucite ones from CB2.
Mandi
The tables look great! I’ve never heard of doing a lead test, so that was a good little bit of info.
Also, off topic, but can you share where your striped shirt is from? I love the contrasting pocket!
Making it Lovely
It was from Madewell, but I don’t think it’s available anymore.
kris
I was really nervous when I started reading but they look FABULOUS!!
Way to go!
Helen
They look awesome, and much more “you.” Great video!
Alison
do you always sand after the first coat of paint as a general rule, or is it just a matter of how it feels?
Making it Lovely
I go by how it feels.
Christine
What a fantastic idea! I never would have thought to ombre those! I love that the tables were held together by magic, you don’t want to go messing around with that ;) Great job.
Joni
Do you always look so cute when you paint? :)
Love the tables, thanks for the video!
Kristi
I think this may be my first time posting but I check your blog daily (love it!). I love that you posted this! I have nesting tables in storage upstairs and they would look so cute in an ombre pink for my daughters future “big girl room”. Thanks for sharing!
Kathryn S.
I loved your tutorial! The tables turned out great!
Amie
I would have jumped on those tables, too! What a great find.
Sarah
Love these tables and the colors you chose! What a fun update. I like that they pop more in the space now. Also, great video!
Sarah
Making it Lovely
Thanks!
Comments are closed.