
The vintage yardsticks that my mother-in-law has been collecting for the lake house’s bathroom have finally become wainscoting. Three years after she mentioned the project to me, and at least six years since she conceived of it. (It’s about time, eh?)
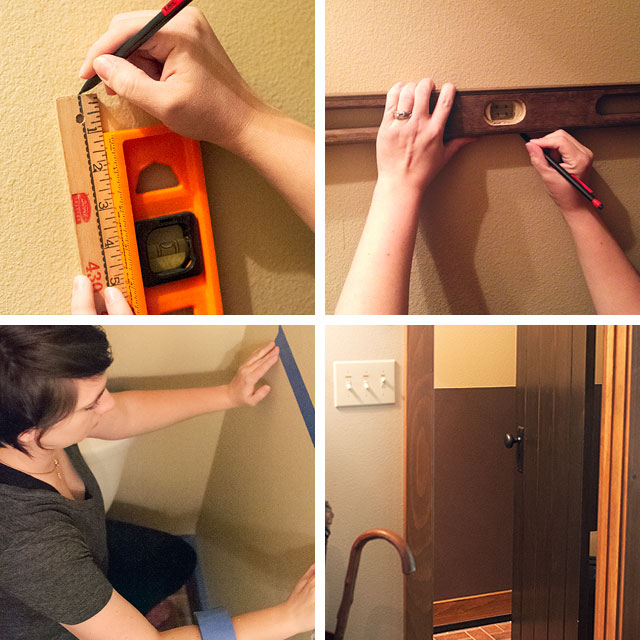
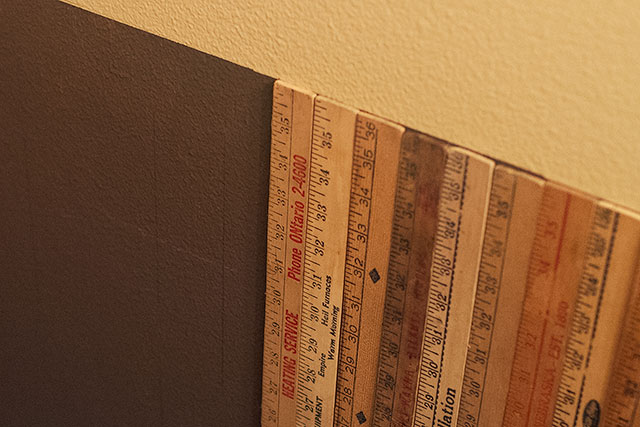
First, I marked off the room 36″ up from the baseboards (I held a level against a yardstick, vertically, to be sure I wasn’t measuring at an angle). Then I used a longer level to draw a thin horizontal pencil line across my marks, connect-the-dots style. I taped everything off, and painted the lower half of the walls in a neutral brown. The yardsticks going up were old and not perfectly straight, so the dark background helps disguise any potential wonkiness by blending in to the background as shadow. There are also holes at the top and/or bottom of many yardsticks, and the dark brown looked better behind those than the existing wall color did.
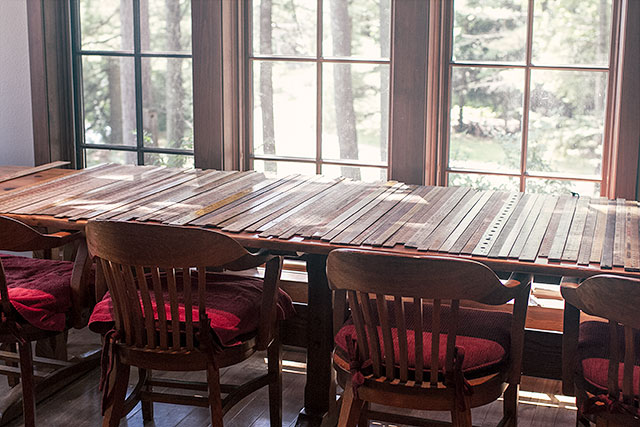
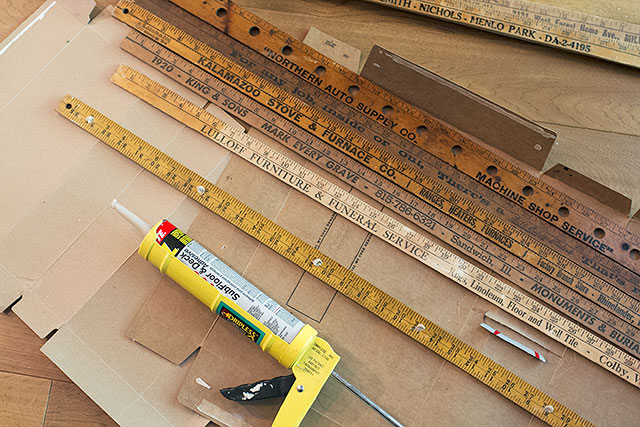
I laid out the rulers on a long table so I could arrange them in a pleasing manner before I began gluing them. You didn’t think I’d just grab and go, did you? What’s a DIY project if you don’t painstakingly put a ton of time into something that nobody will notice except you? I wanted the colors to blend, but not too much, and I wanted the best ones on the long wall that would be visible from outside the room.
Then glue, glue, glue. My hands hurt for days after caulking out so much adhesive. A contractor recommended PL400 to my in-laws, so that’s what I used, but I think Liquid Nails would have gotten the job done just fine too. Penciling in some vertical plumb lines beforehand helped keep everything from going askew.
There was enough room behind the toilet to slide the yardsticks into place along the wall, but the sink was a little trickier. I could have removed the sink temporarily, but opted instead to work around it. There was only a six inch wide section that caused a problem, where the pipes attached to the wall. I cut out the middle section of a few yardsticks and glued them into place from the bottom, and again from the top (matching up each one as though they were whole). You’d have a hard time noticing them unless you wiggled under the sink for an inspection. Even then, there’s just a clean rectangular cutout so it doesn’t look scraggly.
To finish off the wainscoting look, I bought pine trim to stain and match up to the existing pine throughout the house. The wood just needed to be measured and cut with a meiter saw (easy 45 degree angles for the corners), but there was an outlet in the way on one wall. Solution: cut a rectangle out of the trim. Tools needed: a drill, a jigsaw, a clamp, and sandpaper. You know the deal.
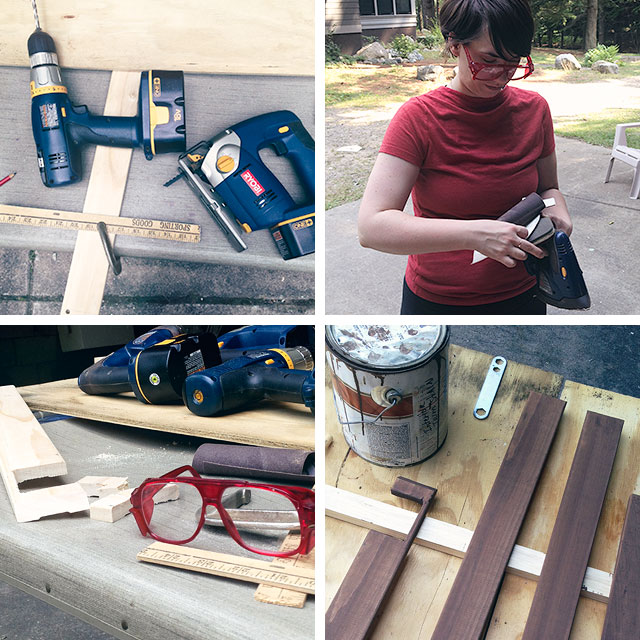
And do you like my stylish shirt? Brandon informed me, after taking that picture, that it looked like it was on backwards. It was.
The trim has gotten a coat of stain, but it was oil-based and needed to dry for 16 hours before getting a finishing coat of satin polyurethane. It can go up today, and then I’ll put the rest of the bathroom back together. Both the mirror and the framed WI print across from it now hang too low, so I have to move the picture hooks up a bit. I’ll take photos of the finished space and share it here tomorrow!

19 comments
Sarah
I thought your shirt was on purpose, too. I thought, “Wow, she’s always so on point; even when she’s DIY’ing!” Then I read that it was really backwards. That’s how stylish you are..you can rock a backwards shirt and people be like, “Ooooooo…” p.s. Love the yardstick wainscott.
ashley
wow! what a neat idea :)
Sarah
Can’t wait to see it!!!
julia
great idea! the matching red glasses are cute too :)
lsaspacey
Yes, the shirt is great but I’m really impressed that you matched your safety glasses to it. Now, that’s what I call stylish DIY.
Kaitlin Jenkins
That’s coming along so nicely! Can’t wait to see it finished. I was happy to hear you pre-arranged them first- I would have too ;)
vedjen
Your shirt was the first thing I noticed — I was going to ask where you got it because I thought the fit was gorgeous! Now I’m going to see if my shirts, worn backwards, look that great.
Laura @ Rather Square
Fun project! Do you know how much your MIL has paid for these yardsticks over the years?
cathy
Fabulous! I think I need to start collecting yardsticks!
lfw1031
Ha! I love the fact that the Lulloffs are covering all the bases with furniture AND funeral services! I hope that stick gets a prominent location! Nice job, as always.
Rebecca H
Your shirt, hilarious. You make me laugh. I’m so impressed with your blog each and every day. Wonderful!
Michelle
I can’t wait to see this finished! seriously, that’s an awesome idea if you have just the right space to fit it in. I had a friend that once made a skirt out of ties she found in a thrift store…just sewed them all together and added a zipper. For some reason this reminds me of that although I have no idea why! :-)
bridget b.
very cool idea!
Laurie
I can’t wait to see this! Those yardsticks look fabulous with the business names on them like that. I am bereft that I don’t have a collection like that. They are wonderful.
Sarah
What a cool idea! I can’t wait to see the finished product!
Comments are closed.