
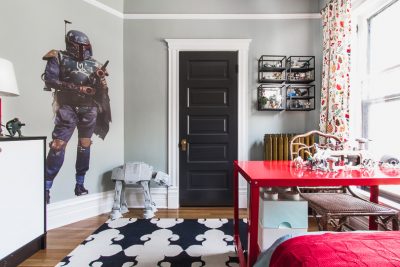
I’m quite enamored with just about everything craft related, but I get especially excited when I get to create a piece of jewelry or another type of accessory. I was so happy when Nicole was open to the idea of me sharing a jewelry-based DIY with you all, and I hope you enjoy it. And while the idea of making your own jewelry may sound a bit intimidating, I assure that if you’re even somewhat remotely ‘crafty’, you can create something for yourself with just a few basic items you can find at just about any craft store.

To get started with this particular statement necklace, take a trip to your local Michael’s (or other craft store), which is where I picked up everything you see below, including the beads, and pick up the following items:
Jade colored beads in multiple sizes (I used 3 different sizes), mono-filament jewelry wire (it looks just like fishing line), a package of jewelry chain, an all purpose pack of ‘jewelry findings’, which includes jump rings, crimping beads, lobster claw closures, and pin wires. You can buy all of these items in separate packages but if you’re a beginner or aren’t doing a lot of jewelry making, this all purpose pack is great. You also want to have a pair of scissors on hand, as well as a pair of needle nose pliers and wire cutters, which they sell on the cheap at a craft store, or you could always use a pair from your tool chest. Total supplies, if you include buying the tools, should run you less than $30. *Note that over the weekend I made this necklace again for a friend and this time I used a jewelry wire called Soft Flex in ultra fine. It was actually great to work with and because this necklace gets a little heavy, it is really sturdy and should hold up better over time. It is quite a bit more than mono-filament, but may be worth it in the end.

Begin by cutting a length of your jewelry wire (roughly 18 inches), and string 1 of the crimp beads and a jump ring through the tail end of one side. Loop the wire over the jump ring and through the crimp bead again, creating a loop that is held together by the crimp bead. Gently but firmly squeeze the crimp bead shut with your needle nose pliers. There’s an actual bead crimper that they sell, but I’ve never had a problem closing my crimp beads shut with my pliers. You’re now ready to begin stringing your beads. Once you’ve completed one strand, close it off using the same method that you began with, using a crimp bead and jump ring. Your other 2 strand will now attach to this single jump ring. Trim the extra jewelry wire. Note that each strand will be approximately 14-15 inches long when finished. You don’t want all 3 strands to be exactly the same length so that they lay better on your neck.

Since I’m not an actual jewelry designer and do this for fun, I always try to keep my designs relatively simple. I always love the look of mixed metals and gems, but I leave the real pattern mixing to the professionals, and stick to similar materials and tonal, or complementary, colors when creating something new. With this necklace, the only variations I made was to use a slightly different pattern with all three strands. One strand uses just the 2 smaller sized beads and has tiny gold seed beads spaced between each one. The other 2 strands contains a mixture of all 3 sizes, but in a slightly varying pattern.

Once the body of your necklace is finished, it’s time to attach your chain. I think adding the chain creates a more finished look, and it also makes the necklace adjustable. Snip off 2 pieces of chain with your wire cutters. My chain is approximately 2.5″ long on each side. Attach each piece of chain to the jump ring on either side. A tip when opening and closing your jump rings; if you have 2 sets of small pliers on hand, gently pry each end apart, as shown, and then squeeze shut. This helps to maintain the shape of the ring, but it’s not necessary. Grab 2 more jump rings and attach it to the end of one chain, and attach it to the lobster claw and chain on the other end. Now you have your closure. If you’d like to really lend a finished look to your necklace, you could grab a sapre bead and attach it to one of the pin heads and then run it through a loop of chain and twist it shut, nipping off the end with your wire cutters, but this is not necessary.

You’ve now finished your necklace and are ready to try it on! Total time to complete this necklace is 45 minutes or less, depending on your comfort level with working with the tools and beads.

I tried the necklace on with a white tee, a chambray shirt, and this red dress, and it looked great with all three options, but I really love the way it pops against the red. Jewelry making is one of the most rewarding hobbies I have, and I hope this inspires you to give it a try. Please let me know if you have any questions.

120 comments
Alyssa | Richcomplexions
OMG!! This is a true definition of beauty and perfection!! I’ll be doing mine today, hope I find the same color of beads used here.
thejewelcreation
Such a cute and classy necklace! Amazing
Mamie
This article will assist the internet viewers
for setting up new blog or even a blog from start to end.
Daniela Walsh
I love this tutorial! I am starting an online shop selling jewelry, and this necklace tutorial is EXACTLY what I wanted for ideas. Thank you so much!
xo
Daniela
Horace
I would like to thank you for the efforts you have put in penning
this blog. I am hoping to view the same high-grade content
from you later on as well. In fact, your creative
writing abilities has motivated me to get my own, personal blog now ;)
Law Professionals
Just a fast comment to say just post. Just interested.. did you design the blog design yourself?
deloom
I love this! I’m a sucker for a big, bold colorful necklace. :) Thank you for sharing! <3
JustJoannie
I love this! I was wondering if there was anyway to incorporate fancy-colored diamonds into this kind of necklace. I love the idea of a statement necklace, but would really like to keep the diamond aspect. They remind me a lot of my grandmother and the jewelry she would make me as a child.
Thanks for this beautiful guide!
Theresa campbell
Thank u for this little idea! You made a gorgeous piece and I adore the color you chose. Gives me a great idea! :)
Donna
I love making necklaces. I am a novice, so I do not know much about jewelry making. But, the only problem I keep having is that the necklaces keep breaking after a couple of times wearing it. How do you know if certain string or clamps are not strong enough for certain designs? Do you experience similar problems? What kinds of wires and or clamps do you use?
Beader Bubbe
What a beautiful necklace and looks easy enough to do. In fact, going to try it….thanks again for the tutorial.
Elisabeth
is this jade statement necklace for sale? I would really like to order one for purchase. I’ve been looking for something like this jade green statement necklace for a few weeks now and I can’t find anything, until I came across this tutorial. Only I want to purchase it.
thanks,
elisabeth
Dawn
This looks gorgeous. You make it look easy, but I’m not so sure… going to give it a try! I appreciate you giving a cost estimate – I was wondering how much it would be to supply gather… $30 is worth the shot. :)
Tyler
I found this on Pinterest and made my own :) Thanks for the help and inspiration!
http://www.raysofpurple.com/2012/09/diy-statement-necklace.html
Heather
This looks SO easy. Thanks for the tutorial, I plan to try it in orange :)
Tara
Hi! Love this necklace! What’s the estimated price for a necklace like this minus the tools?
Kelly
So gorgeous! I used to make jewelry for fun…definitely inspiring me to break out my “jewelry box” and make something new! : )
Devi
Hi… beautiful design! I love the color of the beads :) I make jewelry for fun too… I find it relaxing actually… I will definitely try this some time!
blair
Hello Andrea, this is a lovely necklace tutorial and i love the finished product . i made one now . i am really fond of craft and i loved ur blog i too have an idea of making a ring would u like to try ?
Jeanette Fisher
Thats amazing! Do you have an etsy.com account?
sara h.
Thank you SO MUCH for this tutorial, I was so inspired, I made three necklaces, including the one you showcased here. While I don’t think I’ll be opening up an etsy shop anytime soon, thanks for showing me how easy it is. Now I don’t have to covet those JCrew pieces quite so much :)!
Mary
That is SOO gorgeous! Mind making one for me?? =)
Thanks for the tutorial. Maybe someday I’ll make one!
Erica W
I just finished making this, took about an hour. To anyone who doesn’t think they have the skills, I have one hand (seriously) and I did it! I found that it helped to have long fingernails to better catch the crimps & other small bits. Thanks for sharing :)
Andrea Howe
That is amazing Erica. Thanks so much for sharing :)
Jill
Thanks so much!! I made this yesterday and it turned out FANTASTIC!! I love it so much!! However, it took way longer than 45 minutes (at least 2 hours) but so worth it!! I haven’t done any beading for more than 15 years and that was all super basic, what a great introduction I’m sure I’ll be making more!
Jill
Gina
Mine took me closer to 2 hours, but for a novice, it was an easy project & now I have the confidence (& supplies)to try making more jewelry! Thank you for sharing!
Kali
I remember making necklaces when I was a kid and how fun it was. Although mine were much more simple I agree they are super easy! Once you’ve made one your possibilities are unlimited! This one is beautiful and goes with just about any color. One great thing about buying the supplies at Michaels is the great coupon offers they have. You can get just about everything for half price. Thanks for reinspiring me to make beautiful necklaces again!
Brave Beltworks
This is such a stunning necklace – great colour!
Sara Russell Interiors
This certainly is a statement necklace and perfect for the summer! Thanks for teaching me how to make one!
xo Sara
Mei
Thanks for sharing this wonderful project,Where did you bought the beautiful color beads?? Can you sharing a place where we can buy online? Thanks so much!
Adventures in Dressmaking
Wow, I’m impressed! Love the colors, and this looks AWESOME and maaaaaybe like something I could do. I almost never make jewelry but would love one of these! And I’m hitting up JoAnn today, so I’ll take a look at the bead aisle and see how intimidated I get…. thanks for the lovely tutorial!
Miranda
Looks amazing and I LOVE it with the red top, great color combo!
Jess
Oooooh I love! Def going to be making this next week while I am on stay-cation!
Amanda
This looks pretty! I’ve been making my own jewelry for quite some time, and i learned a few new ideas. Awesome! and thanks! :)
katrina
this is PERFECT!
Linda
Hello Andrea, this is a lovely necklace tutorial and I saw it on Pinterest. I have a question, I want to know what type of bead you used as the spacer-beads between the jade colored beads? Was it a seed bead or is it metallic, or metal? Thanks so much and congratulations on your new little one coming soon! ;D
Andrea Howe
Hi Linda! Thank you for the well wishes! Yes, the beads in between were gold seed beads, available just about anywhere :) I only used them between the small and medium size beads because they just got swallowed up by the larger bead. Let me know if you have anymore questions!
Amanda
I am trying to make this but went to two Michael’s and could only find two sizes of beads. 14mm and 10mm. Any idea where I might be able to find the 12mm or are they sold only at Michael’s?
Jennifer
I’ve been meaning to give jewelry making a try since my love of statement jewelry doesn’t exactly jive with my bank account balance… this post just pushed me over the edge and I’ll be hitting the craft store tomorrow to pick up any missing supplies.
Heather @ Interior Groupie
Wow! Great tutorial and I LOVE the finished product!
Nancy
Nicole, you look so fit! I know a while back you did some posts that included how you were changing your diet. I wish you would do an update. I like that you had a sensible approach, and would love to know how you fit fitness and healthy eating into your daily life. Especially since you are so busy!
Nancy
Oops! Forgot to mention that I love that necklace! I am inspired to try and make one myself.
Meredith
I love this necklace! Thanks for the tutorial! I am going to have to make a few of these for summer!
shortsweetseason
I LOVE this necklace and I never feel inspired to DIY jewelry, but I am going to make this. It’s beautiful!
the domestic fringe
I love it!!! Such a beautiful color.
~FringeGirl
See
I love this idea. i love everything about it – i’m totally going to spend the weekend making some statement necklances!!!! i’ll post some pics so you can see.
Summer // House&Hold
really incredibly beautiful!
excellent tutorial – this will help me re-string some of the broken down vintage beads/necklaces from my grandma too!
Danielle
Soo pretty! I’ve always wanted to try jewelry making and I think this might give me the push I’ve been needing!
Courtney
Love it! Totally attempting. I second the nail polish inquiry.
Holly
I LOVE this necklace!! Can’t wait to try one just like it!! Could you give us an estimate of the cost? Thanks so much for your lovely post!*:.
Kelli
I love this necklace. I have been looking for something like this to make to go along with a maxi skirt that I am making. I will be making this for sure and will let you know how it goes. Thanks again!
Ashley {GirlyObsessions}
This is a great tutorial! I have a container full of jewelry supplies, and new beads that I’ve had since Christmas and I can’t find the motivation to make something for myself!!! I think this post may have done the trick! (I also love Fusion Beads!)
Uncle Beefy
Okay, so not a look I’m gonna pull off. Well, at least not without plenty of raised eyebrows. But, what a fantastic DIY! Reasonably easy and super chic. Awesome!
Making it Lovely
Oh, come now. Around the house, perhaps? ;)
Jules
Hah!!
Phoebe
Love this project! Where did you get the beads? I have the toughest time trying to find beads in pretty colors.
Allison
I love your nail color (especially in contrast to the green beads). I’ve been wanting to find a nice orangey red. Can you share the shade if you know it?
Andrea Howe
It’s called Geranium by Essie. It’s a great shade. If you can’t find Geranium, get Fifth Avenue. It’s almost identical. I know because I bought Geranium the other day thinking it was so different from Fifth Avenue, which I already had at home, but nope, only the tiniest bit of a color difference. Both are really pretty orangey reds :)
Allison
Thanks!
Sarah
I’ve only made 3 bracelets so far! Super simple ones, I like that when you get started it begins to get cheaper as you already have the bits and pieces so you don’t have to keep buying pliers etc.
Really want to make earrings!
Tiffany
I love this. Hopefully I can do it . Lol
mandie
I, too, love how it pops against the red!!! I’d love to make some of these!!
Erin
This might just be doable for a novice like me. And it’s gorgeous. Also, where is the red dress from? The detailing looks beautiful.
Andrea Howe
It’s from ASOS. It’s from their maternity line, but I do believe they did a non maternity version as well. You can pop on over to see the full outfit shot if you’d like on my blog :)
Valerie Olsz
Love at first sight! So do tell, are you selling this particular piece? I’d love to own it or one like it. Pretty sure I’m not equipped to make one as superior myself……
Andrea Howe
Oh I wish I had the time right now to open a shop! But with 2 blogs going, and baby #3 on the way I’m afraid not :) Maybe someday soon though! I promise this is very easy to make though!
Jeanette Fisher
Do you have a esty.com account?
Shalini Rajkumar
Lovely necklace! I dabbled with jewelery making a long time ago, mostly earrings but I was never happy with the quality of wires I got from Micheal’s. Do you know of any online resource? I am motivated to get back into making some jewelery for myself.
Andrea Howe
Excellent question! Yes, sometimes the Michael’s supplies aren’t of the highest quality. I used them as a reference here because for a novice trying to just find things all in one place, they are a good resource. But if you’re looking for professional grade, I hear Fusion Beads is great. I personally haven’t shopped there but I know a few friends that have and like it quite a lot. I’m lucky enough that we have a fantastic family owned bead shop minutes from my house that I can go into if I need real high quality materials. good luck! http://www.fusionbeads.com/index.php
Sara G
LOVE LOVE LOVE this necklace! I was just at Michaels today and had these exact beads in my hand but decided to research how to make a neclace first and then i happen to come across your blog!
Questions: I also only found one size in those beads, did you get them all at Michaels? Also, how many strands of each size of beads do you think i need to make this?
Michele
Hello! Love this piece. Did u say where u got the beads? I am only finding 2 sizes not three :(
Michele
Hello! Love this piece. Did u say where u got the beads? I am only finding 2 sizes not three :(
Amanda
Beautiful tutorial with lovely photos! Love the green. I read this question and also wanted to suggest etsy.com as a source for jewelry supplies. I’ve found some unique stuff and the prices are about as competitive as anywhere else!
Jules
Okay, I think I can do this. Maybe we can get together and make one or two?
Andrea Howe
Jules, you know you don’t even have to ask. Any excuse to see you my friend! :)
Melissa
Love this necklace. Now I am tempted to try my hand at making a necklace!
Heather
Beautiful!! Thanks for the great tutorial and beautiful step by step photos. I’ll definitely try this out soon!
Comments are closed.