

Making Beaded Necklaces
I recently helped a couple dozen ladies turn waxed cording and beads into necklaces at my Anthropologie craft event. I…May 14, 2015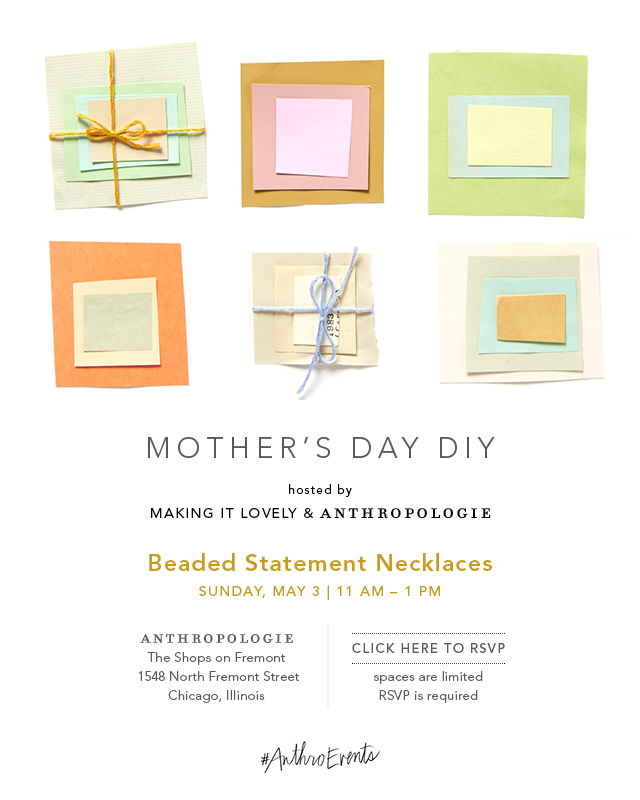
Mother’s Day Crafting at Anthropologie
I'll be hosting another crafting event at Anthropologie soon! Last time, we made wooden Valentines, and this time we'll be…April 17, 2015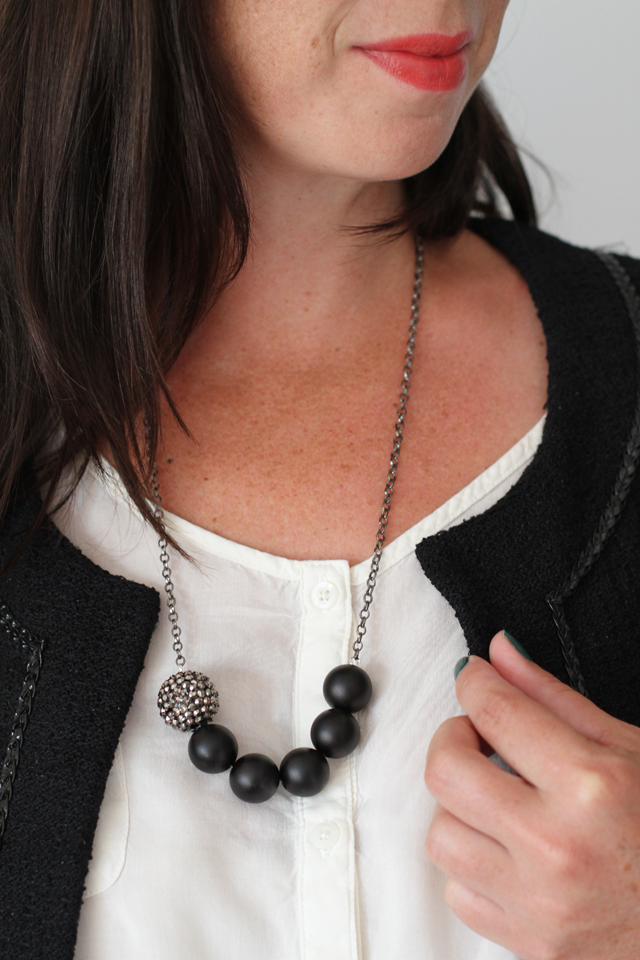
How To Make A Simple Bauble Necklace
post by Andrea I come across beads and baubles that I love on a constant basis, and in fact need…July 31, 2012
How To Make a Statement Necklace
post by Andrea I'm quite enamored with just about everything craft related, but I get especially excited when I get…May 23, 2012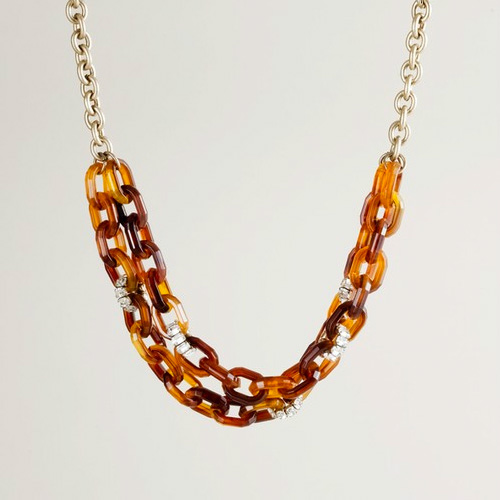
Resin and Crystal Link Necklace
This is something that you're going to ask about six months from now when you see it in a random…August 31, 2011
Style: May 2011
This is a prettier version of what I've been wearing lately. I wrote about that top on Babble not long…May 16, 2011
Making Beaded Necklaces
I recently helped a couple dozen ladies turn waxed cording and beads into necklaces at my Anthropologie craft event. I made one at home beforehand…
Mother’s Day Crafting at Anthropologie
I’ll be hosting another crafting event at Anthropologie soon! Last time, we made wooden Valentines, and this time we’ll be hosting a craft for Mother’s…
How To Make A Simple Bauble Necklace
post by Andrea I come across beads and baubles that I love on a constant basis, and in fact need to stop buying beads at…
How To Make a Statement Necklace
post by Andrea I’m quite enamored with just about everything craft related, but I get especially excited when I get to create a piece of…
Resin and Crystal Link Necklace
This is something that you’re going to ask about six months from now when you see it in a random photo of mine, but by…
Style: May 2011
This is a prettier version of what I’ve been wearing lately. I wrote about that top on Babble not long ago, and I’m still loving…