Tag: upgrade

  • Review: Indow Window Inserts

    Review: Indow Window Inserts

    Indow provided two window inserts for review.

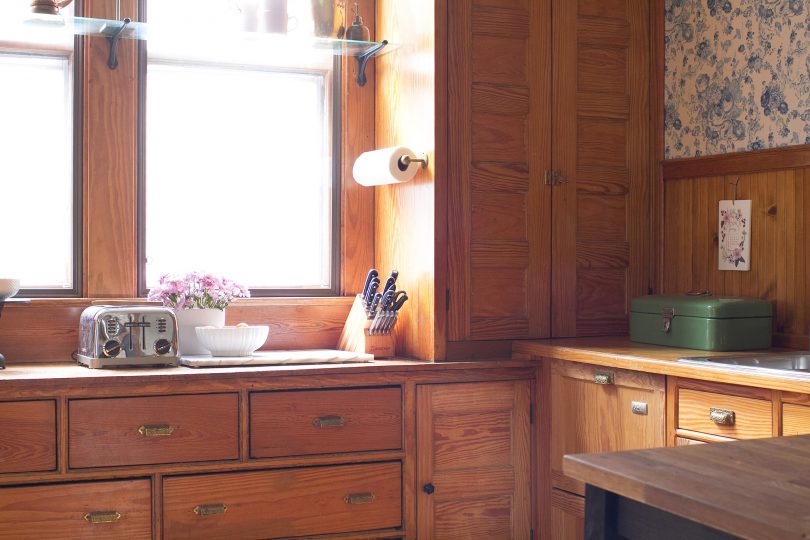
    Most of the windows on the first and second floor are original to the house — single pane, wavy glass, and all. They’re lovely and historic and I would opt to preserve and restore rather than replace them. That said, they can be pretty drafty. We’ve improved the heating situation here since a tomato froze on our countertop shortly after we moved in (for real), but the kitchen windows were some of the draftiest in the house.

    Kitchen Windows with Indow Inserts | Making it Lovely

    In years past, we’ve taped up window film. We went through the whole process of taping and shrinking the film with a hair dryer for each window and it works, but the installation is awkward and takes a lot of time. Plus it doesn’t hold up all that well over time. The film starts out being relatively unnoticeable, but the pressure of constant drafts makes the the windows look rippled, and once there’s enough slack, they’re noisy! Think plastic rustling and the thwack of the film being sucked backwards. Then when the weather warms, you rip it all down, hopefully not taking too much of your windows’ finish with it, throw it away, and do it all again the next year. Not exactly ideal.

    I’d heard good things about Indow window inserts, so I was definitely on board when they reached out and offered to send a couple of inserts for review.

    Kitchen Windows with Indow Inserts | Making it Lovely

    The inserts are edged in compression tubing to hold them in place that comes in three colors (white, black, or brown), and there are various options for different applications (like blocking drafts, noise reduction, light control, or adding privacy). The woodwork on our first floor is all unpainted, so I chose brown frames to blend in, and standard grade acrylic since I was primarily concerned with cold drafts.

    Kitchen Windows with Indow Inserts | Making it Lovely

    Indow had an installer in the area (an architect who lives about five minutes away), so we set up an appointment for him to come out and measure our windows. They’re rarely square — especially in an old house — and he used a laser tool for precise measurements. If you don’t live in an area where someone can come out to you, Indow can send the tool out to you so you can do it yourself. Our installer came back with the inserts when they were ready and showed me how to put them up, though again, it’s totally doable if you’re on your own. It took five minutes! They work perfectly! And they aren’t noisy! They’re a serious upgrade over the window film we had been using, and obviously better than living with the drafty windows as-is.

    I bought a little movable weather gauge our first year here because I was curious about the temperature differences throughout the house. I set it on our window sill before and after putting our Indow inserts in, and there was a measurable 20 degree difference.

    Measuring the Temperature Difference with Indow Window Inserts

    HOORAY!

    The compression tubing holds the insert in place without adhesives or hardware, and there’s no damage to the window frames. We’ve had our Indow inserts in all winter and they’ve been fantastic! They work, which is the important thing, but they also look good and stay in place. There has been the added benefit of some noise reduction too, even though we didn’t specifically choose the ones that are best at soundproofing. Far better than the rustle of plastic sheeting we had in the room before!

    Indow Window Inserts Detail

    There’s a small ring in the bottom corner of each insert, so you break the seal with your finger and then give a little pull. (This is a weird analogy, sorry, but breaking the suction is like unlatching a baby.) Then you can store them and bring them back out as needed. Our windows are staying put even if we someday renovate the kitchen, so we’ll be using the inserts each winter for years to come.

    Kitchen Windows with Indow Inserts | Making it Lovely


    Thank you, Indow, for providing inserts for review! Many people in the comments asked about pricing, so I’m updating the post with that information here. The price per insert for our windows was $262 excluding shipping and measurement and installation fees.

    If you’re interested in inserts for your windows, you can find out more and get a free estimate from Indow right here.

  • With the Push of a Button

    With the Push of a Button

    This post is sponsored by Legrand.


    The first and second floors retained most of the original Victorian hardware but there was a mishmash of light switches when we bought the house, so we swapped them all out for brass plates with period-appropriate push-button switches. The third floor, however, had remained cobbled together. The paneled wood doors were different styles, sizes, and colors, and all had mismatched hardware. The lighting fixtures were blech and the generic white toggle switches were nothing special. My plan for the space has been to elevate the details, bringing them in line with the rest of the house so they would feel less like an afterthought.

    I kept the white trim but painted all of the doors black a few months ago. The old doorknobs were replaced with brass knobs and mortise locks chosen to reference the ornate detailing of the original hardware downstairs. I also installed brass sconces and added black shades that look amazing with the black doors. With those upgrades taken care of, I turned my attention to the light switches.

    Legrand Adorne Push-Button Light Switches

    Legrand offered to send my choice of their Adorne switches and wall plates, and I first thought about going with all white. The third floor is more modern and less period than the rest of the Victorian, but I do still want it to feel like it belongs. White didn’t seem right. The doorknobs that I installed are a sort of modern take on Victorian hardware, so I went with the Adorne Push Switch, which I figure is the modern version of the old style push-button switches on the first and second floors.

    Magnesium gray switches and aged brass are a nod to the black and polished brass of the past. There are tons of styles and colors to choose from for the wall plates though, including a customizable option that can be painted or wallpapered. There aren’t any visible screws on the plates, so the overall effect is super sleek.

    Guest Ready Bedroom with Legrand Adorne Push Button Light Switch | Making it Lovely

    I turned off power at the electrical panel for the circuits I was going to be working on. There are instructions included with each Adorne switch or outlet, but the short version is to start by removing the old switch plate and switch. Pull the wires through the new backplate and screw it in, connect the hot wire and neutral to the new switch, then tighten the screws to hold them in place. I added electrical tape around them before pushing them in, but maybe that’s overkill? You push it into place until it clicks in, then do the same with the wall plate. Done.

    I documented the whole installation on my Instagram Stories and saved the video. Apologies for the tight closeups, but I cropped it from a vertical to a horizontal format.

    Some of those switches on the third floor had definitely seen better days. They’re so much better now!

    Legrand Adorne Light Switch, Before and After

    Upgrading the details of a house, especially those that you touch and interact with daily like light switches, make such a difference. Our Adorne light switches feel modern, but also like they totally belong.

    Legrand Adorne Light Switch | Making it Lovely

  • Upgrading to a Smart Thermostat

    Upgrading to a Smart Thermostat


    This post is sponsored by Honeywell.

    I received a Lyric thermostat and compensation in exchange for coverage. All opinions and thoughts about this product are my own.

    hr 644

    We’re continuing to modernize our Victorian’s heating system. We’ve already replaced the boiler with a more energy-efficient model, and we had thermostatic radiator valves installed on our radiators throughout the second and third floors. Now our latest change has been upgrading to a Lyric thermostat.

    Old Thermostat

    The house’s existing 1980s model was missing its cover, and I was glad to replace it with something more attractive. This may be a bit dorky, but I actually have a favorite thermostat, design-wise! My grandparents had The Round in their home, and it has always been my standard for what a thermostat should look like. The Lyric draws on the design of The Round, marrying the look with smart new features.

    Installing the Lyric Honeywell Thermostat

    The Lyric app walks you through the installation, and it’s pretty straightforward. I was all set with the power off, and with my phone and a screwdriver handy. There was some wall damage hidden beneath the old thermostat, so I used the Lyric’s optional backplate to cover it. (When I eventually wallpaper or paint the dining room, I’ll repair the plaster and remove the plate.) I mounted the new thermostat, reattached the wires, and connected to it wirelessly, but then I had to name it. Ack, the pressure! So I named it “Hottie” because, you know… it keeps us warm. Clearly I am not good at naming devices on the fly. (Also, I didn’t realize everyone would see what I named it!)

    Lyric Thermostat "Hottie"

    Besides an upgrade in appearance, our new thermostat will also help us save money. Weather and humidity are taken into account with its Fine Tune feature, insuring that 70 degrees actually feels like 70 degrees. You can also further adjust the temperature at any time manually or via the app. We’re keeping the house fairly warm during the day because of the baby, but I did program the thermostat to cool the house down by five degrees when everyone is asleep. The kids get up around 6am so I set that as our family’s awake time for the thermostat, but sometimes I’m up with Calvin for couple of hours before everyone else. I love that I can adjust the temperature through the Lyric app on my phone, without leaving my bed.

    Lyric Honeywell Thermostat

    The Lyric also has a pretty interesting geofencing feature; it can detect when you’re away based on your phone’s location and adjust your home’s temperature to save energy. When you’re back within range (you choose the distance), your heating/cooling system will kick on and the house will be back at your preferred temperature for your arrival. It’s great for us because we don’t have a set schedule from day to day, and sometimes I do some solo traveling for the blog. Geofencing can be configured with multiple users, so it only kicks in when everyone is away. Smart!

    The Lyric Honeywell Thermostat, Installed

    We’ve made so many changes to the functional elements of our house that improve its comfort and efficiency, but that go unseen. Upgrading to The Lyric addresses those issues, and looks good too.

  • It’s Electric!

    It’s Electric!

    Our Victorian had been converted to multiple apartments decades ago (during the Depression, I believe), and was only converted back to a single-family home shortly before we bought it. There have been some quirks associated with that, one of which being that the house still had four electric meters.

    Then something really fun happened one day, several months ago, which is that we lost power in half of the second floor. This was independent of having any work done in the house — one day the lights worked, and then they didn’t, and we hadn’t changed anything at that point. The electric company came out and tagged one of our meters with this delightful sign.

    Abnormal Condition Exists

    Abnormal Condition Exists. Nobody wants to touch that, by the way, because of the liability involved if something happens. The electric company doesn’t want that on their hands, and neither do electricians. See? Fun stuff!

    We had a backfeed issue. I could have my numbers wrong, so forgive me if that’s the case (I’m going off of memory from what ComEd told me and I’m not an electrical expert by any means), but essentially there should have been two prongs in the meter reading at 120 volts for a combination of 240. We were reading at over 400 volts combined when touching the meter to the top right and bottom left prongs because the bottom left prong was live when it should have been completely dead. There was a jumper placed from the top right to the bottom right prongs to power the house until the problem could be identified and remedied, and that’s when we got our lovely tag.

    Multiple Electric Meters

    The live feed meant that somewhere in the house, power was spliced from one meter system into another. We don’t know why it suddenly decided to go on the fritz one day after seemingly working without problem, but the upside is that it pushed along the process of moving from four meters to one. Thankfully, it was much smoother than when we did the same for our commercial and residential natural gas accounts. The village issued a permit immediately (there had been a couple of bad electrical fires in town recently, so they look at these situations with a sense of urgency), and the electricians were able start on the work quickly.

    So we went from this:

    Old Electrical Panels

    To this:

    New Electrical Panel

    Isn’t that just the most thrilling way to spend a few thousand dollars? This is much nicer though:

    Single Electric Meter

    We’ll have to paint the patched siding, but no more Abnormal Condition. Hooray!

    Ah, but then we discovered some knob and tube wiring still in use, so we’re not exactly celebrating over here. In fact, we’ve been having the house rewired over the last couple of weeks. The third floor is nearly done, and then we’ll be taking a break from home renovation work to enjoy our soon-to-arrive baby before moving on to the second and first floors, and the basement too. Our home inspection revealed old, inactive knob and tube, so it was a bit of a surprise to find more that was still in use, but sometimes that just the way things go with these old houses. Until you open up a few walls or run into unexpected problems, you don’t know what hidden issues may need to be addressed.