
The sheet mirror above the sink in the closet is gone. I was so nervous for it to come down!
I watched a few ‘how to’ videos before getting started. Everyone recommended taping the mirror so that if it broke, the shards wouldn’t fall everywhere, which turned out to be a very good idea. The mirror broke. The molding along the edges came off easily enough, but the wall-to-wall mirror was really wedged in there at the bottom with no wiggle room. It cracked in one big diagonal line, but safely, I guess? No injuries to report.
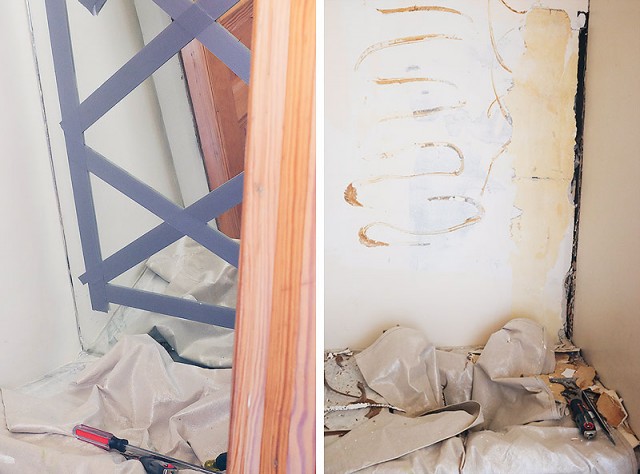
The wall behind had some glue to scrape off, some old patching that came right off, and the corner was pretty much missing. It’s easy enough to patch a hole in the wall — I’ve done it a million times. Corners? How much worse can they be? I mean, sure, I’ve heard that they’re tricky, but again, a few ‘how to’ videos and I was all set to try. Yeah, they’re tricky. I’m sure it will turn out fine, but here’s where I’m at right now.
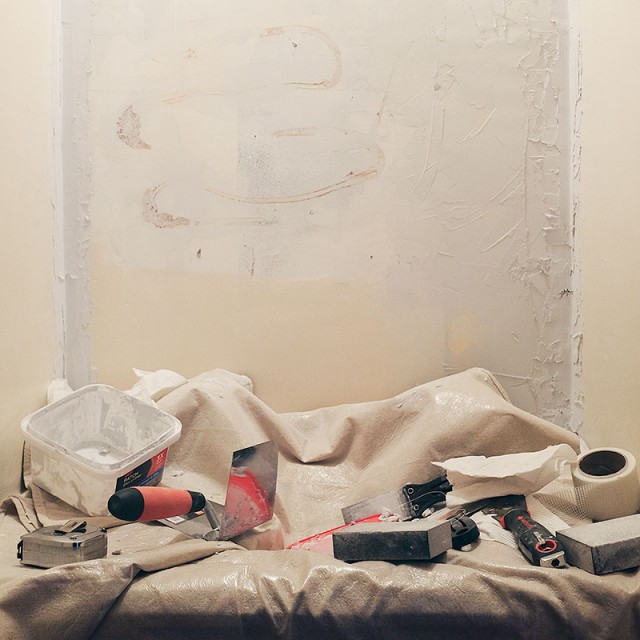
There’s a lot of sanding in my future, and at least one more coat of mud. Which means that our bedroom will continue to function as our closet, since I can’t put anything back in there until the repairs are finished unless I would like a fine coating of white dust all over our clothes.
Meanwhile, the floor in the hallway currently looks like this.
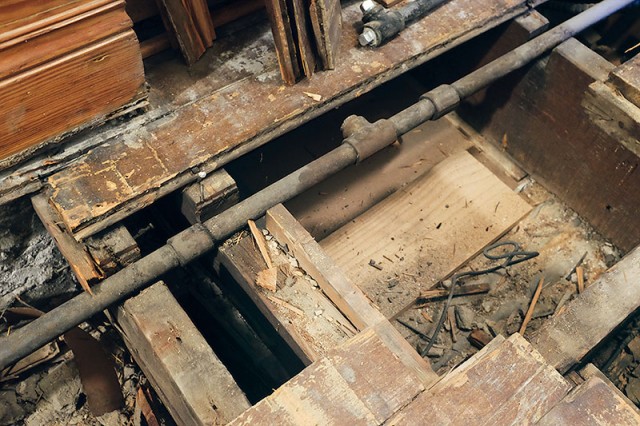
Fiiinnnaaallly getting the soft spot in the floor out there fixed. Remember the 75-year-old beadboard subfloor patch job in the closet? Also present in the hall. Plus a nice section with absolutely no subfloor and a missing floor joist. Nice!
Annnnd the electricians haven’t started yet. (They’re finishing up a big job that has taken longer than they were expecting.) My sconces in the library are up though, and I put up a new pair of matching pendants! I was antsy and couldn’t wait, so I just did it myself. Sharing photos in a post next week, hurrah! (Unless you caught them on Snapchat already. Are you following ‘makingitlovely’ over there? It’s kind of fun, but I’m still getting the hang of it. I went to a couple of events yesterday that would have made for good snaps, but silly me, I was all “in the moment” and forgetting to do the whole social media thing. Pics or it didn’t happen.)


13 comments
Riki
Seam-filling in corners (is that what it’s called when you have plaster? plastering, rather?) is horrible. Well the job is horrible no matter what part of the wall you are working on. I recently removed a wall in my laundry room and the patching was literally the most miserable I have ever been in my life. I hated every second.
BUT my stepfather taught me a useful trick for working on an inside corner: do one side, let it dry completely, and then do the other side. And it worked! Maybe that will help for your next coat of mud.
Good luck with all the sanding and I hope your misery is over soon.
Making it Lovely
That’s what I’m going to try for my next (final) coat. I think the corner trowel I was trying to work with is more trouble than its worth.
Bleubook
Are those gas lines? like for old gaslight? I’m sure we had it in our house at one time, but the (very few) existing ceiling lights are electric now. Some of the neighbors still have gaslight street lights. Not us.
Just curious. Our houses have a lot of similarities. :)
Making it Lovely
Yep, old gas lines!
Emelia
What are your plans for the sink nook? Keeping it a sink nook (kind of a cool little spot to brush your teeth and pick out an outfit at the same time) or changing the space into something else or keeping it a secret until it’s complete?
Making it Lovely
I’m keeping the sink! I get ready there — brush my teeth, wash my face, do my hair, and put makeup on. The mirror that was there had some big black streaks and splotches though, and not even in a cool antique mirror kind of way. I’m replacing it with a prettier wall mirror. Not sure if I’ll be painting the walls or wallpapering yet, but something. And maybe glass shelves, too?
judy
Wow this couldn’t come at a better time. I am in a 1980s home and I am having a very expensive problem with the ceiling fixtures in the kitchen. With bulbs now in the neighborhood of gold in terms of cost. I am burning out bulbs -supposed to last for years-within a week or so of changing. I finally gave up and was using the microwave light which led to the lovely experience of reaching for the silverware basket in the DW and stabbing myself with a paring knife. I have replacement fixtures but could never get up the courage to try an install. And I know the basics of doing this=turn off power light wire to positive-dark to negative and ground to whatever is left. Little shaky on the finer points so thank you Nicole… for a timely post.
Marcee ... ILLINOIS
Gee. Lots and lots of work. You sure have tons of patience Nicole. I suppose it’s a given when buying older homes. We’ve gone through it for over 20 years. Ha! Are we finished? No. Probably never will be. The progress you’ve made is awesome though. When clicking into your blog weekly, there’s always a nice surprise to see! For sure the dining room set-up is gorgeous. Different, but really, really lovely. The table covering is wonderful. Enjoy the holidays Nicole!
Katie
I like that you are doing a mix of DIY and professionals to update your home. DIY is great, but safety is always my biggest concern. The closet is really coming along, can’t wait to see how it turns out!
Making it Lovely
Mine too. Swapping out the light fixtures myself isn’t such a big deal, but that’s about the extent of the electrical work I feel comfortable with. Major plumbing, electrical, and structural issues, I feel better having those in the hands of professionals.
Comments are closed.