Author: Nicole Balch

  • One Room Challenge: Week 1 (My Daughter’s Room)

    One Room Challenge: Week 1 (My Daughter’s Room)

    The One Room Challenge begins again today! I’m back for my fourth round, redoing a room from start to finish in just six weeks. And I’m not alone! There are 20 featured projects by fellow designers and design bloggers to follow along with every Wednesday, and even more to follow on Thursdays as guest participants document their own makeovers. It’s fast and fun and I’m excited to be back.

    I had been talking lately with Eleanor, my ten-year-old, about a bedroom makeover. It was already in our plans, so when the chance came to jump into the One Room Challenge again, the choice of rooms was easy. Lucky duck, she’s going to get an amazing room, and the deadline will push me to get it done quickly for her!

    Eleanor's Room (Before) | Making it Lovely

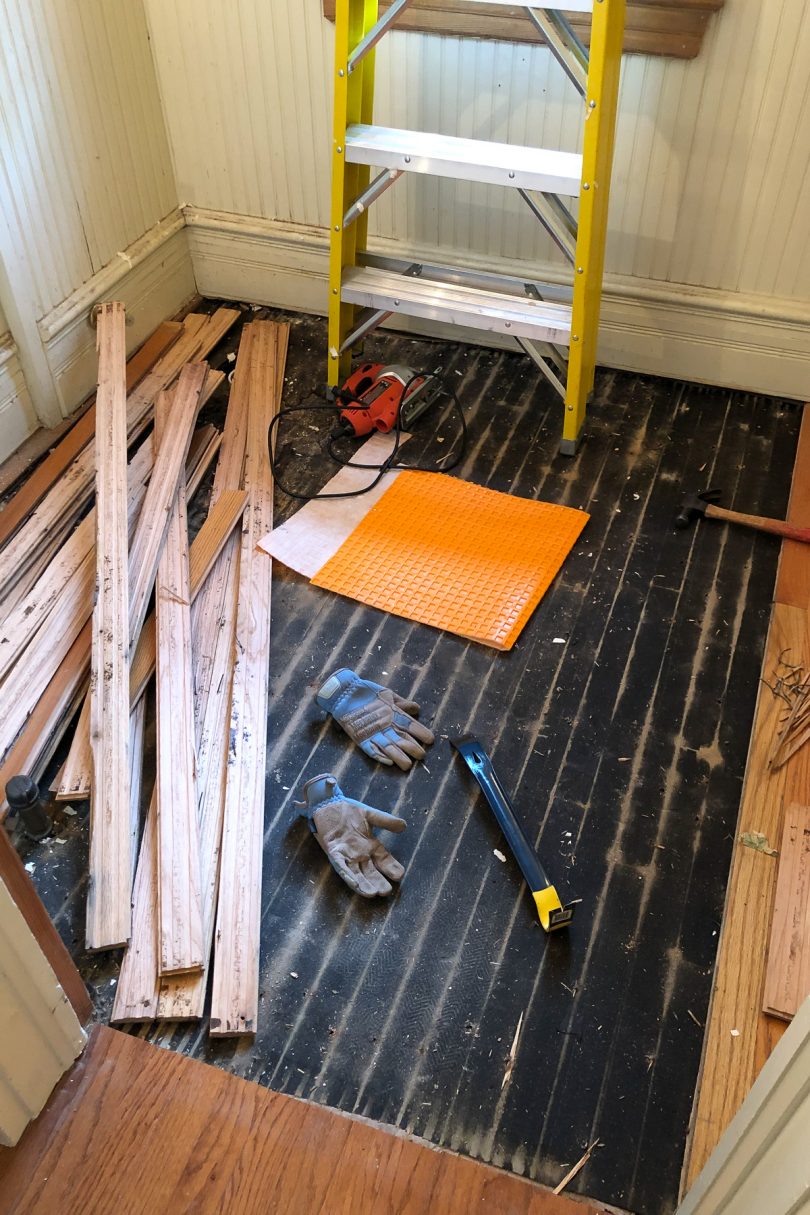
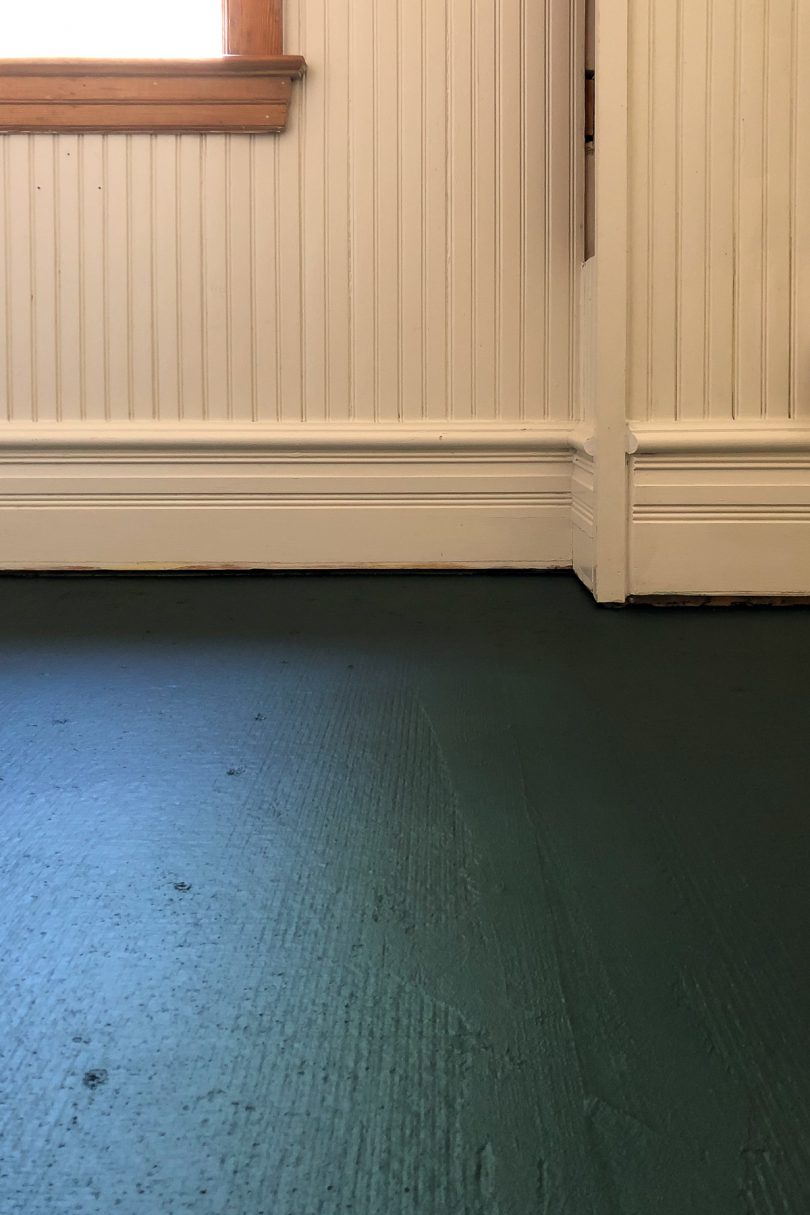
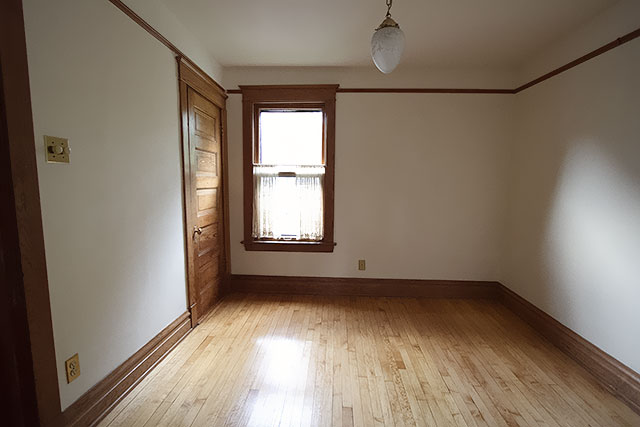
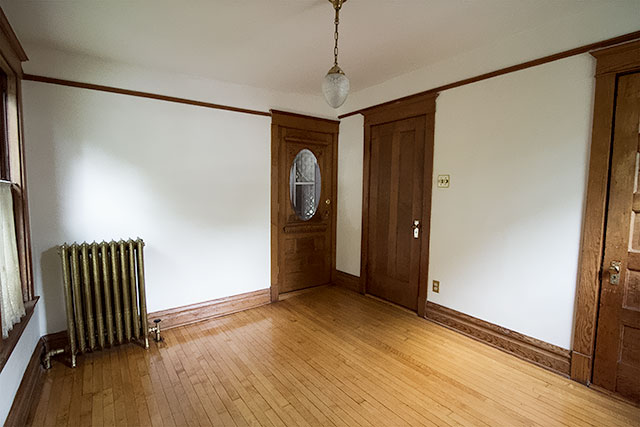
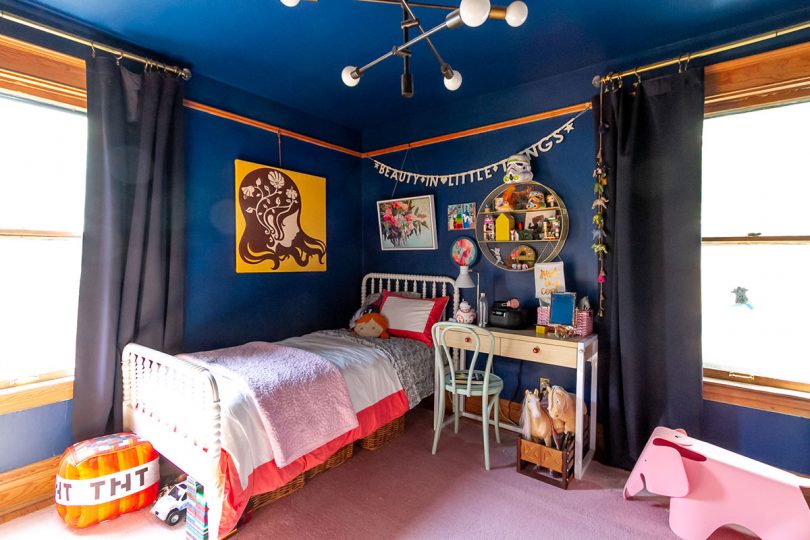
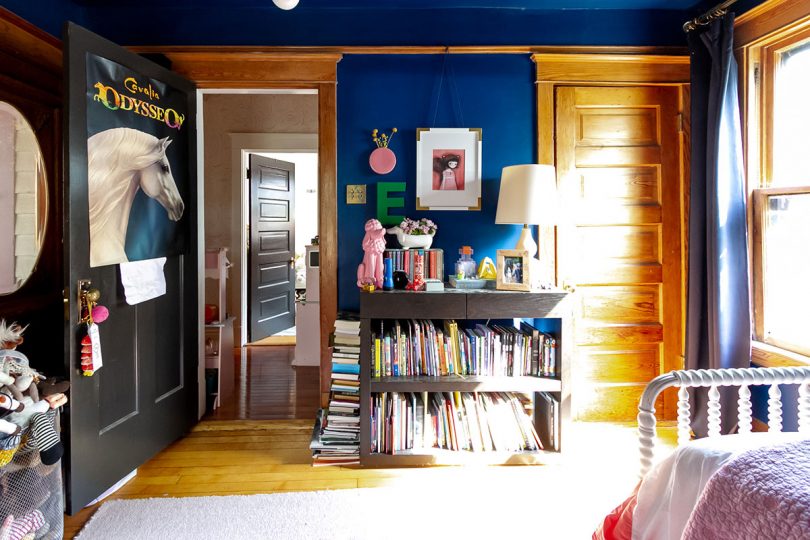
    The room was formerly a sleeping porch that was enclosed ages ago and incorporated into the rest of the house. The walls were white and the wood unpainted when we moved in.

    Bedroom
    Bedroom

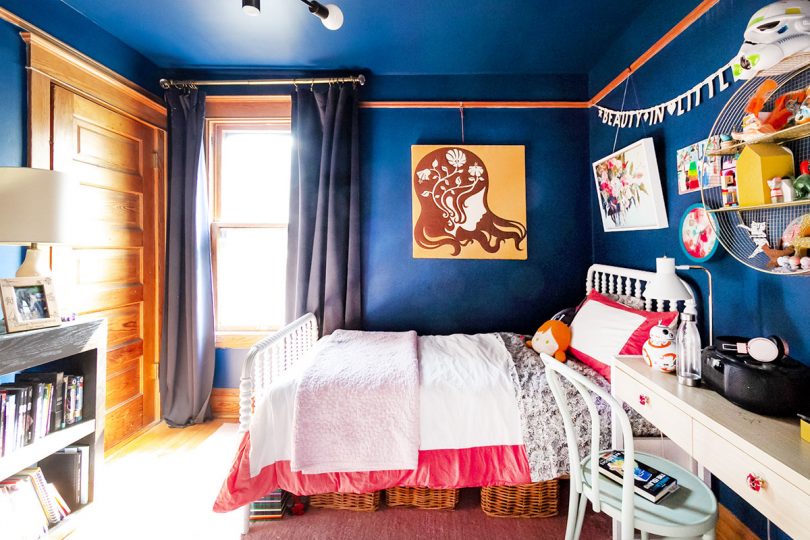
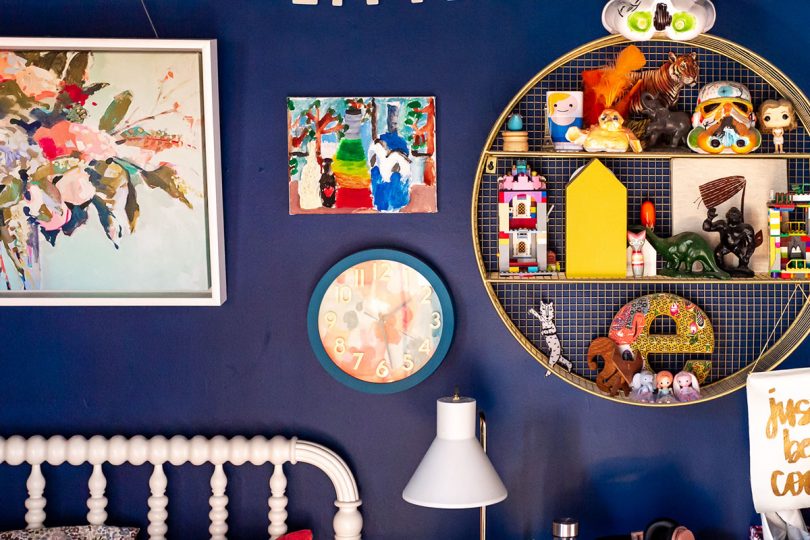
    Eleanor was four when she picked her wall color. Dark blue! Walls and ceiling! And she has loved it for a long time. We’ve made small changes over the years like adding a desk, changing out bedding, and putting up more art and display space for some of her favorite toys and objects. It’s filled with her personality! She’s ten now though, and ready for a bigger change.

    Eleanor's Room (Before) | Making it Lovely
    Eleanor's Room (Before) | Making it Lovely

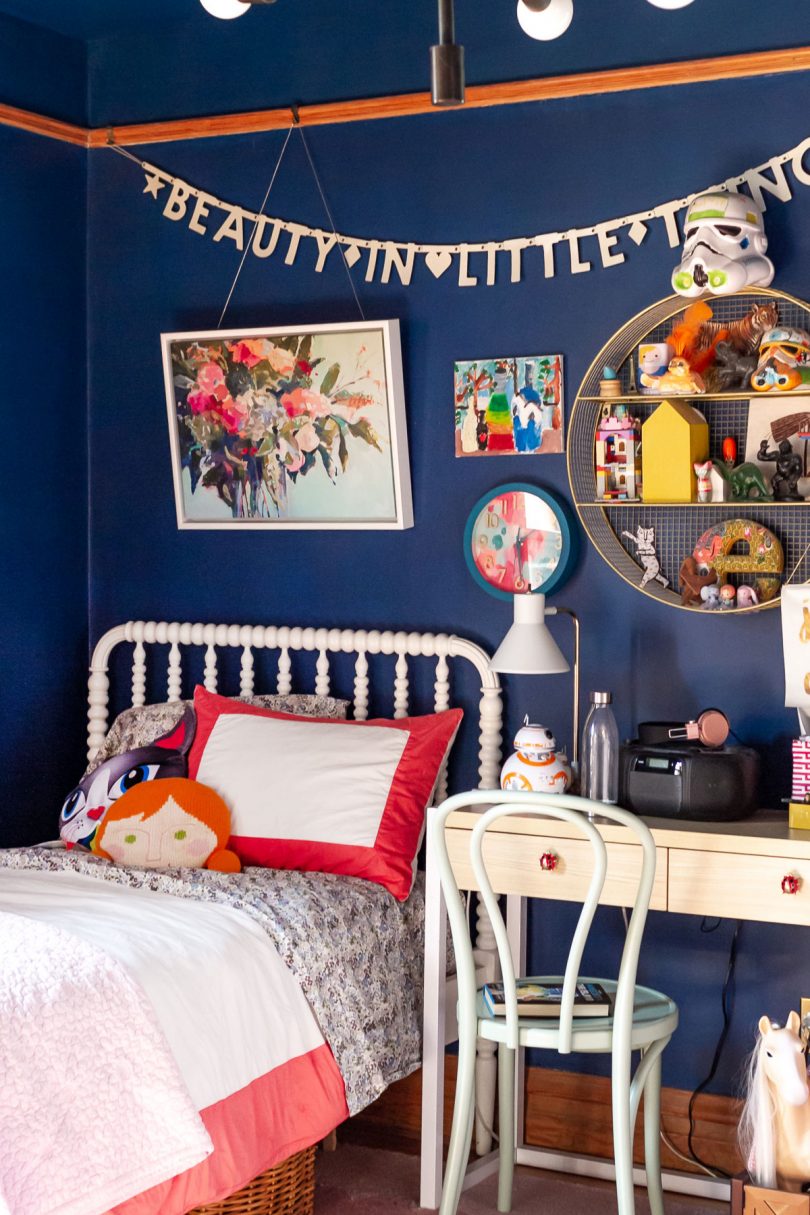
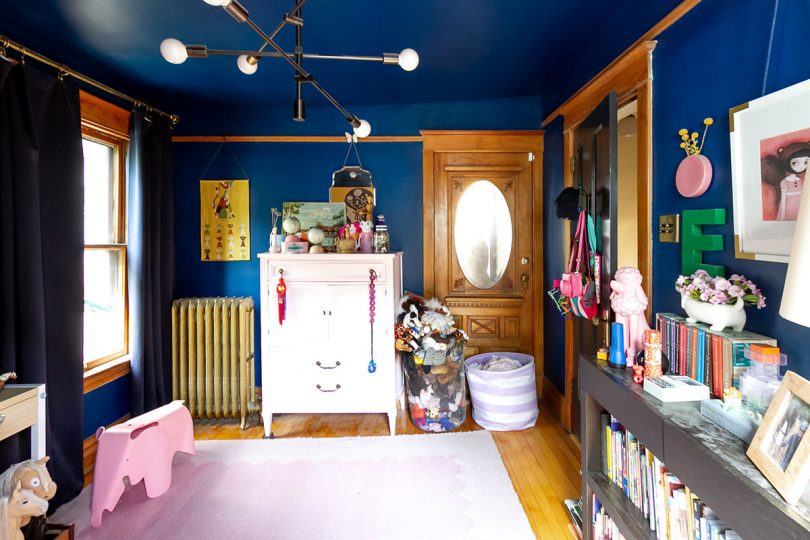
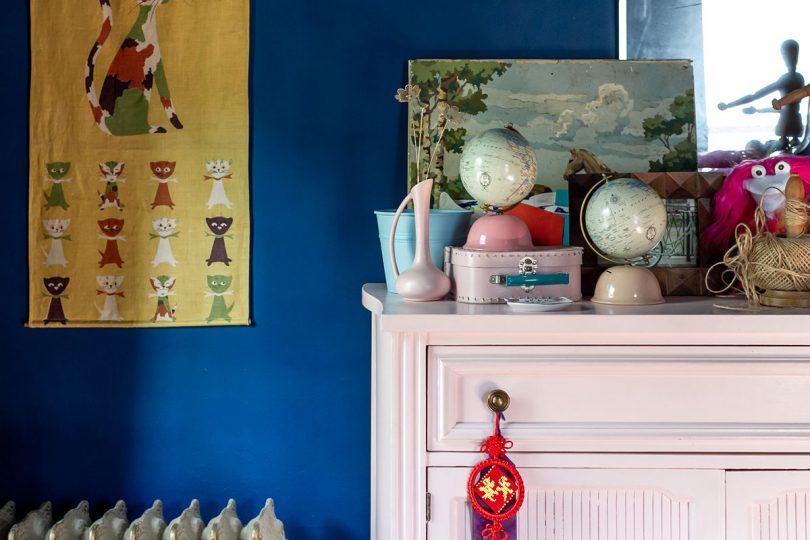
    Oof, it’s a lot of stuff. But it’s important stuff to her. We never really designed this room, just painted and then used what we had from our first house. The dresser, bed, and rug from when she was a toddler. The bookcase that used to be in my bedroom. The makeover is going to come together with more style and purpose, and a lot of what’s out that we’re keeping is going to get moved into the closet (which is currently underutilized).

    Eleanor's Room (Before) | Making it Lovely
    Pink Eames Elephant in Eleanor's Room (Before) | Making it Lovely
    Eleanor's Room (Before) | Making it Lovely

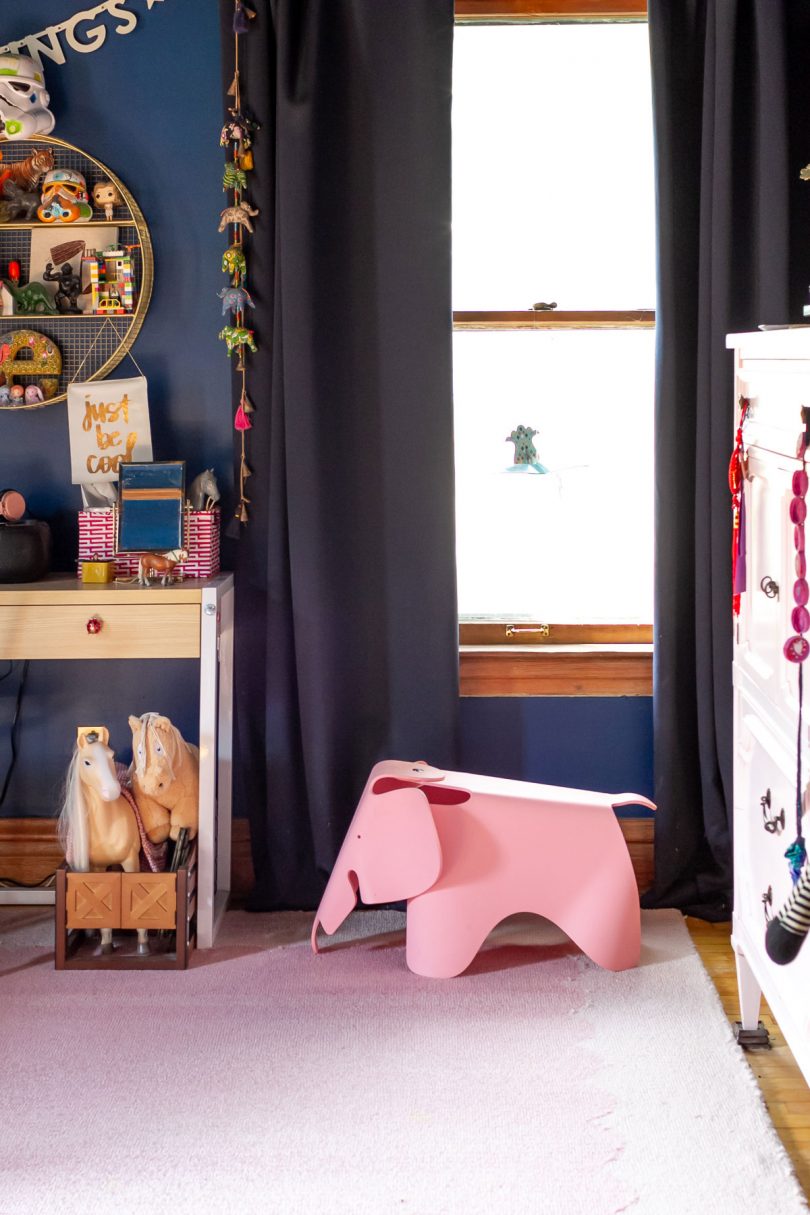
    The books are overflowing. Some can come out (she’s read them all, multiple times, and has outgrown many), but there’s also a stack that’s not even in her room right now.

    Eleanor's Room (Before) | Making it Lovely
    Eleanor's Room (Before) | Making it Lovely

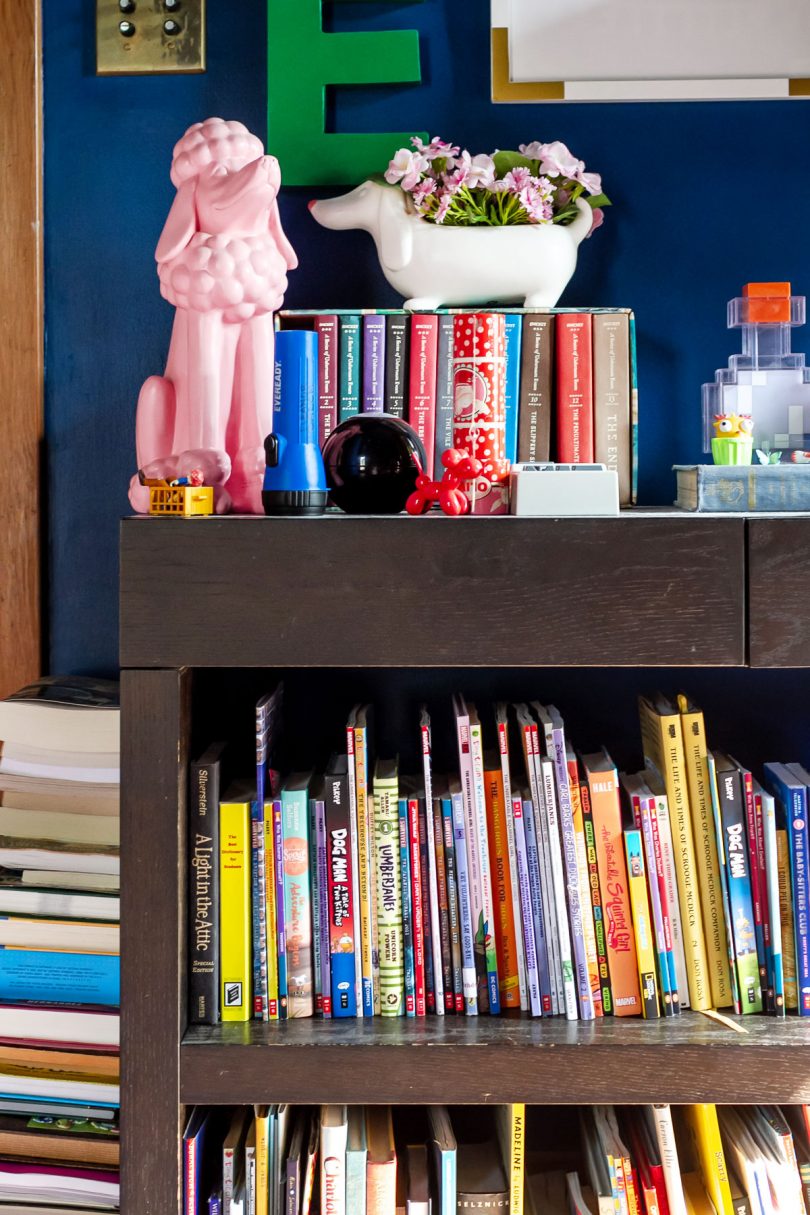
    Some of the art on the walls is personal to E, but some was chosen by me and she doesn’t mind if it stays or goes. She was young and without strong opinions on decorating when a lot of it went up.

    Eleanor's Room (Before) | Making it Lovely

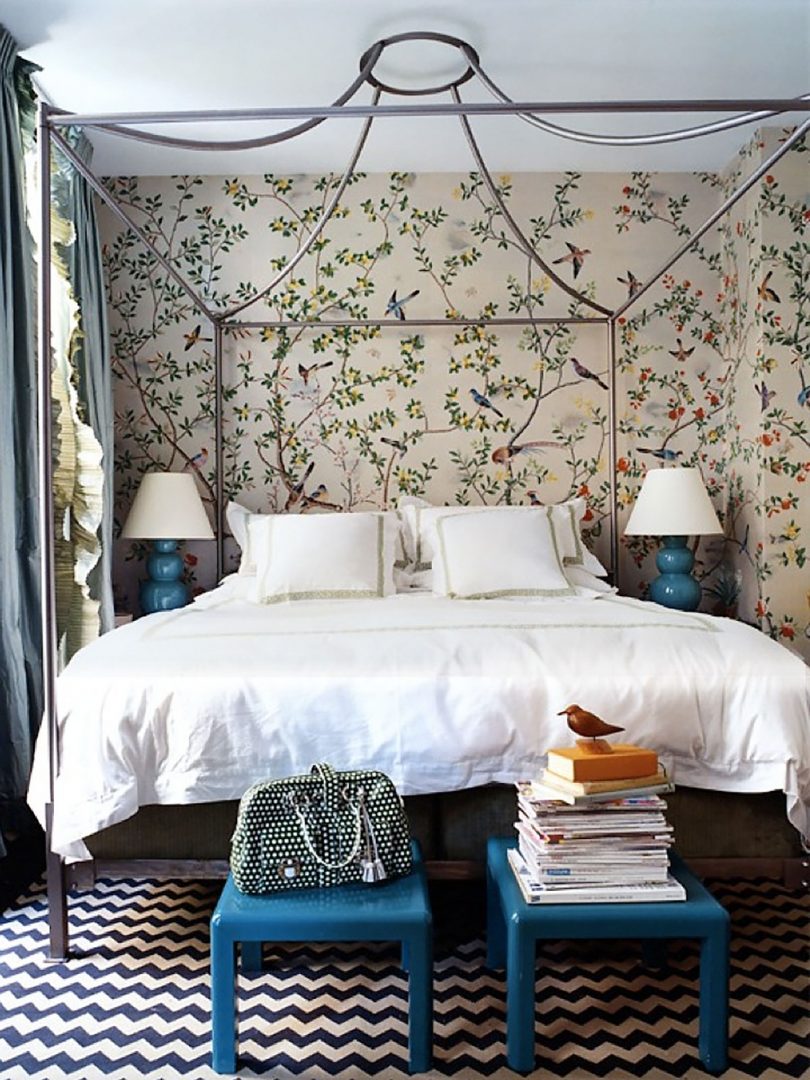
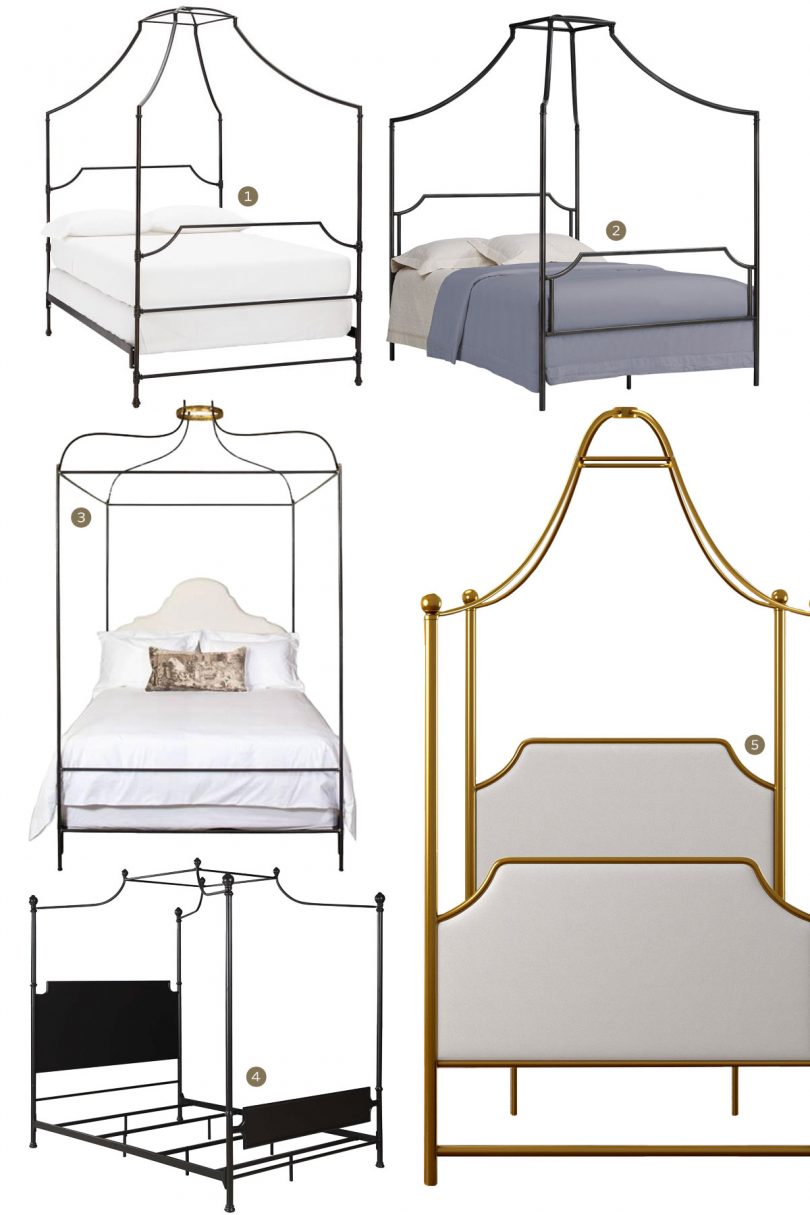
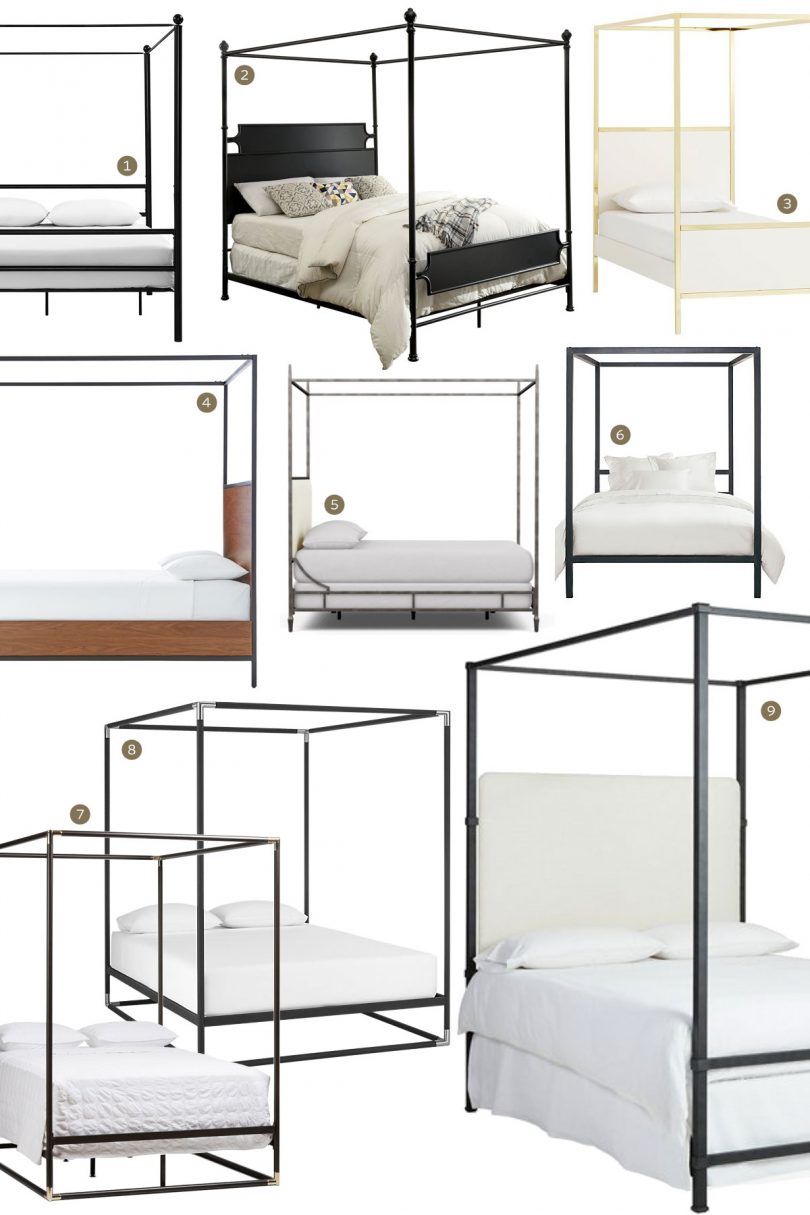
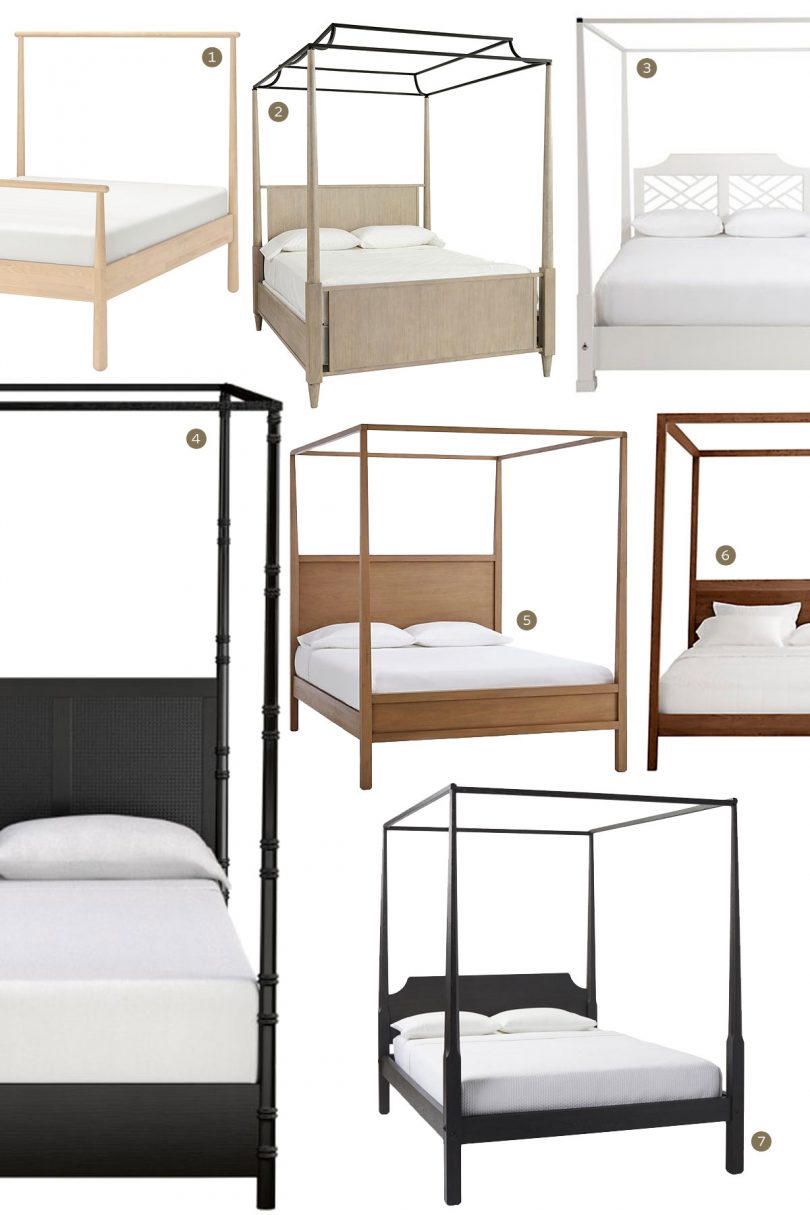
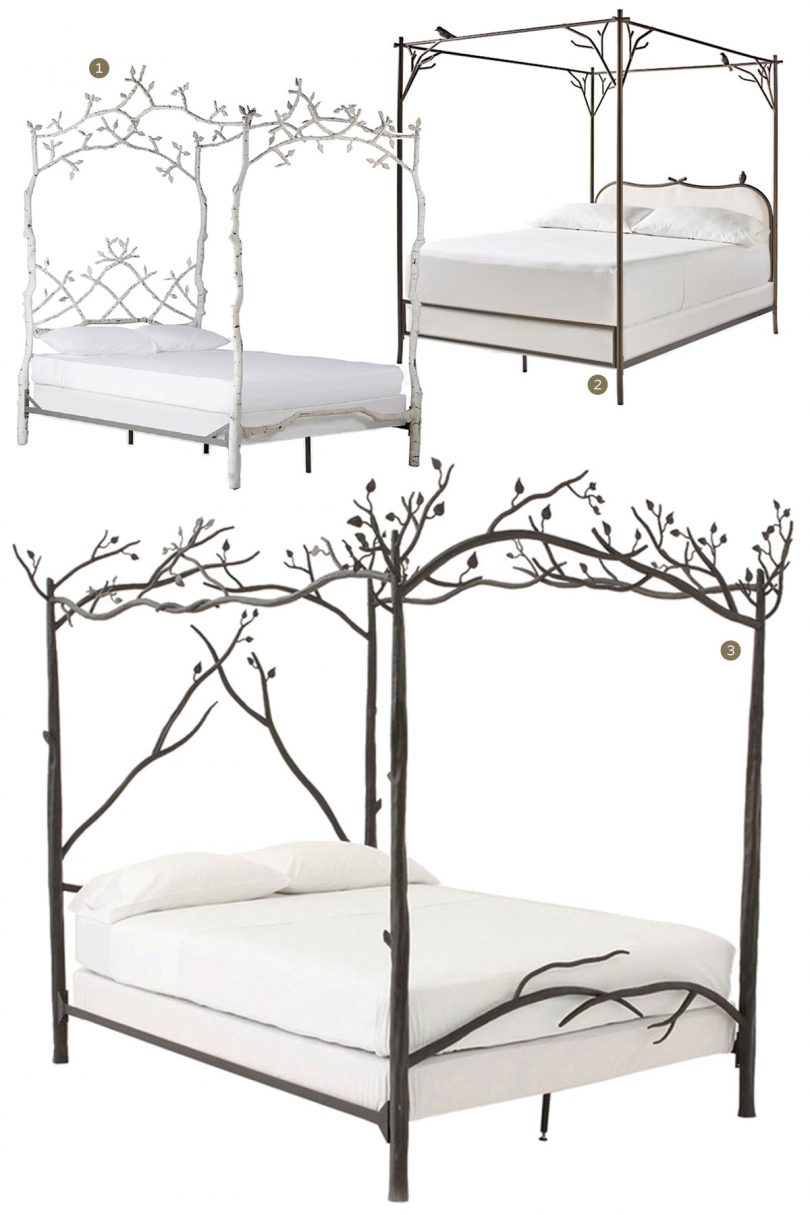
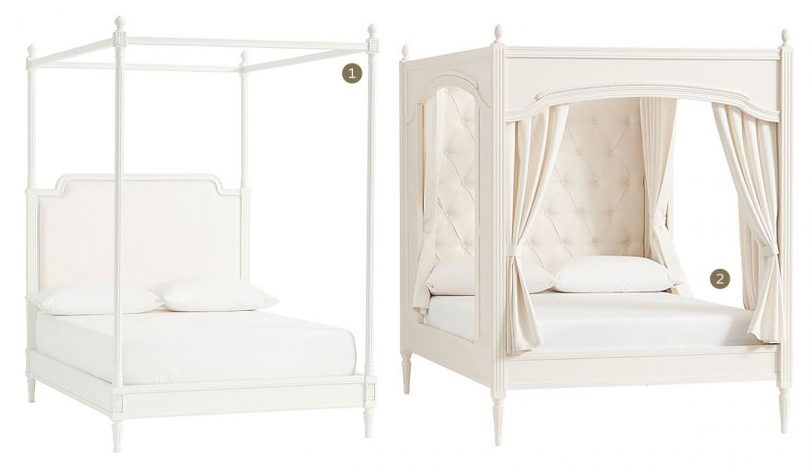
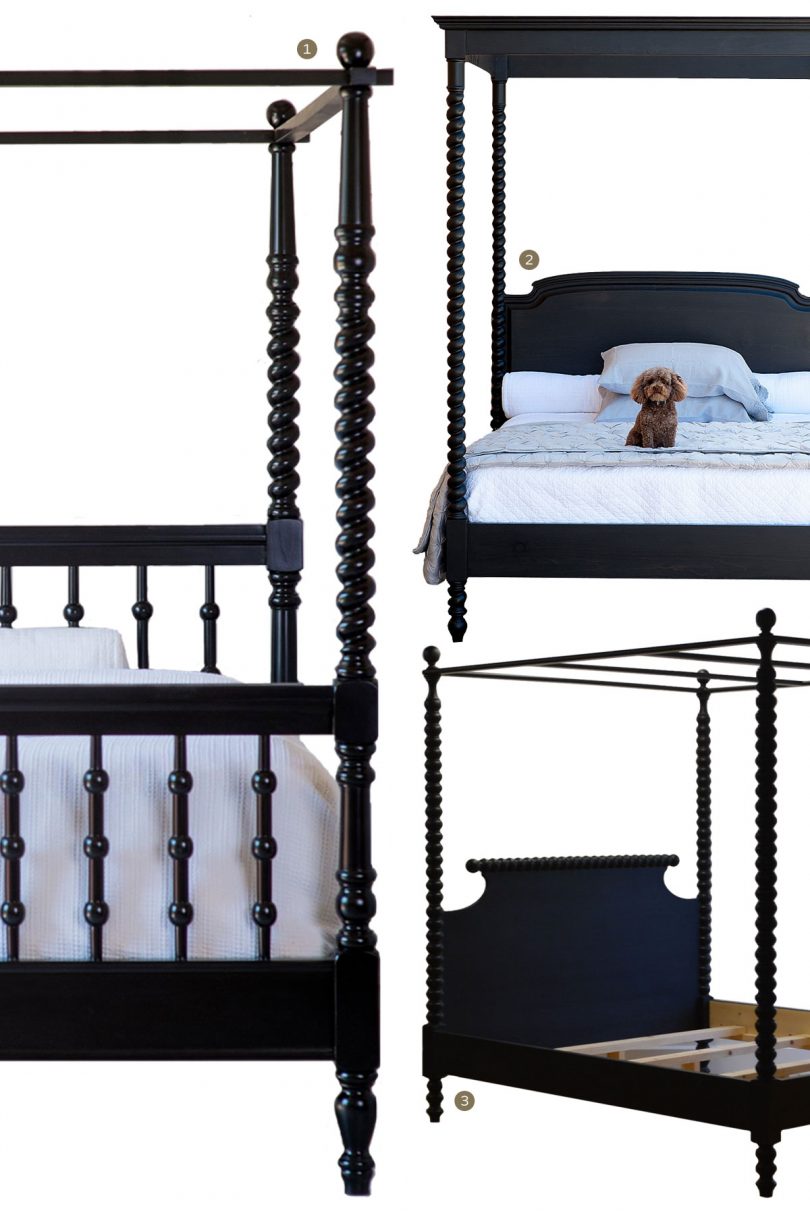
    Eleanor wanted a canopy bed so badly, until she didn’t. (That was a quick phase!) Her wishlist is pretty short: a bigger bed, more space for books, less pink, and light blue paint instead of dark. She’s getting everything she wants for her room and I’m having fun working with her to make it a space she’ll love for years to come. I’ll share the design plan next week!


    Follow along with the One Room Challenge participants!

    One Room Challenge, Fall 2019
    One Room Challenge, Fall 2019

    One Room Challenge• At Charlotte’s House  • Design Addict Mom  • Erika Ward Interiors  • Erin Kestenbaum  • Girl & Grey • Gray Malin  • Hommeboys  • I Spy DIY  • Jewel Marlowe  • The Learner Observer  • Making it Lovely •  Nicole White Designs  • Old Brand New  • Oscar Bravo Home  • Place of My Taste  • The Rath Project • Room for Tuesday  • SG Style  • Undecorated Home  • Veronica Solomon  • Media BH&G  • TM by ORC

    My One Room Challenge Posts

    Follow along from the beginning!
    • Week 1: My Daughter’s Room

    And check out my previous One Room Challenges!
    • Spring ’16: Our Bedroom and Den • Fall ’16: Front and Back Entry, Stairs, and Hallways • Fall ’17: My Home Office

  • Tiling with Cement Board Instead of Ditra

    Tiling with Cement Board Instead of Ditra

    This bathroom renovation is sponsored by Lowe’s. Thank you for making this project possible!


    I want my bathroom tile to have longevity. I’m using porcelain (wonderfully durable), and have been taking care to do the job right from the prep work through to completion. I’ll share more in an upcoming post about the tile installation, but first I want to point out a big mistake that I almost made (and how I fixed it).

    I had been planning all along to lay my tile on top of Ditra. It’s an uncoupling membrane that isolates movement between the subfloor and finished tile, preventing cracks over time. It’s also a waterproofing layer. All good things!

    Our bathroom had hardwood flooring, and you can’t lay Ditra directly on top because solid wood shrinks and swells with temperature and humidity changes. I could have added a more dimensionally stable subfloor (OSB, plywood, or cement board) on top of the hardwood. It would have added more weight to the floor, but more concerning was the additional height. When I had the cast iron radiator removed temporarily, I was advised to keep the connections at the same place. There is some give in the pipes, but not a lot. Same with the tub drain and toilet stack. I started to worry that in hopes of saving myself a little time by not ripping out the wood floor, I would be creating costly plumbing fixes in my near future when it came time to reattach everything.

    I decided to demo the floor. It added more time to my project, but it was the right thing to do. I had to use my Dremel Multi-Max Saw in a couple of places, but most of the wood came up easily with the combination of a pry bar, wrecking bar, and claw hammer. Safety glasses and gloves are a good idea too.

    Hardwood Flooring Being Removed | Making it Lovely

    Next I set about getting the floor ready from there. The plywood subfloor beneath the wood was mostly in good shape. There was some water damage beneath the toilet, but that was easily cut out and replaced.

    At this point, I was still planning to use Ditra with my tile, but the finished floor would have now been too low, so I opted to lay OSB on top of my plywood to add thickness. Two 4’x8′ sheets cost less than $20. They’re big and heavy and hard to maneuver, but I got them cut to size, carried them up to the second floor, cut my openings for pipes, fine tuned the fit, and screwed the OSB into place (6″ spacing around the perimeter, 12″ grid spacing within). Hooray! I finished just before midnight, tired and sweaty, but feeling good about my progress.

    OSB Subfloor

    There are different instructions for Ditra installation based on the type of subfloor you have, so I looked up that information the next morning. The OSB wasn’t the issue I ran into, it was the tile size. “The tile format should always be greater than 2” x 2” (5cm x 5cm).” Hi, I would be using 1” square mosaics! Oh no.

    I was basically back to where I was when the hardwood flooring had still been in place. Cement board over top, or rip out what I had just finished and put cement board directly over the plywood subfloor? Out with the OSB. I went back to Lowe’s and picked up DUROCK cement backer board instead, plus thinset, the proper screws, and alkali-resistant fiberglass mesh tape.

    Cement board can be scored with a razor blade and then snapped for a clean edge. A saw will cut it too, but produces silica dust particles — a razor blade is the better choice. Screws (8″ apart) hold the cement board in place, but thinset between it and the subfloor ensure there are no springy weak spots and make the floor behave as if it were one solid slab. Taping the joints and filling the gaps with thinset (be sure to smooth the top) also adds to the stability.

    Installing DUROCK Cement Backer Board with Thinset Mortar
    DUROCK Cement Backer Board with Taped Seams

    I added two coats of Mapai Aquadefense for waterproofing as well. I don’t think this was strictly necessary (this is a bathroom floor, not a shower or wet room), but I’m looking at it as a bit of added insurance. Porcelain tile doesn’t absorb much water and cement backer board is water-resistant, but neither is waterproof.

    Mapai Aquadefense on Cement Backer Board Floor

    My mistake put me behind schedule, but lessons have been learned. May they spare you from a similar mistake!


    I shared all of this on Instagram Stories as I realized what I had done, and very quickly, the worried messages started coming in. People had either installed Schluter Systems Ditra themselves beneath small tile, or had hired a professional that did. What now!?

    You will probably be fine. Probably! The problem though is that Ditra has a waffle texture and where the small tiles overlap in a way that they’re not fully supported, there is a possibility that they’ll pop up or break, or the grout will crack over time (the very thing an uncoupling membrane is supposed to prevent). I’ve seen recommendations for filling the waffle voids completely, letting that dry, and then proceeding to tile. The job would not be covered by the Schluter’s warranty, but if the openings were all filled to the top it should stand up to normal traffic.

    TL;DR A high heel putting pressure on a tile is one thing — I had been planning on putting our claw foot tub back in. That much weight focused on four points made me nervous, and since I realized my oversight before it would have been terribly difficult to reverse course, I opted to change my installation method.

  • Canopy Beds

    Canopy Beds

    Eleanor, my eldest, is interested in making some changes to her room, and she has requested a canopy bed! After talking to her more and looking at examples together, we’re realizing that what she wants more than the look of a canopy bed is the feeling of coziness and privacy.* She wants a place to hide away and read, and I want to give that to her.

    We may do something custom, perhaps building the bed into a nook, or mounting curtain rods from the ceiling, and if we do I’ll share more about that process (of course). To start though, we’ve been looking at readymade canopy beds. They’re falling into general categories, and I’ve rounded up examples below.


    Curved Metal Beds

    We all remember this Miles Redd bedroom, yes? It predated the chevron craze, but was also an early example of the canopy beds Redd has been doing (in ever more elaborate styles) since. I could get on board.

    Miles Redd Bedroom with Canopy Bed

    Pottery Barn Teen has a simple metal canopy bed that’s lovely, but it lacks a solid headboard. (Annoying because pillows tend to squish out the back.) If you’re willing to overlook a few details, this is the same shape but costs far less. I think it’s worth seeking out a solid headboard, in whatever material you like, and I’ve included a few in the mix below. What I did not include in this “curved metal” category are the arched canopies that reminded me of my childhood 80’s bed — I just can’t do it.

    Canopy Beds - Curved Metal
    1. Maison Canopy Bed, PB Teen
    2. Bailey Canopy Bed, Overstock
    3. Iron Venetian Canopy Bed, Tara Shaw
    4. Sprague Canopy Bed, Overstock
    5. Clementine Canopy Bed, Overstock

    Boxy Metal

    Again, some of these lack a solid headboard, but maybe that’s my unique fixation? I particularly like the combination of a metal frame with an upholstered headboard.

    Canopy Beds - Boxy Metal
    1. Lolington Canopy Bed, Wayfair
    2. Moira Industrial Canopy Bed, Overstock
    3. Flynn Canopy Bed, Pottery Barn Kids
    4. James Walnut with Black Frame Canopy Bed, Crate & Barrel
    5. Lincoln Upholstered Bed, Ethan Allen
    6. Architecture Bed, Room & Board
    7. Frame Canopy Bed, CB2
    8. Industrial Black Canopy Bed, Baxton Studio (half the price of CB2’s, but it has more supports beneath and the corners look less elegant)
    9. Amalfi Canopy Bed, One Kings Lane (and you may also like this similar style from Pottery Barn)

    Wooden Canopy Beds

    I’m not sure that these are right for us, but there are some lovely transitional style wooden canopy beds.

    Canopy Beds - Wooden
    1. Gjöra Bed Frame, IKEA (not a true canopy, but interesting)
    2. Lindy Canopy Bed, Ballard Designs
    3. Hayward Bed, Ethan Allen
    4. Colonial Cane Bed, Williams Sonoma Home
    5. Keane Driftwood Canopy Bed, Crate & Barrel
    6. Hale Bed, Room & Board
    7. Whitaker Four Poster Bed, Serena & Lily

    Forest Beds

    I was surprised that these weren’t more appealing to my daughter. She loves spending the summer exploring the woods, surrounded by the forest canopy, but that didn’t translate into wanting a forest canopy bed. Still, these are fun for the right person.

    Canopy Beds - Trees
    1. Arbor Bed, Grandin Road
    2. White Iron Mature Trees Bed, Overstock
    3. Forest Canopy Bed, Houzz (I think this is the same as Anthropologie’s, but priced lower)

    Modern Fairytale

    These read a little more juvenile, and definitely more feminine, like something a storybook princess would sleep in. We both liked the sense of enclosure in the second one, but didn’t love the bed itself.

    Canopy Beds - Modern Princess
    1. Colette Canopy Bed, Pottery Barn Kids
    2. Blythe Carriage Bed, Pottery Barn Kids

    Wooden Spindle Beds

    My favorite style! I would invest in a bed for my master bedroom (I did, and I love it), but these are beyond my budget for a kid’s room. I could be surprised, but I expect that my daughter’s interest in canopy beds may be outgrown as she gets older.

    Canopy Beds - Wooden Spindle
    1. Spool Canopy Poster Bed, The Beautiful Bed Company
    2. Grand St. Andrews Barley Twist Canopy Bed, The Beautiful Bed Company
    3. English Farmhouse Spindle Canopy Bed, English Farmhouse Furniture

    * I’ve been saving examples in an Instagram collection to share with Eleanor and it has been tremendously helpful for narrowing down the things she likes (and just as important, the things she doesn’t). Saved collections are private, but I’ll work on moving the images to a Pinterest board. There were many responses from people that are looking at canopy beds for their kids too (or for themselves) and lots of requests for more details on the images I shared briefly in Instagram Stories. I’ll let you know when it’s up!

  • Honor Roll

    Honor Roll

    Honor Roll
    Lily Labradoodle on Mosaic Bathroom Floor Tile

    Look at that pup luxuriating on my tile floor. I’ve painted the bathroom, finished the floor, installed the lighting, and put a working toilet in. HOORAY! The sink faucet is in many parts and the most complicated I’ve used, but it’s making sense and I should get the sink in working order shortly. It’s all very exciting! I’ve been taking photos and even some video all along the way and I’ll share the process. I DID THIS. You can do it too.

    Shall we? On to a few things that have caught my attention between bathroom renovating and new project planning!


    We had a great discussion about canopy beds on Instagram and I’ll have a roundup with my thoughts for you next week. The ones that I love the most are $4000+ (of course), but then there’s also a great one for less than $300. Today, I’m off to get a sink in working order! (It can’t be that hard, right?) I’ll be sharing as I go in Stories if you want to follow along.

  • Honor Roll

    Honor Roll

    Honor Roll

    I’ve either been working on the bathroom or relaxing with family in Wisconsin. Back and forth, back and forth. Work, rest, work, rest. It’s been a good balance, but I’m staying put in Oak Park and finishing up this bathroom for good.

    Oscar and Nicole at Rivendell
    Boden Rainbow Sneakers

    Enjoy your weekend! I should have a tiled floor by the end of it. Dare I dream for a working toilet too?

  • The Bathroom Design Plan

    The Bathroom Design Plan

    This bathroom renovation is sponsored by Lowe’s. Thank you for making this project possible!


    I’ve been working away on our second floor bathroom, clearing everything out and prepping for what’s to come. Let me show you what that is, exactly!

    Bathroom (Second Floor) Design Plan
    1. Pendant Light (Similar)
    2. Birds!
    3. Hallway Wallpaper
    4. Existing Vintage Sconces
    5. Wall Color TBD
    6. Kohler Bancroft Pedestal Sink
    7. Rohl Country Bath Brass Sink Faucet
    8. Beadboard Color TBD
    9. Kohler Elongated Comfort Height Toilet with Black Toilet Seat
    10. Existing Hooks (About Those…)
    11. Cast Iron Radiator and Existing Brass Hardware
    12. Existing Clawfoot Tub, Painted (Color TBD)
    13. Barclay Brass Bath Faucet with Hand Shower
    14. Framed Kid’s Drawing
    15. Existing Trash Can
    16. 1″ Square Tile (Black, Lemon Chiffon, Cappuccino, and Biscuit) and Hexagon Tile (Biscuit)
    Olive You, Brown.

    The tub and many existing elements will stay, and all supplies (we’ll get into that in a separate post) and new pieces are from Lowe’s. There are a few variables to finalize, namely paint and the tile border design, but the overall plan is solid.

    Work on the floor and prepping for paint has kept me busy, and I’ll choose the paint color towards the end. If I had to pick right now, it would be a match to the color of this dress. I’ve already painted the door (and every door on the second and third floor) black, the hallway right outside the bathroom has pink wallpaper. The plumbing fixtures are white, hardware is brass, and the floor tile will have a bit of ochre and tan. There’s a lot of room to play with colors from there!