

Let’s Go!
Today is our anniversary! Brandon and I have been married for nine years. We've been parents for four of those…May 22, 2013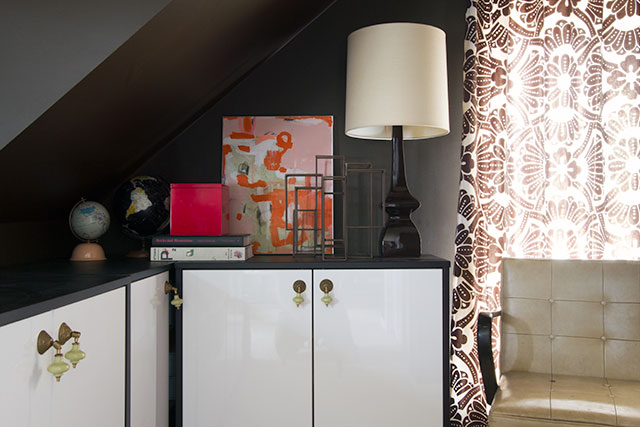
La La La La Lovely Library
Sometimes I can't come up with a snappy title. Sing it to this. Hey, I can finally share more pictures…May 21, 2013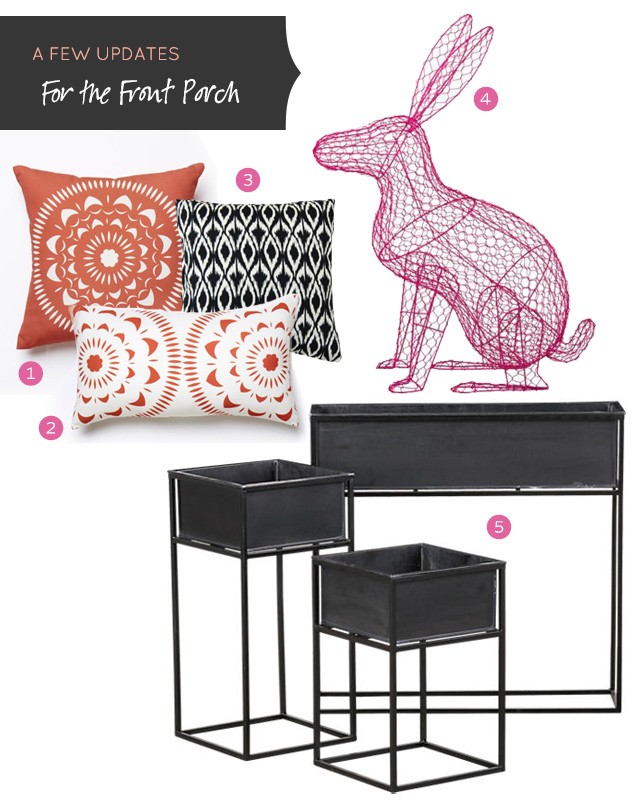
A Few Updates for the Front Porch
The nice weather kind of happened all at once here, and now I'm realizing that the front porch needs a…May 16, 2013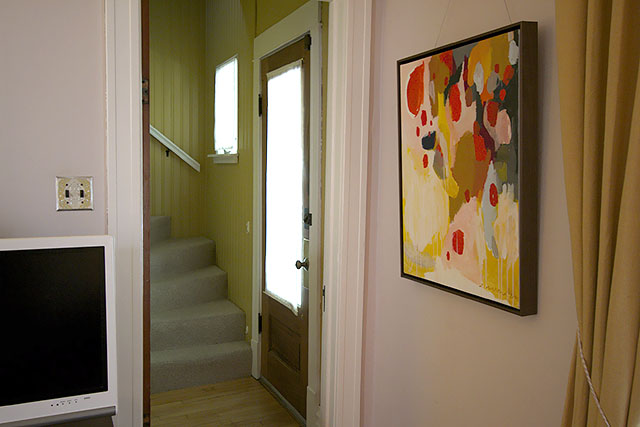
Wood Doors, White Trim
I left the doors unpainted in the front entryway. (Thanks for your feedback.) The door between the living room and…May 15, 2013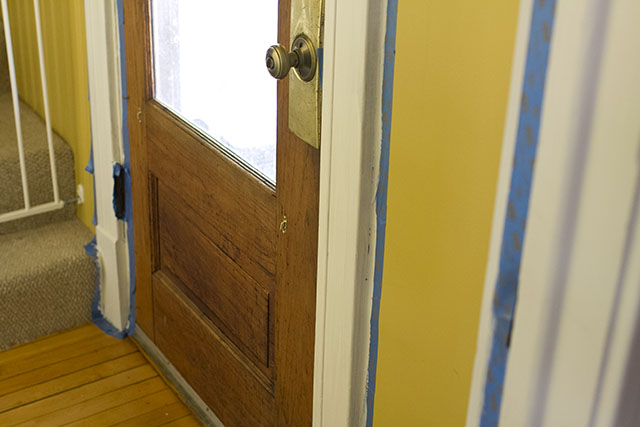
Wood Doors with White Trim?
I'm painting the trim in the front entryway. It's the last spot in the house to get a coat of…May 13, 2013Diaper Storage in the Nursery
This post is sponsored by Honest. We're starting to talk up the whole "big boy" thing with August, about how…May 8, 2013
Let’s Go!
Today is our anniversary! Brandon and I have been married for nine years. We’ve been parents for four of those years, and homeowners for six.…
La La La La Lovely Library
Sometimes I can’t come up with a snappy title. Sing it to this. Hey, I can finally share more pictures of the library! I took…
A Few Updates for the Front Porch
The nice weather kind of happened all at once here, and now I’m realizing that the front porch needs a little sprucing up. New pillows,…
Wood Doors, White Trim
I left the doors unpainted in the front entryway. (Thanks for your feedback.) The door between the living room and the stairway shows its age…
Wood Doors with White Trim?
I’m painting the trim in the front entryway. It’s the last spot in the house to get a coat of paint, so I’m finally getting…
Diaper Storage in the Nursery
This post is sponsored by Honest. We’re starting to talk up the whole “big boy” thing with August, about how he’s going to start sleeping…