

Totally Rad Photoshop Actions
They hooked me on the free samples, and now I'm love with the full set. • Totally RadFebruary 22, 2011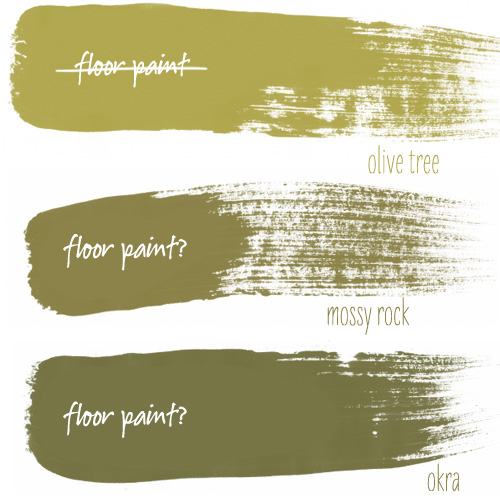
Basement Floor Paint
I'm having second thoughts about using Benjamin Moore's 'olive tree' for the floor paint. Maybe I should go a shade…January 25, 2011
Laundry Room Paint Color
And the winner is… pale blue! As I had mentioned, I'm not normally a fan of blue. I like certain…January 20, 2011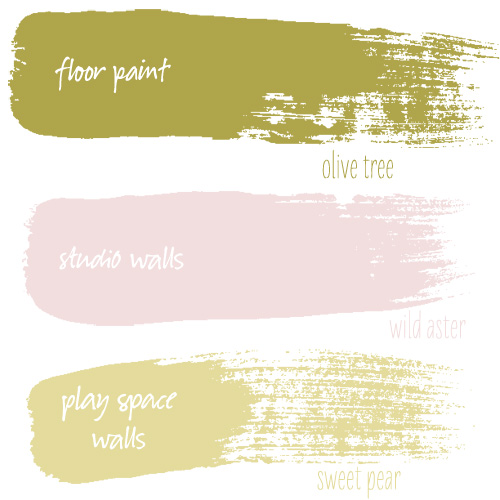
Basement Paint Colors
We're tiling the half-bathroom and laundry room in white Octagon & Dot with charcoal gray grout, and we're going to…January 19, 2011
The Dining Room with Painted White Trim
I know, I've taken far too long to show you the 'after' photos. The problem is that I don't really…November 22, 2010
Recycled Paper Bunting (and a Giveaway)
I have a great giveaway for you today (sponsored by Windows Phone 7), but more on that in just a…November 15, 2010
Totally Rad Photoshop Actions
They hooked me on the free samples, and now I’m love with the full set. • Totally Rad
Basement Floor Paint
I’m having second thoughts about using Benjamin Moore’s ‘olive tree’ for the floor paint. Maybe I should go a shade or two darker? Brandon said…
Laundry Room Paint Color
And the winner is… pale blue! As I had mentioned, I’m not normally a fan of blue. I like certain shades though, so I’m willing…
Basement Paint Colors
We’re tiling the half-bathroom and laundry room in white Octagon & Dot with charcoal gray grout, and we’re going to paint the rest of the…
The Dining Room with Painted White Trim
I know, I’ve taken far too long to show you the ‘after’ photos. The problem is that I don’t really see the dining room as…
Recycled Paper Bunting (and a Giveaway)
I have a great giveaway for you today (sponsored by Windows Phone 7), but more on that in just a bit. First I want to…