

Twisted Felt Garland
Very little sewing required. Hooray for easy crafts! • Purl BeeNovember 22, 2010
Pink Paper Fireplace Flames
Cutest idea ever! Makes me wish I had a fireplace. • Twig & ThistleNovember 20, 2010
Recycled Paper Bunting (and a Giveaway)
I have a great giveaway for you today (sponsored by Windows Phone 7), but more on that in just a…November 15, 2010
Fabric Twist Ties in Gifted
Have you looked at Gifted yet? It's the newest e-magazine on the block, put out by the talented and lovely…November 3, 2010
Autumn Leaves Napkin Rings for BHG
This is the second craft project I've made for Better Homes & Gardens this fall (the first was the Halloween…October 12, 2010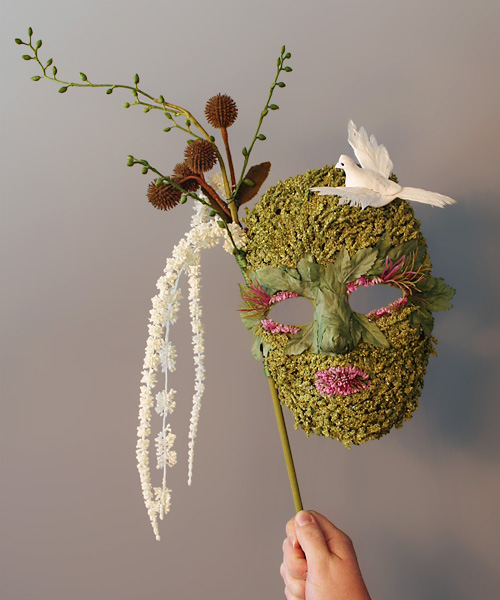
Halloween Mask for Better Homes & Gardens
Remember when I mentioned that I would be crafting four Halloween projects for Better Homes & Gardens? Well I'm thrilled…September 10, 2010
Recycled Paper Bunting (and a Giveaway)
I have a great giveaway for you today (sponsored by Windows Phone 7), but more on that in just a bit. First I want to…
Fabric Twist Ties in Gifted
Have you looked at Gifted yet? It’s the newest e-magazine on the block, put out by the talented and lovely Ez of Creature Comforts. I…
Autumn Leaves Napkin Rings for BHG
This is the second craft project I’ve made for Better Homes & Gardens this fall (the first was the Halloween mask). I, along with the…
Halloween Mask for Better Homes & Gardens
Remember when I mentioned that I would be crafting four Halloween projects for Better Homes & Gardens? Well I’m thrilled to finally be able to…