
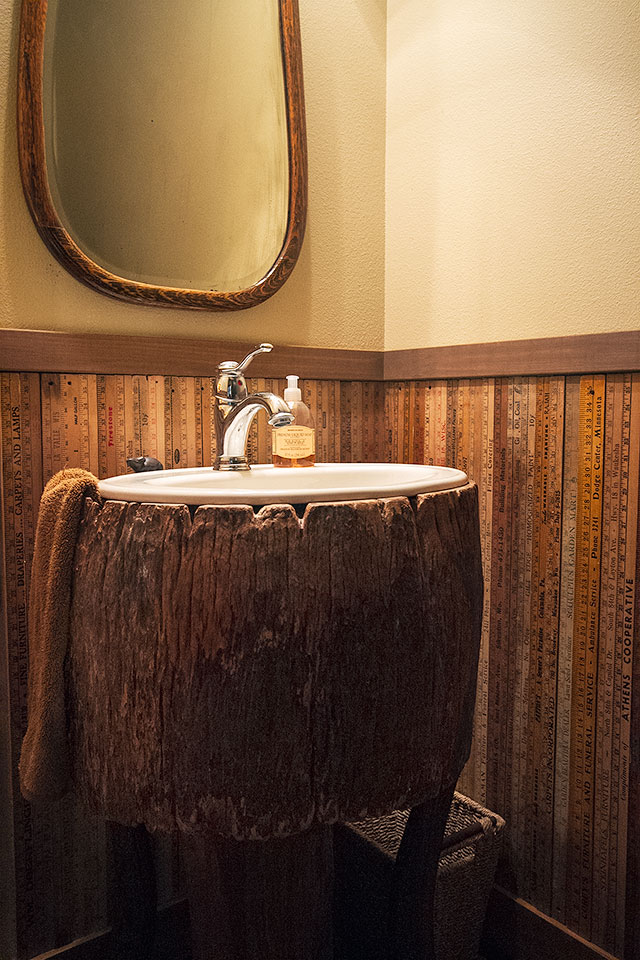
The Lake House Bathroom, After
(With DIY Vintage Yardstick Wainscoting) The vintage yardstick transformation into DIY wainscoting is complete! The family lake house bathroom is…August 21, 2013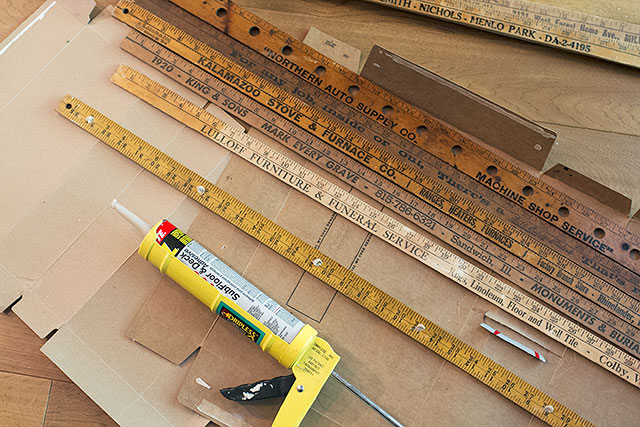
How to Make Yardsticks into Wainscoting
The vintage yardsticks that my mother-in-law has been collecting for the lake house's bathroom have finally become wainscoting. Three years…August 20, 2013
The Lake House Bathroom, Before
Last night, I started a fun DIY project at the lake house. If you have a very good memory and…August 15, 2013
How to Make DIY Monogrammed Trophies
Or mugs, dishes, or vases -- anything ceramic or glass. But I went with trophies. Supplies glass paint or all-purpose…October 25, 2012How to Make a Terrarium (Video)
Remember the punch bowl that I turned into an open terrarium? I put together a quick little video, showing how…August 20, 2012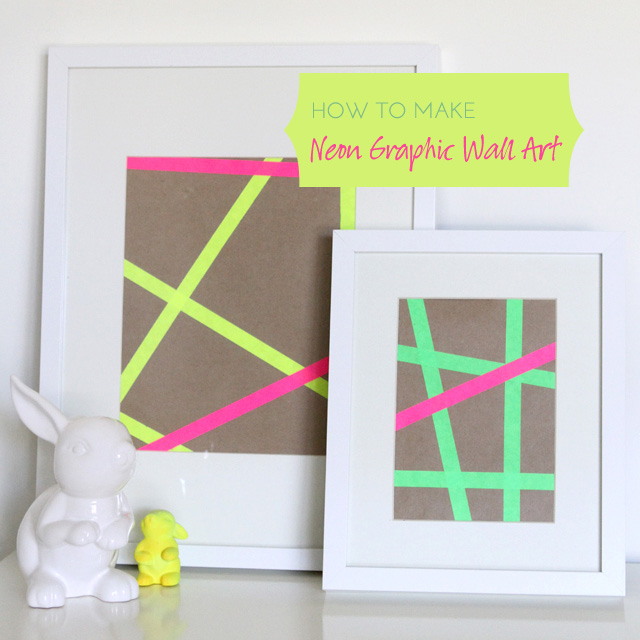
How To Make Graphic Wall Art
post by Andrea I've been deep in the throes of getting a very special room ready for an expectant arrival;…August 14, 2012
The Lake House Bathroom, After
(With DIY Vintage Yardstick Wainscoting) The vintage yardstick transformation into DIY wainscoting is complete! The family lake house bathroom is looking pretty dang fantastic. There…
How to Make Yardsticks into Wainscoting
The vintage yardsticks that my mother-in-law has been collecting for the lake house’s bathroom have finally become wainscoting. Three years after she mentioned the project…
The Lake House Bathroom, Before
Last night, I started a fun DIY project at the lake house. If you have a very good memory and have been reading here since…
How to Make DIY Monogrammed Trophies
Or mugs, dishes, or vases — anything ceramic or glass. But I went with trophies. Supplies glass paint or all-purpose craft paint (I like Martha…
How to Make a Terrarium (Video)
Remember the punch bowl that I turned into an open terrarium? I put together a quick little video, showing how I made it. p.s. Today…
How To Make Graphic Wall Art
post by Andrea I’ve been deep in the throes of getting a very special room ready for an expectant arrival; baby number three. [editor’s note:…