
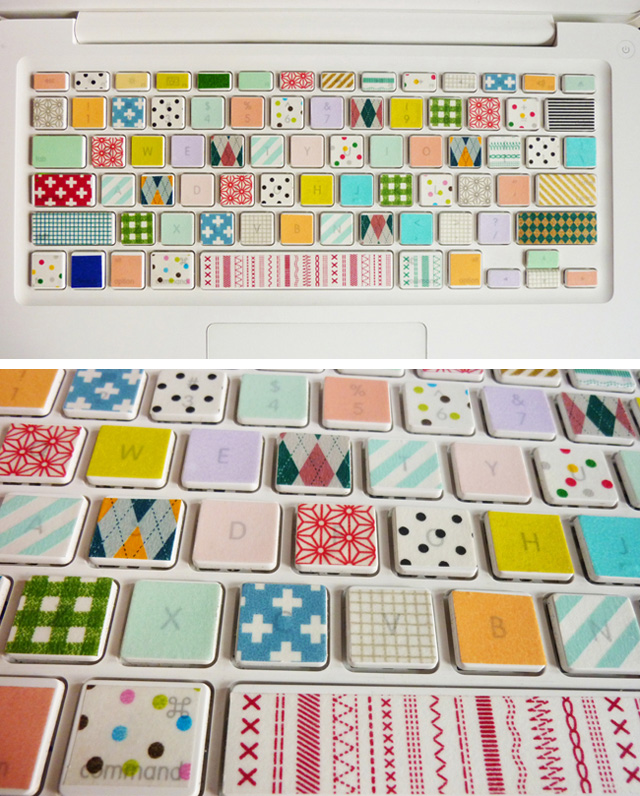
A Happy Keyboard for Happy People
Earlier today, I dropped a box of crayons on my keyboard, and I tweeted my cry of frustration. Then I…January 4, 2012
Winter Birds Free Printables
These birds were painted last year by Becca Kallem. Visit her blog to grab the full set (there are twelve…December 5, 2011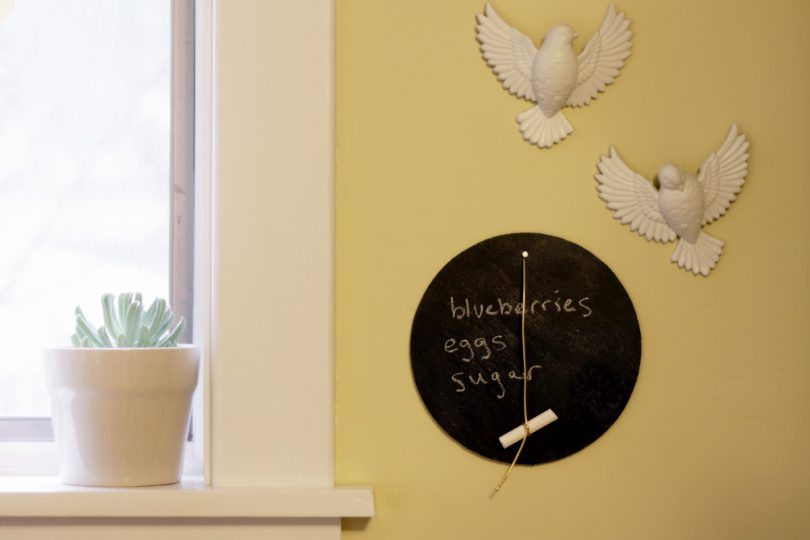
DIY Chalkboard Holiday Favors
I was asked to contribute to her Holiday Guide by Emily Henderson, so I came up with this DIY chalkboard…November 2, 2011
Happy Halloween from the Gruffalo’s Child and the Big Bad Mouse
Eleanor is still little enough to let Brandon and I choose her costume for her, but she's big enough now…October 31, 2011
How to Find a Wall Stud (Video)
I put up my almost Hang-it-All in the basement stairwell yesterday. To make sure it would stay put, I needed…October 24, 2011
The Porch Rug (Revisited)
I thought I'd talk about painting the porch rug in a bit more detail today. So many of you loved…May 25, 2009
A Happy Keyboard for Happy People
Earlier today, I dropped a box of crayons on my keyboard, and I tweeted my cry of frustration. Then I was asked if it looked…
Winter Birds Free Printables
These birds were painted last year by Becca Kallem. Visit her blog to grab the full set (there are twelve birds in all), and you…
DIY Chalkboard Holiday Favors
I was asked to contribute to her Holiday Guide by Emily Henderson, so I came up with this DIY chalkboard holiday favor. They look cute…
Happy Halloween from the Gruffalo’s Child and the Big Bad Mouse
Eleanor is still little enough to let Brandon and I choose her costume for her, but she’s big enough now at 2-1/2 to be excited…
How to Find a Wall Stud (Video)
I put up my almost Hang-it-All in the basement stairwell yesterday. To make sure it would stay put, I needed to be sure I hit…
The Porch Rug (Revisited)
I thought I’d talk about painting the porch rug in a bit more detail today. So many of you loved the project (thanks!), and it…