
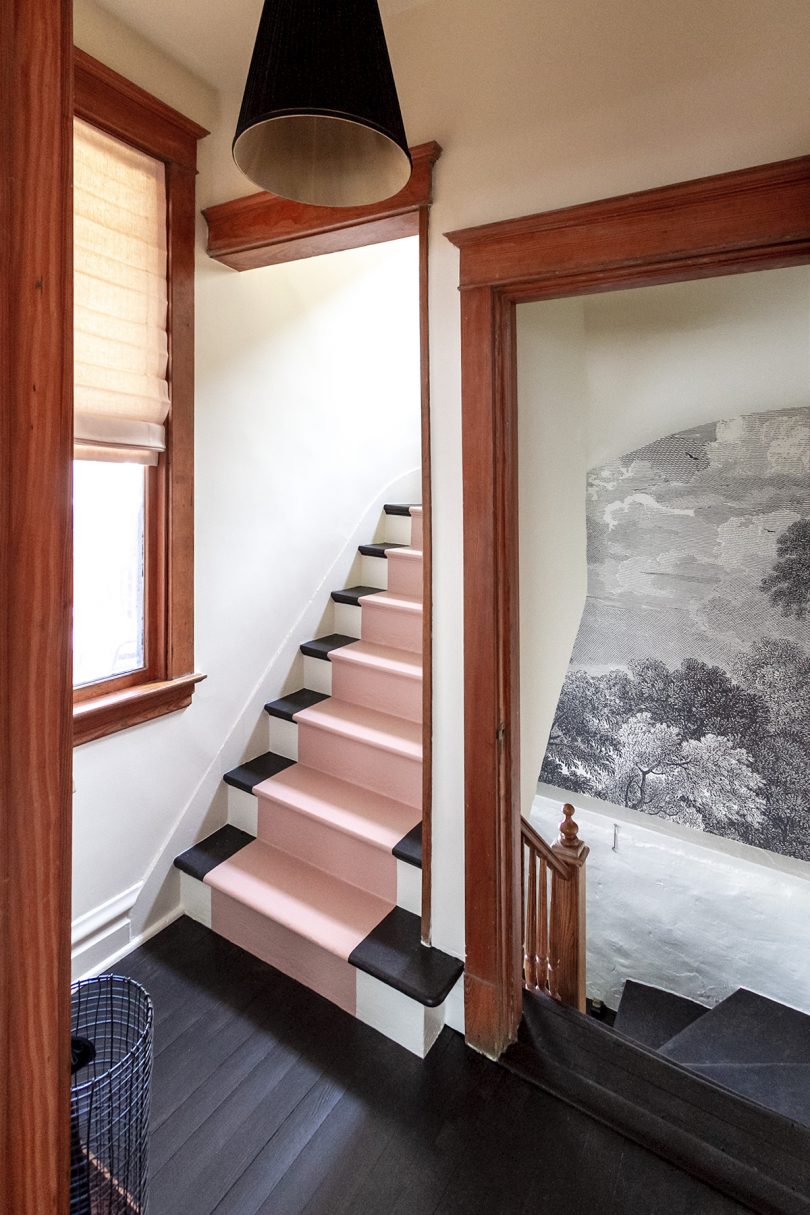
Painted Stairs and Entryway Makeover
This is a sponsored conversation written by me on behalf of Dutch Boy. The opinions and text are all mine.…March 6, 2019
Honor Roll
Let's start with a before and after. The renovated 'after' is up first. The great paint debate will never die!…December 8, 2017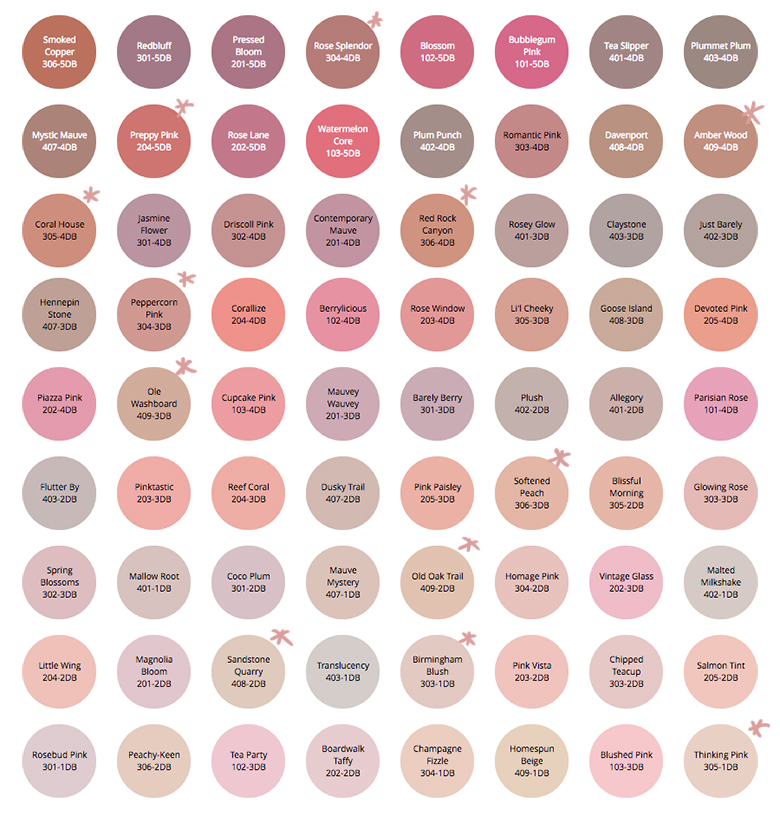
Planning Our Paint Color Palette with the Simply Yours Tool
This post is sponsored by Dutch Boy Paint. We took on several spaces for the latest round of the One…November 21, 2016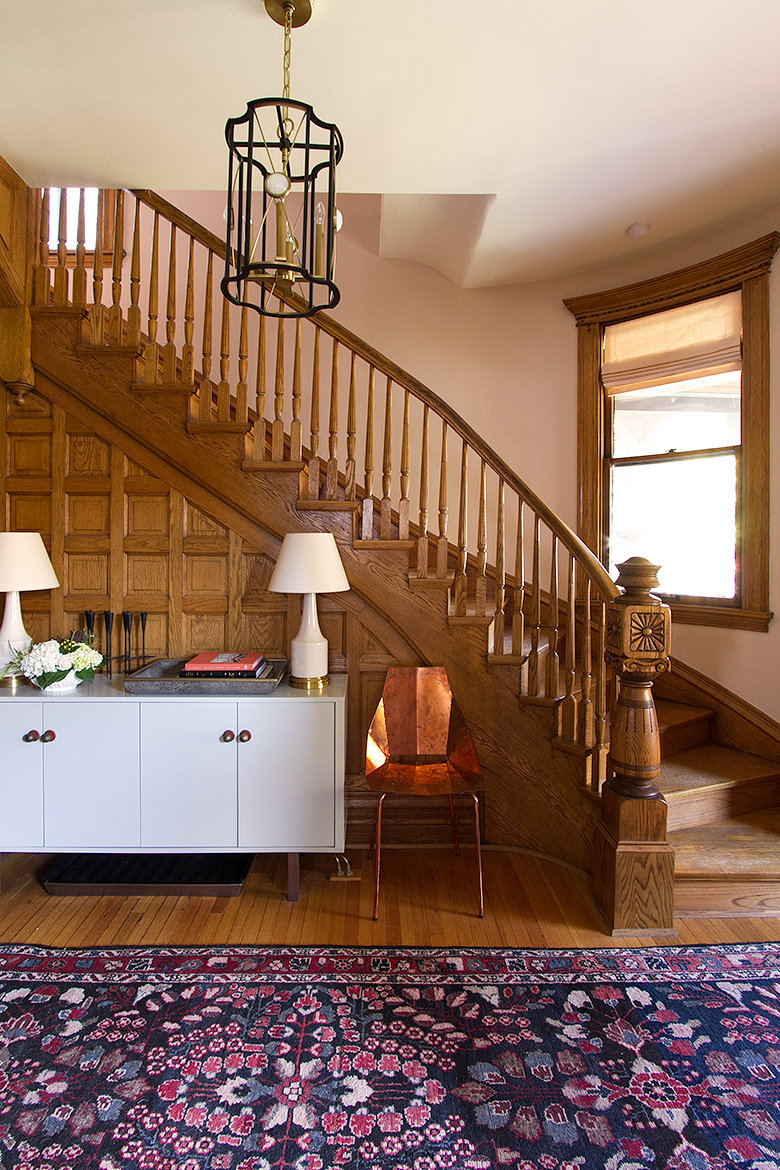
One Room Challenge: Week 6 (Front and Back Entry, Stairs, and Hallways – Final Reveal!)
Hey, who needs a distraction right now? Today is reveal day for the Fall 2016 One Room Challenge! Let's get…November 9, 2016
All the Trimmings
The living room's trim is now white. Our house feels lighter, and all is right. Oh, wait… now the need…March 13, 2012
Living Room Trim Progress
I spent yesterday filling nail holes with wood putty, sanding, caulking gaps, washing, taping off the floor, priming, and painting.…February 20, 2012
Painted Stairs and Entryway Makeover
This is a sponsored conversation written by me on behalf of Dutch Boy. The opinions and text are all mine. Our back entryway got a…
Honor Roll
Let’s start with a before and after. The renovated ‘after’ is up first. The great paint debate will never die! This L.A. mansion is stunning…
Planning Our Paint Color Palette with the Simply Yours Tool
This post is sponsored by Dutch Boy Paint. We took on several spaces for the latest round of the One Room Challenge. The work spanned…
One Room Challenge: Week 6 (Front and Back Entry, Stairs, and Hallways – Final Reveal!)
Hey, who needs a distraction right now? Today is reveal day for the Fall 2016 One Room Challenge! Let’s get into it. I have been…
All the Trimmings
The living room’s trim is now white. Our house feels lighter, and all is right. Oh, wait… now the need to paint the dining room…
Living Room Trim Progress
I spent yesterday filling nail holes with wood putty, sanding, caulking gaps, washing, taping off the floor, priming, and painting. I have one more coat…