
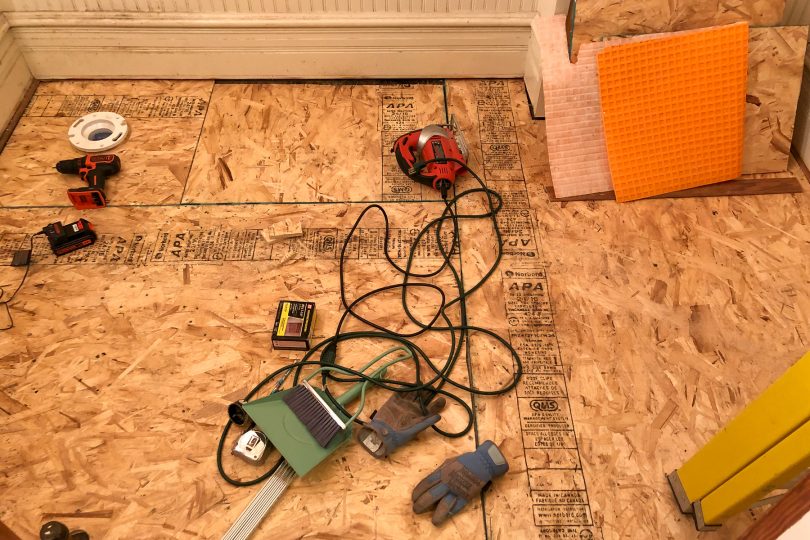
Tiling with Cement Board Instead of Ditra
I want my bathroom tile to have longevity. I’m using porcelain (wonderfully durable), and taking the time to do the…August 29, 2019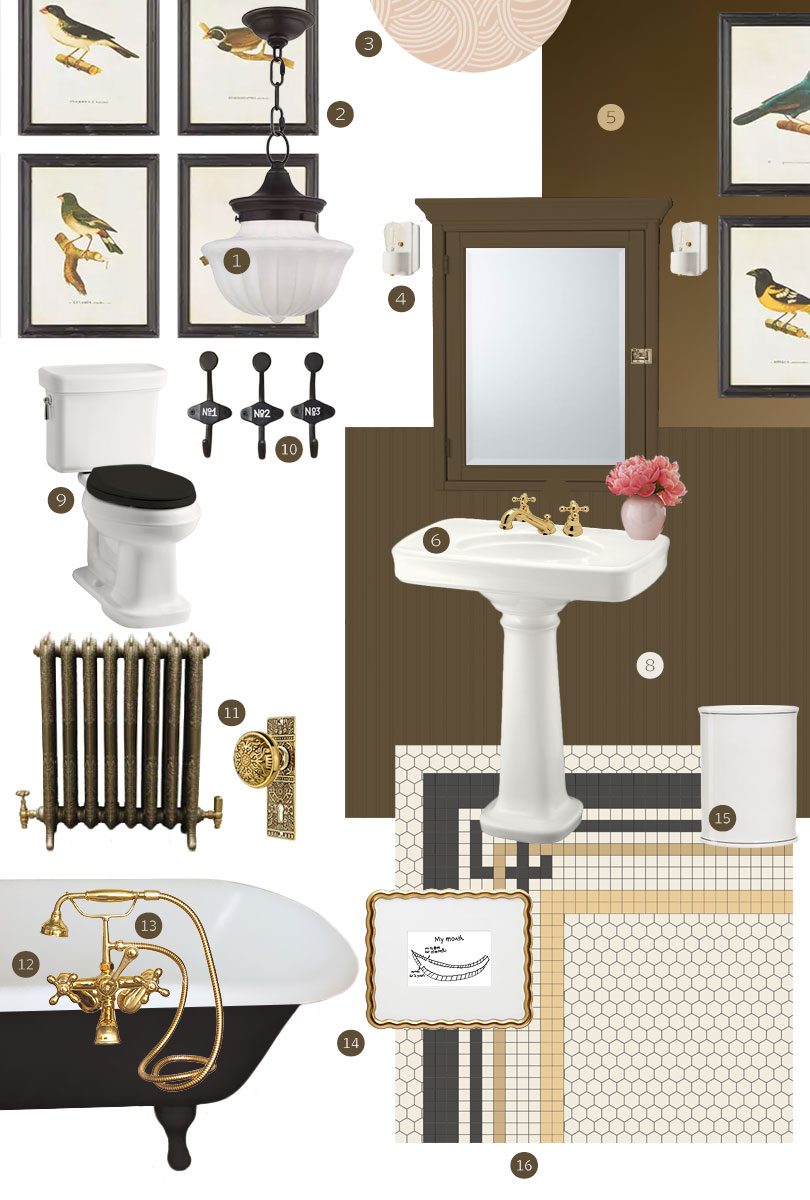
The Bathroom Design Plan
This bathroom renovation is sponsored by Lowe’s. Thank you for making this project possible! I've been working away on our second…June 26, 2019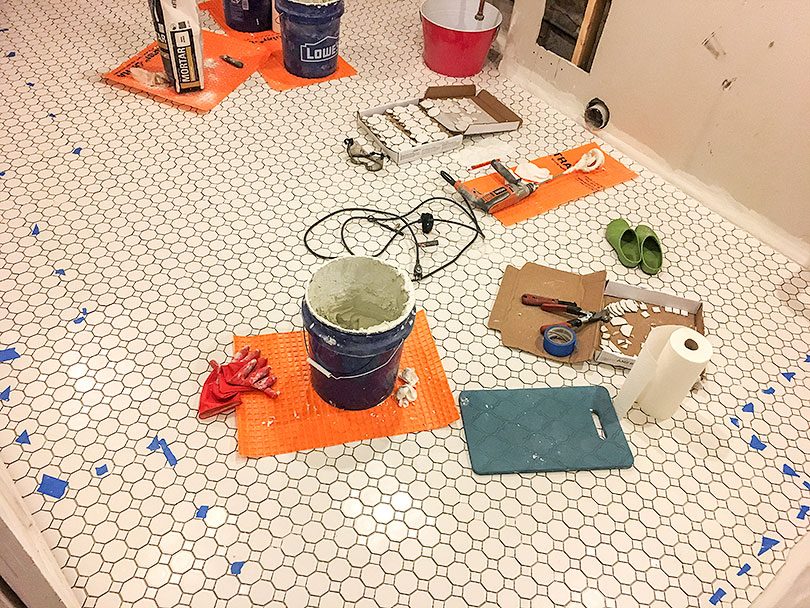
Tiling the Basement Laundry Room
Today, I grout! But first, let’s take a look at the tiling progress I’ve made. I started by finding the…July 11, 2018
It’s Electric!
Our Victorian had been converted to multiple apartments decades ago (during the Depression, I believe), and was only converted back…October 1, 2014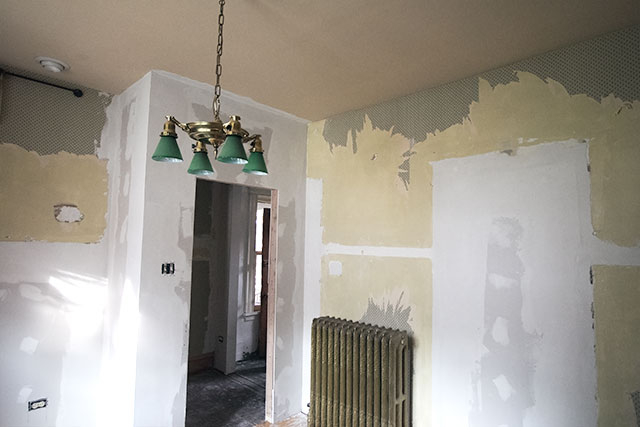
The Second Floor is Taking Shape
Hey, no more visible lathe! We have walls! That's the door we're going to reuse for the new nursery, casually…August 4, 2014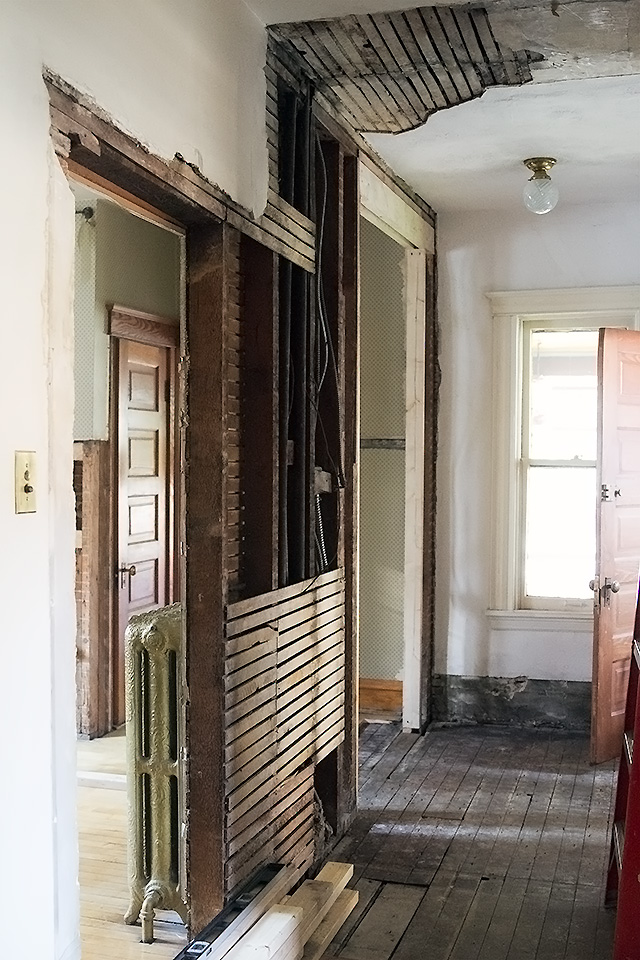
Moving the Door Over
We're still a ways off from finishing the conversion of the kitchen on the second floor into a bedroom and…July 21, 2014
Tiling with Cement Board Instead of Ditra
I want my bathroom tile to have longevity. I’m using porcelain (wonderfully durable), and taking the time to do the job right from the prep…
The Bathroom Design Plan
This bathroom renovation is sponsored by Lowe’s. Thank you for making this project possible! I’ve been working away on our second floor bathroom, clearing everything out…
Tiling the Basement Laundry Room
Today, I grout! But first, let’s take a look at the tiling progress I’ve made. I started by finding the center of the room, then…
It’s Electric!
Our Victorian had been converted to multiple apartments decades ago (during the Depression, I believe), and was only converted back to a single-family home shortly…
The Second Floor is Taking Shape
Hey, no more visible lathe! We have walls! That’s the door we’re going to reuse for the new nursery, casually hanging out all akimbo at…
Moving the Door Over
We’re still a ways off from finishing the conversion of the kitchen on the second floor into a bedroom and finishing the hall, but it’s…