
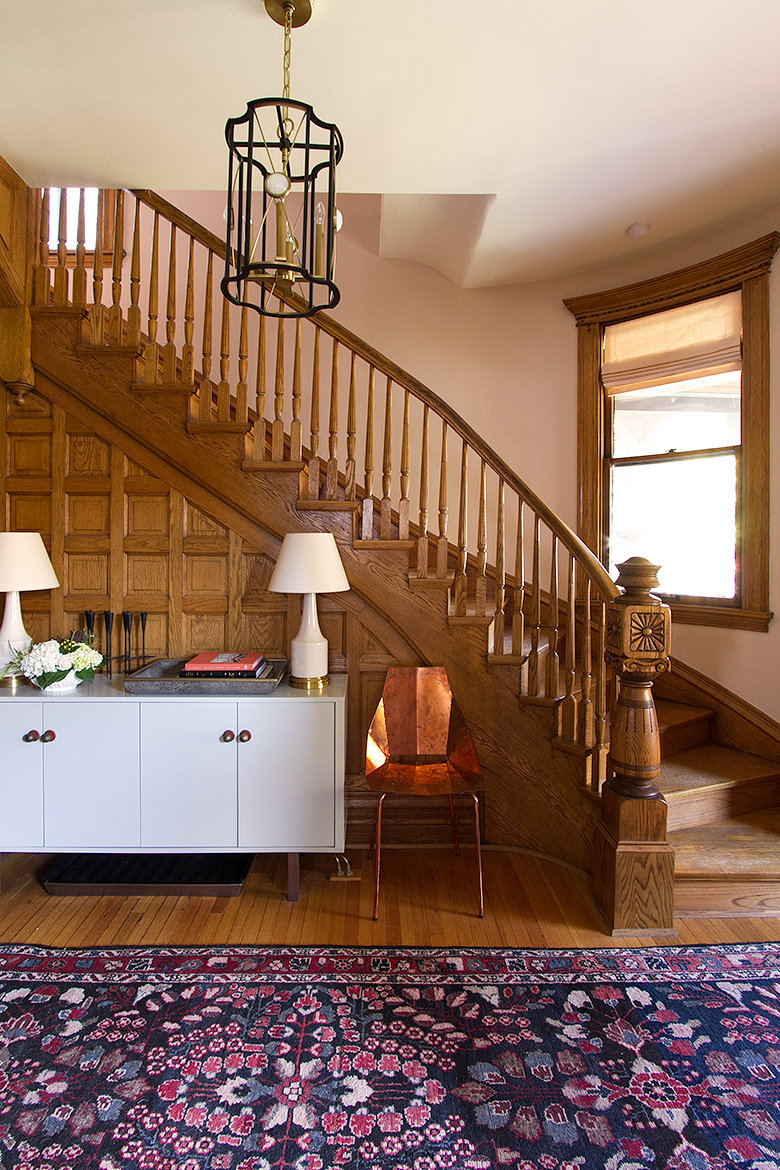
One Room Challenge: Week 6 (Front and Back Entry, Stairs, and Hallways – Final Reveal!)
Hey, who needs a distraction right now? Today is reveal day for the Fall 2016 One Room Challenge! Let's get…November 9, 2016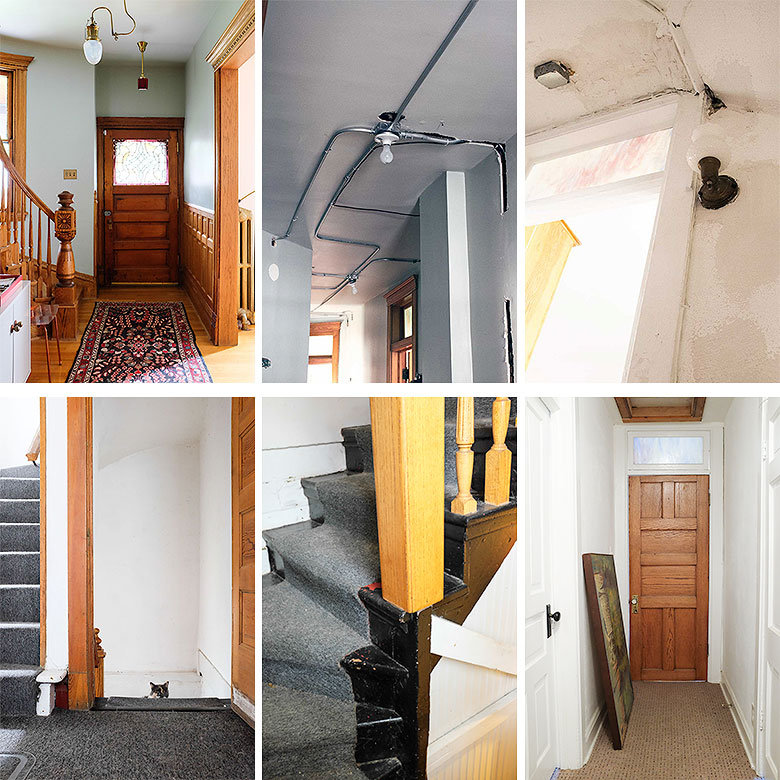
One Room Challenge: Week 1 (the Before Shots)
I'm thrilled to be taking part in the One Room Challenge again! A huge thank you to Linda at Calling…October 5, 2016
Tending to the Climbing Roses
We have a bunch of vines and climbers in the garden. Autumn sweet clematis on the front fence, grapevines on…August 8, 2016
Finishing the Third Floor Bathroom
I was all set to finish this space up last summer. And then I thought, well, if I just install…June 14, 2016
The Lay of the Land
OK, done with the front of the house! For now at least. I'm eager to get out there and make…June 7, 2016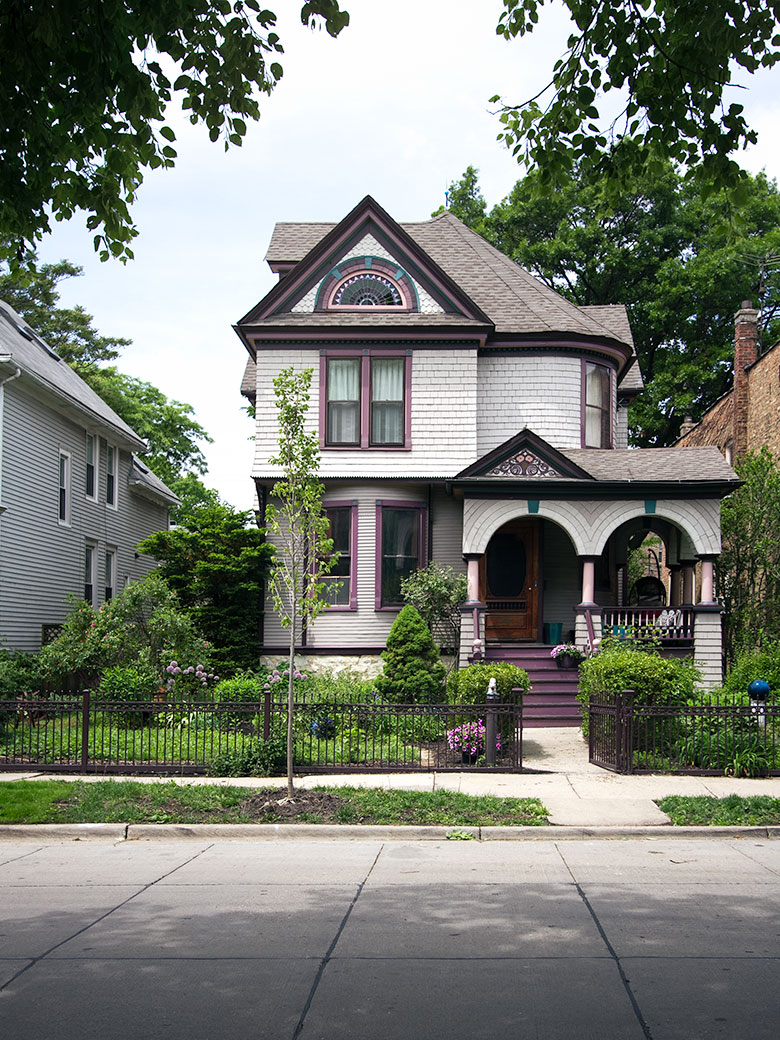
A ‘New Horizon’ for the Front of the House
I spent a full day yesterday from 8 a.m. to 5 p.m. pruning boxwoods. That's insane. I'm assuming it's faster…May 26, 2016
One Room Challenge: Week 6 (Front and Back Entry, Stairs, and Hallways – Final Reveal!)
Hey, who needs a distraction right now? Today is reveal day for the Fall 2016 One Room Challenge! Let’s get into it. I have been…
One Room Challenge: Week 1 (the Before Shots)
I’m thrilled to be taking part in the One Room Challenge again! A huge thank you to Linda at Calling it Home for organizing the…
Tending to the Climbing Roses
We have a bunch of vines and climbers in the garden. Autumn sweet clematis on the front fence, grapevines on the back. Honeysuckle on a…
Finishing the Third Floor Bathroom
I was all set to finish this space up last summer. And then I thought, well, if I just install a new toilet, maybe some…
The Lay of the Land
OK, done with the front of the house! For now at least. I’m eager to get out there and make some changes and additions, but…
A ‘New Horizon’ for the Front of the House
I spent a full day yesterday from 8 a.m. to 5 p.m. pruning boxwoods. That’s insane. I’m assuming it’s faster if you are a more…