
I finally found my inkjet compatible shrinky dinks paper! I made the key chain I had wanted to make back in December, and I also made a cute dog tag for Murray. I’ve edited the photos of Murray’s tag to remove or blur our address and phone number, but the info is on there.

for my PO Box

Collar from Pattern & Paw. Enter ‘nicoleislovely’ to save 15%!
How To?
It’s a very easy project.
First, you’ll need to come up with a design. I know that not everybody is artistically inclined, so… I created a free Pet Tag Template for you! It’s the tag I used for Murray, cleaned up and simplified for widespread distribution. ;) You’ll need Photoshop to use the template, but I also included a plain jpeg version.
You’ll have to lighten your design at least 50% before printing. The 3″ circle will shrink down to about 1.25″ after baking, and the colors will be much more vivid. After printing, cut your design out and punch a hole now if you want one.

Keep an eye on the shrinky dinks while they’re baking. Mine only took three minutes.

before baking

fresh out of the oven
You can leave them as-is, but a clear topcoat is recommended. I just used clear nail polish.
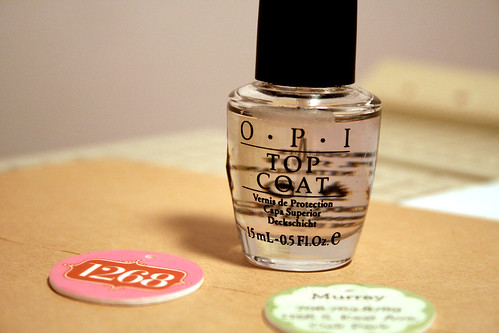
I left the back of my key chain white, but I colored the back and sides of Murray’s dog tag with a brown Sharpie.

That’s it!


76 comments
Stephi
Do you know if you can print on the ink jet sheets and also color on them with possibly colored pencils? or permanent markers?
paulina
I loved it! I want to make some for my little Emma, can you please tell me what kind of paper you used?
Thanks!
Making it Lovely
Shrinky Dink paper. I linked to it above.
Mary
Great idea! I’ve also read that recyclable #6 plastic will “shrinky dink” too! – just another idea out there.
Making it Lovely
I’ve updated the post to include a new link to the free Pet Tag Template!
Sharon Abbey
Hi,
I made these for my dogs (before I found your site). I used the printable shrinky dink plastic as well as the traceable ones. They all turned out well, the traceable ones had better and true colors, the plastic printable ones ‘smeared’ with exposure to water even after coating them.
The BIGGEST problem I had was the hole. I created it according to the directions, and had to remake it when it came out of the oven while still flexible. It was far enough away from the edge and was the perfect size for the ring (however using a regular size hole punch is not recommended in the Shrinky Dinks instructions, because it shrinks to nothing, I found this out) I was happy with how most of mine turned out ( I made 6 for my dogs) but withing a month, the hole had broken on every single one of them. The plastic seemed to be more sturdy than the traceable, but they all broke with normal use and the dogs playing with each other. I still have a ton of pages left so Im going try again. Any suggestions before I do???
emily
they actually make a thinker one now designed for luggage and pet tags its called ‘ULTRA THICK MISTY WHITE’
however they don’t have any of that size/kind for printers that Ive seen but they do mention that they can be used for designs on both sides, which is nifty. you can make the front pretty with just their name and then your address and phone number on the back.
Making it Lovely
I had good results with a regular-sized hole punch, but I did find that it broke after a while as well. Unfortunately, I don’t think they hold up to heavy-use (though mine did last longer than yours). You can try reinforcing the opening with metal, perhaps something from a jewelry supply store?
Gretchen
Would you please send me the link for the shrinky dink key chain circle. Thank you so very much for a great project.
TANYA
I love these….so cute. Looks like I’m the only one though that can’t open the template. Am I trying to get it from the wrong spot?
Thanks
Tanya
Andrea Withrow
I too would like the template. Gorgous dog btw
Karen
Love this, would also like the template. Please send?!
Lori
Love this site. So glad I stumbled on it. Oak Park is one of my favorite places on earth. I cannot wait to visit the store next time I am in town.
I have been searching the site for the dog tag download to no avail! Help
Heather
might be the cutest thing ever! I am going to run to the store to find shrinkydink paper!
Bexster
Your tags are awesome! I am not artistically inclined, and the link to the template is dead. If you see this, could you please re-link the template? Thank you, thank you, thank you!
Michelle
This would be perfect for my dogs. How can I get the template?
Deb
Hi there! I love your blog and your fabulous ideas! As soon as I saw this one in your archives, I found the inkjet shrinky dinks online and have received them today. I’m now ready to create lovely new tags for our dogs. However I can’t open your template. Would you please add the template again or email it to me.
grannyj
God gave me the idea for a key chains business,or at least make them to give away at some of our retreats. You instructions are very simple and I think it would be a wonderful start to my business. A good way to put extra income into the household and everyone can help.
Della Lindsey
Nichole, thank you, I have been looking for a way to put my artwork on jewelry. This is definitely inspiring!
Marcy
Thanks for this great tutorial and template! I bought some regular shrinky dink paper today in the hopes that I could just print on it anyway? But no? My dog has like 5 collars and the other has 3 (he’s only 4 months old!!) so I didn’t want those stupid metal ones for each one. So I opted to do this!!
Nicole Pratt-McDermott
Hi! I just LOVE this!!! I will be buying some Shrinky Dinks this weekend and look forward to attempting this craft. I have attempted several times to download the template but have had no luck in doing so. I’m wondering if I am doing something wrong or is the link no longer working. I’m sure it’s me, but wondering if there’s anything you could email me directly, as I’m so excited to get started. I came across this when searching out shrinky dinks however now I’m addicted to your site!! Thanks.
PS: Your garden looks great!! :)
kelly
I just made a dog tag and it’s super cute! Thanks for the great idea. Also, Readymade (www.readymademag.com/store/) is now selling shrinky dinks that are printable on both sides, however they seem to be a little more textured that the ones shown.
Mandy
Can these be two-sided to where I could put contact information on the back?
maura
OMG! I love it! so cute! thanks for a great idea. maura
Jessica
I love this project! My friends and I are going to have a shrinky dink party soon after seeing your post…
http://blackwhiteyellow.blogspot.com/2008/03/shrinky-dinks.html
diane
LOVE this!
I’ve been meaning to purchase some shrink paper and I think I finally got the little push to go get it!!!
Thanks for sharing this :)
*diane
Barb
Very cool. I tried one of these recently, but I used a pic of the dog. For some reason, when I used the nail polish, it blurred the image. Maybe I didn’t let it cool enough. I still want to play around with it. I was thinking of doing two circles (one with a pic, one with the address) and gluing them back to back. I know if you color it (with pencils or something), sometimes it’s recommended to sand the plastic first so it all adheres better.
maize
Hi there,
Thanks for this. I thought I should also tell you that when you open up the template there is one which shows your personal info on the dog tag. Thought you might want to delete it.
:-)
Heather*
I am loving that shrinky dinks are making a comback. I haven’t played with them in years. I am going out to get some today!
BTW~ Love your cards too!
shetat2s
LUVLUVLUV IT!!
i just re-discovered shrinky dinks, and as a tattoo artist it is a wonderful medium to reprint and share my tattoo inspired paintings. conjurs up good convos and business has picked up! everyone wants to know who the artist is and where they can get their own. they love it when they find out they are talking to her!!
great job!!
i too use clear nail polish, i find when i put it on right out of the oven and the plastic is still warm the ploish just glides right on.
Morgan
Make sure you use a sealant…I made a tag for my dog a while ago and the first time he went outside in the snow the image ran all over his fur. So now I always use an acrylic spray to seal everything!
Darren K
I want shrinkydinks, I have never heard of them before, I remember we used to shrink the old aluminium foil chip packets and thy did the same, I am trying to get some shiped to Australia, I hope I can!!!
kellie
i mentioned this on my blog with credit and link to you, of course… i was so excited to remember shrinky dinks… i love these!
murray is such a cutie!
kara
Ohhh! Those are so cute! I have been making Shrinky Dink tags for my dogs for a few years now (although your patterns are soooo much nicer! Mine are all just made with sharpies, stamps & colored pencils.) I have a bunch of the ink jet plastic too so I am excited to try your templates.
The only thing you should beware of is that with dogs the tags do break off fairly easily (and often!) so you might want to have a sturdier one as Murray’s permanent (or back up) ID tag.
SuzyCat
What a brilliant idea!
It’s been almost a year since I moved and I have still yet to change my cat’s tags and this is simple, cheap and you can make it however you want…awesome!
p.s. i’m a new reader, hi!
Chrissy
This is just fantastic! Your blog is my new favorite thing in the world, BTW.
Thanks for the adorable template, my kitties will look so pretty wearing your design! :)
xo
Kathleen
Thanks for the inspiration and your dog is sooo cute. I hope everything is a-ok with Murray health wise. What an absolute sweety.
alis
I can’t believe I hadn’t discovered your blog until now (I did via domino’s “inpiration from domino flickr group” gallery), your blog is amazing, and you are so talented! There is not a tiny bit I didn’t go “oooh” and “ahhh” about your posts. I featured you on my blog, I hope that’s ok.
xx
Alis
Caitlin
So cute!
Thanks for the template, too! I’ll download it when I get home after work.
Not that I have either a need for tags or even any Shrinky Dink paper, but you never know when it’ll come in handy! ^_~
What size hole punch did you use to make the hole before it shrank?
Lucky
hi. just found your blog last week :)
i did shrink dink tags a few months ago – and they were no where near as fab as yours! thanks for the tips – makes me want to try again.
Making it Lovely
Corie, I linked to the shrinky dink paper above, but here it is again: link.
Erica, so cute! They must be fierce protectors. ;)
I didn’t post the template for the other tag (1268) because that’s an original design of mine that I’m using for several items in the shop. Sorry! A few people have emailed me about it too, but I hope you all understand. If you’d like to try making your own tags, you can search istockphoto.com to find designs!
Jen
I’m absolutely trying this. Love the idea!!!
Lindsay
is it crazy of me to want a dog now… just so i can shrinky dink it a collar tag? =)
i’ve got to get my hands on some of that goodness. the possiblities are endless!
thank you for sharing the template. i’m feeling greedy and wishing you’d posted the mailbox one as well. =)
Jennifer Pebbles
Love these!! I have a stash of shrinky dink paper waiting for me to play with, but I wanted the printable kind…now I am off to shop!! Thanks for the info!
amanda
way. too. cute. gotta make some of these for my furbaby!!! :)
Sarah
This is so adorable! And then I found the template and was even MORE excited :)
Erica Burns
Murray is so precious! Love the Shrinky Dink tags. I must make a set for Lola & Bella. Take a peek at them guarding the house here:
http://farm3.static.flickr.com/2363/2279341131_4c5fbc5556_b.jpg
Jen
Great designs! I made some collar charms like this a couple of weeks ago to give out as prizes at our dog club event. Alas, my designs aren’t quite as nice as yours…
Corie
I read your blog all the time and think you have the most fabulous taste. I love checking in every few days to marvel at your new ideas, you are truly very talented!! You’ve really inspired me to tap into my own creative side, and it’s been a whole lot of fun working on things for my own home.
And where did you find printable Shrinky Dink paper!???
Lili
I’ve been planning on doing the same thing for Sugar!
Gina
This is the cutest idea! I love playing with the shrinky dink stuff but never thought of this. My pets have Lindsay’s cute collars too so I can make them to match.
Crow797
Love the idea! I can’t wait to make my dog Crow a really cool one! Your blog rocks!
trisha
i love the collar tags you created, what a great idea!..i don’t want to step on toes but i make/sell collars and leashes and yummy dog treats too..so if your new puppy is in the market for some treats drop me a line! =)
Joanne
I haven’t played with Shrinky Dinks in thirty years! I’ll have to try this.
Kylie
How have I never known about shrinky dinks!!! I swear we have NOTHING in Australia. :) Both the tags look absolutely fablous. :)
Valerie
The collar and the tags are perfect! I think I may need some for myself….
Michelle B
Nicole,
Thank you for sharing this pattern!
I can think of so many cool ideas to use it for. I love labels of all sorts.
The last picture of Murray is really precious.
I love sleepy doggie and kittie shots!
iloveupstate
I just squealed…outloud…really loud. Love this!
molly
I think I got them at Dick Blick, or maybe Charette.
Erin
Fabulous! I’m sure I’ll find some reason to buy this…
Making it Lovely
Ooh, where do you get yours? I want some double sided ones!
I was going to use spray sealer, but I couldn’t find it (and didn’t want to make a trip to buy some). ;)
molly
Cute! Murray looks quite dapper in his new collar and tag.
The inkjet shrinky dinks I have are printable on both sides, so I put a patten on the back as well. And I use spray acrylic sealer to coat them.
Comments are closed.