
My dad was a handyman, and I grew up helping him. I’ve painted my home from top to bottom, as well as the houses and apartments of countless other people. I’ve learned a thing or two over the years and I’m happy to share my tips and a step-by-step guide with you! It looks like a lot of information (because it is), but don’t worry or get overwhelmed. Painting a room is an easy, inexpensive DIY project and you can do it!
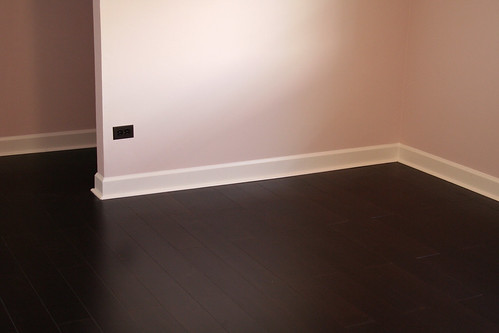
(Pictured above is my studio. I primed and painted the walls, installed and primed and painted the wood trim, ripped out the old carpet, and laid new bamboo flooring.)
Prep Work for Painting
- Fill any holes or imperfections with spackle, wait for it to dry, and then lightly sand the patches. If you have a crack, you must first widen it slightly before spackling or the spackle will just sit on top.
- Scape away any peeling, cracked paint, then sand the area smooth.
- Clean the walls if they may be dirty (especially in a kitchen or bathroom), and always take a damp cloth to clean the dust off of trim and the tops of doorways.
- Use paintable caulk to fill any gaps between the walls and trim before painting the trim. Fill any dings and divits in the wood with wood putty, wait for it to dry, then sand smooth.
- When in doubt, prime. Using a primer can hide dark colors, block stains, and help your new paint job last longer. It’s also a must when painting exposed woodwork, and there are many primers that adhere to glossy surfaces (allowing you to skip sanding first).
- Stir your paint before you begin, and don’t paint straight from the can. Obviously you would pour the paint into a roller tray if you were about to use a roller, but consider using a small bowl when painting with a brush. Its easier to hold, and decanting paint will keep the can free of the impurities (dust, wood particles, etc.) that your brush may pick up as you work.
- If you want to use tape, buy painter’s tape (it’s usually blue or green, and marked as such). Apply it in short, overlapping strips, and press down firmly along the edge to ensure a crisp line.
Painting Tools
- You will need the following tools to prep for a typical room: Spackle, putty knife, fine grit sandpaper, and a damp lint-free rag. You may also need paintable caulk and wood putty if you’re working on the trim.
- Tools to paint a typical room: Paint, a tool to open the paint can, stir stick, angled paint brush, small bowl (I don’t recommend painting straight from the can), roller, roller cover, roller tray, and a roller extension pole (if you have high ceilings). Painter’s tape is optional, and a drop cloth to protect the floor is a good idea. You don’t need any funny little gadgets to paint edges.
- A 5-in-1 tool
is a painter’s best friend. You can use it open the paint can, open cracks in the wall for repair, spread spackle (takes the place of a dedicated putty knife), scrape loose paint, and clean rollers.
- Use a good quality brush. I like a 2.5″ angle brush
for most projects (painting trim, doors, cutting in), and a 2″ sash brush
for windows.
- Use a good quality roller cover. Cheap ones leave a messy edge and can shed little fuzzies all over. I use a fresh cover for each paint job, but they can be cleaned. A 3/8″ or 1/2″ nap is good for most walls.
Choosing Paint
- I’ve tried many brands and I’ve been happiest with Benjamin Moore, though Behr impressed me as well. If you find a color you like from another line, a paint store can match it for you in the brand you like.
- Choose a finish that is appropriate for the room and application. I like semi-gloss for trim, eggshell for kitchens and bathrooms, and flat for all other rooms. Glossy finishes are the most durable, but flat finishes help to hide imperfections. Most paint finishes now, even flat, will hold up to a little cleaning. Porch paint is the most durable option for painting wood floors.
- Oil or latex? I always use latex (water-based) paint. It dries quickly, there are less fumes, and it cleans up with water. You can still choose latex if you are painting over oil paint, but you must prime first with an oil-based primer. You can test what kind of paint you have by rubbing it with a cotton ball soaked in rubbing alcohol. If the paint comes off, it’s latex.
- Get a low-VOC (Volatile Organic Compounds) paint if you’re concerned about paint fumes (in a nursery, for example). Many brands offer a low or no VOC option, including Mythic, Benjamin Moore, and Behr. Consumer Reports ratings are available to CR subscribers.
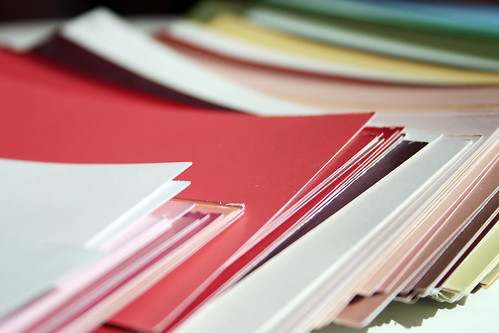
(Paint chips from Martha Stewart’s line at The Home Depot.)
Choosing a Paint Color
- Choosing colors is a bit of an art, but here’s a “rule” that I think you can ignore: Don’t pick a color and then ask for a half-strength or lighter version. Some people swear by this, but I’d suggest choosing a lighter color instead if you feel like the one you’re considering will be too dark.
- Most people prefer slightly muted (tinted with gray or brown) colors, as opposed to a pure or primary color.
- Your ceiling does not need to be white! If the wall color is not too dark, I use it for the ceiling too. If you do choose a dark wall color it may be a little much to use everywhere, you can have fun choosing another color for the ceiling that will work with the rest of the room.
- Most paint companies are offering sample sizes now, so it’s easy to try a few colors out before buying a gallon. If you don’t want to paint the samples directly onto your wall, paint each color on a board of foam-core (paint stores sell them).
- Choosing a paint color should come at the end of the decorating process.
- The worst thing that can happen if you hate the color you choose is that you’ll have to repaint. It would be unfortunate, but not catastrophic.
Painting Techniques
- Keep a wet edge, and always paint from dry to wet. This will minimize brush strokes and roller marks.
- Don’t stretch your paint. You don’t want to glop the paint on, but scrimping will leave you with a patchy, blotchy paint job.
- Taping is optional, especially if you have a reasonably steady hand. Using an angle brush, start slightly away from the edge and then curve in to meet it. This will help you avoid leaving a big blob of paint where you begin.
- Holding the brush the narrow way (not the way you would naturally hold it) makes it easier to get a crisp line when painting trim.
- Painting a room is best accomplished by first cutting in (painting along the trim, ceiling, and corners) with a brush. After that has dried, you can go in with a roller for the walls.
- I find that it doesn’t matter whether you paint the walls or the trim first. My preference is to paint the trim first because I find that I can get a cleaner line when I cut in to paint the walls. If you like to tape off your edges, you may find it easier to paint the trim last.
- Wet your brush and then blot out most of the water before you begin. This will help to keep paint from creeping up into the ferrule (the metal part where the bristles are attached) and save your brush.
- Only dip your brush about a half or quarter of an inch into the paint, then wipe off one side on the edge of the paint container. This will help you avoid paint runs (from using too much) and keep your brush in good condition.
- Paint in long, continuous strokes. Not doing so is one of the most common mistakes.
- When painting with a roller, aim for covering a three foot wide section at a time. I typically go from the ceiling to a midway point, load more paint, and then go from the midway point down to the floor. Then I move left or right to the next section, always remembering to keep a wet edge and working from dry to wet.
- When painting with a brush, don’t dab the paint on or move in a short back and forth motion. You can paint with the brush left and right (or up and down) to get the paint on, but then take one long finishing stroke from the dry side and tapering off into the wet edge.
- Put on a second coat. Your paint job may look OK after just one, but it will look better after two. If you’re using a dark or vivid color, you may even need three (or more) coats.
- Let your paint fully dry between coats. The paint can should tell you how long to wait.
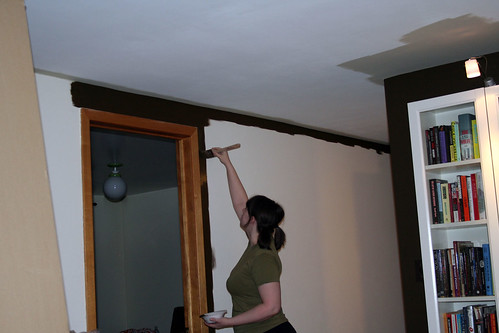
(That’s me “cutting in” while painting my library.)
Cleaning Up
- You can keep your brush or roller wet between coats by covering it tightly in plastic wrap or using a plastic bag. And don’t forget to put the lid back on the paint can right away.
- I use a fresh roller for each paint job, but you can clean them with water and a 5-in-1 tool.
- Remove painter’s tape as soon as the paint is dry.
- If you taped off your room’s edges with painter’s tape and the paint is peeling as you remove it, score the edge lightly with a razor for a clean line.
- If you notice a paint drip while it’s still wet, you can wipe it away with a damp cloth. If it has already dried, you will have to take more drastic measures.
- Stop to clean your brush if you’ve been painting for more than an hour or so. Otherwise, the paint will start to dry towards the top, gumming up your paint job and ruining your brush.
- Clean your brush with a little dish soap (assuming you’re using latex paint) and a brush comb
until the water runs completely clear. A quality brush can hold a lot of paint, so give the bristles a little squeeze to wring out the excess water when you’re done and make sure there is no more paint in the brush. Smooth the brush into shape and then let it sit to dry completely.
Step-By-Step Guide to Painting a Room
Getting Started
- Clear the room, gather all of your supplies, and lay out your drop cloth.
- Scrape off any loose paint, if needed.
- Remove any nails from the wall and spackle any holes or imperfections. Sand smooth.
- Clean the walls and trim, if needed. Dust along the baseboards, windows, and doorways with a damp cloth.
- Caulk along the trim, if needed.
- Tape off the room if you like to use painter’s tape.
Painting the Room
- Prime. Pour your primer into a small bowl and cut in (paint the corners and edges of the room) with a brush first. If you’ll be painting the trim, you can prime it now too. Clean your brush when you’re done.
- Grab your roller and a roller cover, and pour your primer into a paint tray. Prime the walls.
- Paint. If you are painting the walls and the trim, decide which you will do first. Here, I’ll assume you’re doing the walls first. Again, cut in first with a brush and then paint the walls with a roller. Wrap your roller and paint tray in plastic and clean your brush and paint bowl while you wait for the room to dry, then do a second coat.
- Clean your brush, bowl, tray, roller, and roller cover (if you plan to reuse it).
- If you used painter’s tape, remove it as soon as the paint is dry to the touch.
- Wait for your paint to be completely dry before taping off again for the trim. You may want to wait a day to be sure.
- Apply two coats of paint to the trim, letting the paint dry in between. You can wrap your brush in plastic or clean it while you wait for the first coat to dry, then clean everything up when you’re done.
- Again, if you used painter’s tape, remove it as soon as the paint is dry to the touch. If the paint begins to peel, score the edge lightly with a razor.
- Clean up, put the room back together, and pat yourself on the back. You’re finished!
If you have any questions, I’ll answer them in the comments. And if you have any other tips you’d like to share, please do!


194 comments
website
This is a very resourceful site. Thank you for sharing!
Edmonton Painters
You have done a great job with this article!! I have a tip for you though… before you start painting, wash the brushes and rollers with water and a tiny bit of soap. Sometimes there is dirt, dust, or those dreaded bits of fuzz on them. It helps to keep that out of the paint. Good job on the post!
Painting services
You have such a beautiful family. Very good write up on painting!
Henry Killingsworth
I appreciate you helping me to understand that it is important to scrape any cracks when painting a wall. My wife and I would like to paint the walls of our kitchen a different color. I think it would be best if we hired a professional to help us with this project.
Cheryl Adelmeyer
Can I skip the primer and use 2-3 coats of paint? I have some long skinny spots next to mirror and between door molding and corner of wall I am dreading to do. We are talking 1/4 inch here.
Handy Squad
Very helpful tips for beginners, easy to follow guide, thank you for sharing.
Greg
No mention of sherwin williams, would you say they are far behind Benjamin Moore and Behr, in your opinion?
Lisa Hardley
Apart from these tips you also need to know which bristle type is best?, which brush size is best?, which paint rollers are best? etc.
Larry Weaver
I appreciate the tip to clean the brush, bowl, tray, roller, and roller cover if you plan to reuse it. My home could use a new paint job to bring some life to the living room and bathroom, and we have some painting materials that were used but never cleaned ages ago. Perhaps I should look into working with a professional to get my home painted.
Thomas
This is great! I love the tip on choosing paint colors – it is always something that I seem to struggle with.
Steve Blomer's Blog
Nice tips here. Glad to came across to this wonderful blog! lots of colors look good. Let your eye be the judge. :]
Penny Ivy Hagedorn
I live in an old home. I painted latex paint over some enemal painted cabinets in my kitchen. It is peeling. How can I repainted it correctly? Do I need to peel off all the latex paint? Help please.
Ken
I wondering what color is in that photo at the top. It’s look pink. I would love to know the color name.
Making it Lovely
The color is Wild Aster from Benjamin Moore.
Ken
Thank you! Sorry for all the typos. :/
Emi
Thank-you so much for writing this! This is one of the best posts on painting I have found! Beautifully organized and well-written with careful detail.
Padmashri Brush World
Thank you so much for this information.
Monique Knight
Hi I tried a color of paint for my accent wall and I don’t like the color results like I thought I would. How long do I have to wait to paint over it with another color? Thanks in advance for your help.
william Baer
In my 25 years of painting i have found that rolling out the walls first, then cutting your new color in saves you time.this way you can see exactly were you need to cut your new color in ( No over lapping and time saved buy over cutting brush work. It will in most cases take 2 coats so this way it will give you the proper dry time between rolling your new Benjamin Moore color. I only use B.M., Quality is the best they also have the best colors. Roller sleeve nap 3/8 or 1/2 inch is good.
Anna
Thanks so much! I used some of this info to make a Painting 101 guide for our volunteers!
Best,
Anna
Lou
What a brilliant guide thank you. We brought a house in November and decided dado rails are not for us, but when removing them we found the adhesive they had used to attach them also removed large amounts of paint regardless to the amount of scoring I did with a Stanley knife. The paint peels off very easily, do you have any suggestions on how to get a smooth surface before painting that won’t involve re plastering the whole room or removing all the paint? Any suggestions would be gratefully received.
Edward Bartholomew
I am painting my hallway by roller, and I keep getting roller marks/lines. Can you help
Graham Levins
Hi Nicole.
Great Blog.Really good painting tips. Well laid out. Gonna tackle the living room this week so decided to browse the web when I came across your blog.cheers.
Jeff
Another tip is paint grip. This can be the difference between a straight cut lines and crooked ones. This will show you the proper and inproper way of holding a brush: http://www.colouredcedarpainting.com/secret-knowledge/brush-grip
Alice
We just painted a couple of rooms and used large pieces of cardboard for our “drop cloths.” Worked great and were dry where we dripped for the next coat.
Bridget
Just been trying to paint a rusty radiator and it looks a total mess. I sanded and primed it but with every coat it just got worse. I tried using less paint or more paint but had drip marks which then gave drag marks in the paint when I tried to smooth the finish. I used a well known radiator paint so assume it is me, help I have got more radiators in the same state.
Kathy Cook
I’m painting my bedroom a light yellow with a gray accent wall. The ceiling is going to be an off white. Which walls do I paint first. The lighter walls or the darker wall or the ceiling?
Trine @ Creative Pink Butterfly
What a great post! With lots of great tips! I am currently painting my bedroom and so these are so useful for me :)
Jessica
I need help!
We recently decided to paint one of our bathrooms. The ceiling had some sort of text (it’s all over my house) and we hate it! We decided to scrape it all off. That was the easy part. Once it was all down we had to mud and sand the entire ceiling- luckily it’s a small room. Now that we’ve sanded and washed everything down, I thought I was ready to paint, so I did and now that the paint is on the ceiling, I’ve noticed one spot (it’s a pretty large one) that could have been sanded down a little more. How can I fix this? Do I need to remudd and sand and paint?
ellen mccracken
I would love to post a pic of my granddaughters room that I painted. Is it possible to do that on this blog? I love your tips!!!
Nana D
I looked up this site to find out how long to wait between painting the first the second coat. Did I miss something? I do not see any reference to this question? So how long do you wait even a rough estimate would be appreciated.
Sharan
We are putting a touch up layer of paint on our walls but don’t have the exact color to match. Is it better to go lighter or darker with our paint color to make the match look closer?
Making it Lovely
I think it will stick out either way, unfortunately.
Gael
My daughter has stickers on her walls which I thought we had removed, but on painting we can see marks where some, not all were. I am discouraged! My daughter wants to wait for the paint to dry and then try sanding back these marks I’m thinking she just keep painting & hopefully by the 3rd coat we wont be able to see them??
Debbie
I keep a baby food or pickle jar of paint and if I need to repaint something bigger (like a door or large portion of a hallway wall) I simply paint a white piece of cardboard and go have it color matched if it is no longer available. It has worked great for me. The only issue has been that I tend to use a satin finish and sometimes need to paint the entire wall instead of just a section so that the sheen stays uniform.
Tafia
Thank you for these amazing tips! I’m a teenager doing my first “big” DIY, painting my room, and my mom does’nt think I can do it. I’ll show her!!
Angela
Hi Nicole – love your tips! A few years ago our foyer was painted with the bottom portion of the chair rail brown faux and the upper part of the rail being beige. It does look nice and I do love he faux finish but the brown seems a little dark. Is there anything that can be done to soften the brown and still keeping the faux finish? Thanks for your help
Inspire Me Heather
Wow, thanks for putting that all together – you’ve posted some fabulous advice on painting! I’ve got this linked to my painting post too today, for DIY painting advice from bloggers!
HarriDec
Hey, useful article here. I’d like to try using Benjamin Moore paints myself. Unfortunately they’re not available in the UK :(
marla
I stripped wallpaper off my bathroom walls with a steamer and i thought i wiped down the walls thoroughly. I bought sherwin williams best wall paint – satin finish. I used a 3/4 ” nap roller – and the walls are all bubbly – little bubbles but certainly not the smooth finish that i had hoped for. I even PRIMED the wall. It took 2 coats to cover. I sanded some of the bubbles off and reapplied the paint but the finish is still not smooth. What did i do wrong? all latex paint.
Jennifer
Your roller nap size was wrong or you used the wrong kind. For smooth walls you should have used a soft-woven nap no bigger than 3/8in. Purdy dove naps are great and shed resistant. Or Sherwin-Williams sells their own contractor series that is usually more inexpensive. A bigger nap size will leave stippling on a wall or in some cases, unwelcome bubbles.
Matthew
Hi there. I seem to have a repeated problem with painting a wall beige. I am new to painting and have already learned some lessons from the mistakes of my first coat, but now, no matter how even I try to be with the roller, my painting dries patchy and the cutting in seems to stand out from the rest. I’m pretty sure it’s the way I’m applying it (too tick, too light?) but it’s really frustrating! Any advice appreciated.
Jennifer
Sounds like you are dry rolling for starters. Also when you roll, you shouldn’t be putting hardly any pressure on it. The cut in being noticeable after rolling is called hat-lining. It happens when the paint dries before you roll. After cutting in, you should take a mini roller and roll down from as close to the ceiling as possible without touching, then take your 9 in roller and finish the wall. Reload your nap often. Don’t put too much paint on either or you will leave lap marks. Work in 3×3 sections and go from top to bottom, then roll lightly (don’t reload with paint for this though) from top to bottom over that area before moving on.
HarriDec
This is sometimes called flashing or picture framing. It may be where the cutting in has dried before you roll up to it. You could try cutting and then rolling one wall at a time, if you are still not quick enough to roll before the cutting in has dried then try using a latex extender like Zamix or Floetrol, this gives the paint a longer ‘open time’ and as a result the paint it much more forgiving. It will also help in reducing brush marks in the finish.
Be sure to use good quality tools as well, this is really important!
aliosh
I paint paneled doors using latex paint and a small 4″ ROUNDED END FOAM roller. Don’t use the flat end foam roller because they leave roller marks.
The foam roller prevents drips and brush marks. Plus, you can roll in into the corners in the panels for a really well covered drip less result.
It covers better than a brush and is so much faster too. It the only way I will paint doors.
Lyn
Thanks for your painting tips. I’ve been wanting to paint my wood trims white for a while but never gained enough courage to do it. I faced the same dilemmas you did and all the painters I’ve spoken to pretty much tell me I’m crazy because it’s a B.I.G job, so just learn to live with it! Your blog has given me all the courage I need to start painting my trims (swallows lump in the throat…)
My question is this, I want to paint the whole room (ceiling, window trims, wall, floor trim). I know I should paint the ceiling first. What’s next, the wall or the floor trim first?
painting contractors Denver CO
Preparation is one of the most important things to consider if you want to have a good paint job. One should take time in preparing the walls for painting with the most careful attention to detail. The time spent for preparation is the key factor to ensure a top quality job.
Amy
I love the color of the pink paint in your first photo of your studio. Would you please share the name/brand?
TIA!
Making it Lovely
It’s Benjamin Moore’s Wild Aster.
Interior Painting
Only a couple of years ago we did a whole house repaint and boy did it stink, literally. We were luckily able to air the house out because it was late spring but still it was quite a powerful smell. Last week my husband and I repainted our daughters nursery to reflect more of her grown up style. I didn’t hardly notice a sent at all and we hadn’t purchased a special paint. Being that it is winter here and a high of 22 degrees I guess we lucked out. Funny how in such a short time products can change so much.
Brooke
These are awesome instructions. Now if I could just make myself WANT to paint. I’m not a big fan of painting b/c of how long it takes. I repainted my entire house a few years back because I wanted a change but towards the end I started to get sloppy b/c I was so sick of doing it. :(
Sak
I have just finished painting my landing with dulux one-coat white paint and it has come out all patchy. What can i do to get rid of these patches?
The patches are all over and I have applied 2 coats on two walls. The paint tub says to touch up rather than put another coat on, but paint strokes can be seen! I really am loosing my rag with this task.
Making it Lovely
I think it would be best to wait until the paint is dry, and then do another full coat.
gorbs
I used to buy a new roller for each job and hated cleaning them between colours. On the last room, I noticed a product (it might only be availably in Australia – I think it’s an Aussie invention) called the Rota-Cota. It’s a plastic cylinder that fits over your roller and has a concave scraper built in. You simply use the scraper to get the excess paint off the roller, then push the roller into the Rota-Cota and attach a garden hose to the other end. It forces the water through the pile and in 5 minutes your roller has come out beautifully clean.
*Disclaimer – I’m not affiliated with the company in any way, just an avid DIYer :)
gus shelgosh
we been in this house four years now , since i am not working wife told me i could do some painting , well we decided on two colors , one color on two walls ,back of sofa an going up steps ,but i have alot of work before i start painting , the ceiling has cracks ,so i started scraping them i spray hot water on them ,it helps but if you have any ideas please reply, i read some of those replies, got a few that will help with painting .
Christy
What a great guide! I tend to mess up a lot, and I recently found that baby wipes clean up latex drips much better than a damp cloth. I was desperate and grabbed my kids’ wipes one day. It’s amazing! Like the difference between changing a diaper with a wet paper towel versus wipes.
M
Great guide! Am hoping you have a few tips for problem walls??? We just filled in a doorway size hole in a wall… long story. The wall itself isn’t really straight. We plan on painting w/ a flat very light colored paint in hopes it will minimize flaws. Aside from re- stuccoing the entire wall, is there any tips you can pass on? Thanks!
Making it Lovely
Stripes may not be the best choice for a wall that isn’t straight. They’ll highlight any flaws (just like some people avoid wearing horizontal stripes).
camille
Thank you for all this info!
I am a complete beginner at this, and my question is: do you think it is feasible (though, I understand, not ideal) to paint a room without clearing it completely, but rather gathering everything in the middle of the room away from the walls?
I’m asking because I’m considering repainting my living room, but my apartment is not very big, and there is little room elsewhere to store stuff while the painting job is going on.
If you think it’s possible, how much protection does the stuff in the middle of the room need? Does the sanding emit a lot of dust? Thank you!
Making it Lovely
Totally feasible. There shouldn’t be a lot of dust from just spot sanding a few little areas, but you may want to cover the furniture with a drop cloth to be safe, especially if you’re not an experienced painter. Better safe than sorry.
Pam
Hi there! Love the blog!
I’m preparing to paint my daughter’s bedroom. Your Painting Guide will be a big help!
She has picked out two colors: a soft blue and a soft green. She wants both incorporated into the room, with white trim and pink as an accent color.
My problem is figuring out how to use both colors creatively, without resorting to stripes which is too labor intensive for me.
Any ideas? Thanks so much!
Making it Lovely
Paint the ceiling soft blue, like the sky!
amanda
Planning to paint a bedroom and remembered you had a guide. I’m very excited to try it with all these tips and see how it turns out. Thanks so much for taking the time to put together a guide for those of us who are clueless.
bathroom tiles
You’re a DIY rockstar! I’ve always been happy to paint my own walls, but this gave me some new tips for a better result.
Laurie
I’m curious what you do afterwards
-keep a book with swatches and finish notes?
-keep the 1/4 full can?
-have a touch up cup for each room or color?
I have a basement full of mostly empty cans right now I’m looking at and trying to form a plan.
Also, major interest in that giveaway, I can’t even access the page or comments now…
Making it Lovely
I keep the mostly empty paint cans, but I’ve seen other people use baby food jars (or similar) and always thought that was a good idea.
Mary
Thank you so much for sharing this guide. I’m re-posting it on my facebook page – giving you full credit of course! I hope that’s ok?
My main issue is with front doors. What is the best way to paint them so they are super smooth (no bristle marks/streaks?
Thanks again…
Jennifer
For super smooth finish you should roll the paint with either a velour roller or mohair. I used a 4 inch 3/16 size nap because my doors were not flat and I brushed in the other areas. There is also a product you can add to paint to help with leveling called flo-trol or penetrol depending on whether you are using latex or oil.
Making it Lovely
Oil-based paint will leave a smoother finish because it takes time to dry and will self-level to some extent. You can still get a great finish with latex too though. Ideally, you should take the door off the hinges and paint it while it is laying flat. Other than that, it’s all about perfecting your technique, which is all about practice.
Annie
Hi there! I love your paint choices. I am going to paint my bedroom the same colour! Chocolate froth. Mind if I repost your bedroom photo on my blog?
Making it Lovely
Thanks! I don’t mind at all. Just link back and give credit. :)
Natalie
Hi Nicole,
You may not see this question, but I thought I would post it. What are your thoughts on using ceiling paint versus just using the same paint for the walls on the ceiling? Hope that makes sense. I’m trying to figure out if it is worth buying the different kinds.
Thanks!
Making it Lovely
I always use the same kind of paint I use for the walls. There may be some difference (less likely to splatter?), but to me it seems like a gimmick to sell more paint, albeit it in a very limited “ceiling white”.
Lenetta @ Nettacow
Wow, what great tips! I’ve only painted in our current house, and I’m guessing we’ll be painting at least once more, so I’ll file this away. I linked on my weekly roundup – the post is under my name. Thanks for sharing!
Ang
Thanks M.I.L. for all the great tips. I have grown up painting as well. One quick question. I don’t know what you mean by…”paint dry to wet.”
Thanks,
Ang
Making it Lovely
I tried to explain it further in another comment above.
Let’s say you start on the right side of the room. After you put the paint on and load more onto your brush or roller, you would move a little over to the left (where the wall is DRY). You would then paint from the dry area towards where you started (where the paint is WET), overlapping and feathering out where the paint meets.
Amanda
I have always cut in and rolled the paint on at the same time, alternating as I go along the wall. I have always been afraid to cut everything in first and then paint because I am afraid it will not blend. Do you ever find that when you cut everything in first and then roll the paint on that the line from cutting in and the rolled on paint don’t blend well? Can you see a distinction between the two on the wall once you are finished?
Making it Lovely
I’ve never had a problem, but as I mentioned, I tend to use flat/matte finishes. Even with eggshell I haven’t had a problem. Many people prefer to do it your way though, so if that works for you there’s no need to change.
Tracy Elaine
A good tip I learned from a Benjamin Moore rep is that when you are testing a color in a room, be more mindful of the time of day that the room is used most- i.e. I really only spend time in my kitchen in the morning when it gets direct sunlight and at night when the lights are on. I would then choose the color that looks best based on how it looks under those two specific conditions vs. how it looks at any given point during the day when I’m not typically using it.
tamstyles
hmmmmm….still no answer….thanks anyway.
Kelly
Thank you, this is a great and thorough guide!
Here is another tip for painting baseboards in a carpeted room: I saved cereal boxes for a couple months, flattened them out, tore them open and then just slide them under the baseboard. You can paint the trim so easily and not worry about being neat (as long as you tape off the wall). When baseboards are all dry, just run an exacto knife along the bottom and slide the cardboard out. Any imperfections will usually be hidden by the carpet!
Making it Lovely
Smart!
Sarah
This is all great advice. Some of it seems really simple but I guess most people assume it’s obvious and don’t bother to tell you, like keeping a wet edge and painting from dry to wet, starting away from the trim and curving in to meet it, and cleaning the brush occasionally while you work – all great tips that no-one’s ever told me. This (almost) makes me want to get on with the painting we’re planning (ALMOST!).
Tamsin
wow that room looks amazing… did you install the floors yourself? if so where can i find the instructions for that? great job…. you go girl!!!!!
Making it Lovely
Yep, my husband and I did the floors in the bedroom and my studio! I didn’t put together a step-by-step tutorial, but you can read about our experience here.
Vicki K.
You are so kind to give such a detailed and careful painting guide!! Thank you much!
I have bedroom walls with wallpaper that was adhered directly to the sheetrock. Even using DIF and a paper tiger I cannot get it to budge. Should I paint over it? Someone suggested that I might have to re-sheetrock?? Arghhh. What would you do in a situation like this?
Thanks for your additional answers too.
Making it Lovely
If you can’t get it off, I would try painting over it before I would redo the walls entirely. What do you have to lose, right? You’ll be able to see the seams, but you may find that it doesn’t bother you. Make sure you prime first.
Jennifer
Oh, I forgot to add before you prime, take a razor on either sides of the seam of the wallpaper, about a quarter of an inch and try not to gouge the wall, but use the razor to get under your cut and pull those two strips off. Prime with oil-based primer, then use a lightweight, shrink-free spackle to mud over where the seams used to be and don’t forget after sanding smooth where you used the spackle, to prime those areas or your coat of paint will not look uniform. That’s the best way to avoid the unsightly wallpaper seams. :)
Jennifer
Be sure it’s an oil-based primer or the wallpaper could bubble in spots. Also, Sherwin-Williams is a great paint. They tend to be on the high-dollar end, but the quality and customer service go a long way. Besides, they have perpetual sales and at times (usually about every 4 months) it’s 40 percent off. As for trim, if you do use latex, use a latex enamel. It dries harder than regular latex paint, but I prefer oil. It has a prettier finish. It is also great if you paint inside the door frame of cabinets because latex paint will usually make a sticking noise when you open the door. Proclassic is the best trim/door paint out there and it’s self-leveling, which helps eliminate brush marks. Be careful when you cut in a room and let it dry before rolling the walls. Some paints will leave a hat-line around the room. It’s always best to cut in, use a “weenie roller” which is a 4 or 6 inch mini roller, and pull the cut line down, then use your 9in roller frame to finish the wall always keeping a wet edge. Also you don’t have to cut in the entire room. It’s best to cut in one wall at a time, paint it, then move on.
HollyP
I’ve done that too Candice, first time right before my wedding. This is why I now have a dedicated hat I wear when painting.
I have found that when fixing small holes/imperfections, a barely-damp sponge works well at smoothing the dried spackle. It does add time since you have to wait for the spackle to dry again, but it beats having dust everywhere.
trish
awesome. Thanks for these tips. I’ll be doing a lot of painting just as soon as I get the walls cleaned up and decide on colors. Any tips on stripping wallpaper?
Making it Lovely
Get a big sponge (the kind for washing cars) and a bucket of hot water (as hot as you can stand). Dip the sponge and wring out most of the water so that it’s wet, but won’t drip water down the wall. Hold the sponge against the wall for 30-60 seconds at a time (see what works for you), and the hot water should loosen up the paper, allowing you to scrape it off. If you have vinyl paper you’ll have to score it first with a tool designed specifically to do so.
Candice
Nicole, this is a great guide! Thank you for being so thorough. Like some other readers, I’ve been painting for years and have learned a lot of these tips the hard way. I’ve also found some great new info which is wonderful.
I want to add my voice to the folks who recommend placing plastic-wrapped brushes and paint trays in the freezer or fridge if you need to stop for awhile. It seems really weird but has always worked well for me. I usually employ the freezer but will try the fridge next time.
One more tip: if you’re painting a ceiling, take care not to overload your roller and then stand directly under it when you start painting. The result can be…unpleasant. I learned that one on my first big painting job, and it is a mistake I have not repeated!
Making it Lovely
Yes, painting ceilings can definitely be… unpleasant… if you’re not careful!
Jochen
Hi Nicole,
thanks for this wonderful blog. I enjoy looking at the way you made your house into something really stylish. We just bought an appartement in a 1903 house in Stuttgart/Germany and renovated it. Hard work, but every hour we spent was worth it. We also have a little baby, now 15 months old named Tom- I really liked your idea of taking photos of your daughter in the eames-rocker. We are also fond of design classics- I love to sit in our eames lounge-chair, my wife prefers the barcelona chair by mies van der rohe.
Anyway: You can also rest your brushes, no matter what paint you used, in a glas of water. When you want to use them again the next day, just hit the brushes against a wall or the floor, whatever gets the water off, and then use them again. Also a very good tip from our painter: cracks in old woodwork can be fiiled with epoxy-based putty (normally used for car bodywork). This kind of putty doesn’t sink in and you only need one layer, then sand, and then paint it. And what I also learned is: always use a primer with the same color of your paint scratches (that will definitly occur with a 15-month-old) won’t be so bad, when it only hits the paint, and not the primer.
Thanks again for your blog and all the best for you and your family.
Greetings from Germany
Jochen
Jane
This is so helpful. I hope you consider doing more tutorials- this is very well thought out. I am wondering how you manage to paint with your daughter being so young. Do you stretch it out over time or try to tackle a room in a concentrated day or two?
Also, have you ever painted IKEA furniture? I want to buy the IKEA Kura bed for my two young sons to share but I can’t live with the pine. Would love to hear your thoughts.
Thanks for such a great blog!
Making it Lovely
Somehow we still find time to tackle home improvement projects! And yes, IKEA furniture can be painted, especially the untreated pine. Just use a good primer first, and count on using at least two coats of paint.
Daria
I get it now. I kind of did this when I painted my bedroom, without really knowing why. Thank you so much for taking the time to respond.
cassie
thank you SO MUCH for all of these tips! i saved them and will definetely refrence them the next time i paint a room :)
Daria
Great, great post!
I have noticed that you are swarmed by questions, and I have one, too, in case you decide to tackle them. What do you mean by “keep a wet edge and working from dry to wet”? It seems important, but I really have no idea what it means. To overlap coats of paint to make sure you have covered everything? Thank you.
Making it Lovely
I tried to explain it further in another comment above.
Let’s say you start on the right side of the room. After you put the paint on and load more onto your brush or roller, you would move a little over to the left (where the wall is DRY). You would then paint from the dry area towards where you started (where the paint is WET), overlapping and feathering out where the paint meets. Does that help?
Brandi H.
Nicole, this is such a great post. Thank you for taking the time to place all this information on your blog. It will be very useful.
I have one question, if you have time:
In my condo, there are really high ceilings. I painted these walls once, with a very long extension rod, and some flat thing with roller wheels on it. It was so bad, but some paint did get on the ceiling, which is still there :(
Any suggestions for really high ceilings going up a staircase?
Thanks a lot.
Making it Lovely
You need to get up on a ladder. It’s a little scary though – we did it when we painted our stairway. We used an extending convertible ladder that bent and folded into a whole bunch of configurations, including an extra long straight ladder. That was the only way we could have ever maneuvered a ladder like that into the space.
Nuit
Awesome tips!!!! maaaan you’re talented!!!!!
Janet
An excellent guide! Thank you!
Bridget B.
Hi Nicole,
Thanks for the tutorial. It was very helpful. One thing I’d like is advice on how to blend a new paint job with an existing one. For example, we recently fixed a a coaster-sized hole in one of our walls and I’m concerned that when we paint over the spot it will be obvious that this section was done separately.
thanks!
Making it Lovely
Just try to feather the paint out at the edges as best you can. It will be less obvious if the paint is flat, but if there’s a sheen there isn’t much you can do to avoid a slight difference.
Robyn
Found your fab blog via Chez Larsson, and like hers have
gone back as far as you allow and read – and loved –
every post!
You have really great tips. Keep up the good work!
PhillyLass
Wow! This is fantastic! I’ve wanted to freshen up my boring bedroom for ages now, and paint is definitely the first step. This guide is so so so so helpful!! Thanks so much!
Christy
Thanks for the tips! I’d already learned a few of them the hard way. :) We’re in a trailer house for a few years but I insisted on replacing the carpet with faux wood vinyl & painting the walls. Since the walls are covered with a wallpaper-like substance that can’t be removed, we used 2 coats of primer & 2 coats of paint.
Just FYI, I’ve loved those nailhead curtains from West Elm ever since you featured them – they’re on clearance & the bedding’s 20% off so I just placed a big order! Thanks for pointing those out – I prolly wouldn’t have found them otherwise.
Valerie
You’re a DIY rockstar! I’ve always been happy to paint my own walls, but this gave me some new tips for a better result.
Now we just need a tutorial on how to lay flooring like that!
Stockton
Oh thanks for this! I’ve been wanting to paint my bathroom but have been intimidated …
Nadine
thank you so much! it’s a great tutorial
and I’m going to bookmark this when I get my new home ^^
Franziska
thank you, I learned a lot!
tamstyles
Hi….I never saw a response to my question? Are you able to assist?
Making it Lovely
I’ve been going through and answering questions today. Sorry if I missed yours.
Jacquie
One of the best posts I’ve ever read (I mean that too). Thanks to your wonderful advice I think I could do my own painting now. I really love the step by step guide. Next up…wallpapering a room?
hanh
ahh… i just finished painting our bathroom today – my first effort ever – and this post would have come in handy prior to starting! thanks for taking the time to share your tips.
Chelsea
I was at Home Depot last week to purchase paint. I was interested in a color in a glidden paint line but wanted it in a behr base. They will NO longer mix and match paint colors outside of their paint lines. I asked them if this is new because I’ve had it done PLENTY of times and they said it’s somewhat recent policy. Who knows, it could have just been the lady/store that helped me (it wasn’t my normal/local store).
But, I love the new Martha paint line and I think it’s worth trying out for quality and durability.
Chloe
My Home Depot has started carrying a low-VOC paint. The low-VOC has powder tints instead of liquid tints that Glidden/Behr have. Trying to match low-VOC colors into Glidden/Behr was causing a lot of oops/mistints, so they made this rule.
However, I’ve found that if I ask for a department manager (my paint manager is amazing!) and explain the situation he will oblige. I think some paint associates are confused about why the tinting across brands isn’t working.
Making it Lovely
Huh! I haven’t experienced that, but I always go to a local paint store for Benjamin Moore when I need a color matched. I trust them more. ;)
Becky
thanks for the GREAT guide
Pencils
Thanks for this, we’re about to paint our entire new house. I hoped to do it before we moved in, but snowstorms and a delayed closing prevented that. At least the hardwood floors were done. The one good thing is that we have time to use tester pots and decide if we like the color at different times of the day.
Anyway, my one tip, which I actually haven’t tried yet, is to line the roller tray with a plastic bag before putting in the paint–you can tape it down to get it flat. Then when you’re finished painting, just turn the bag inside out and toss the entire thing, paint and all, no cleanup required.
ColleenwithMurals&More
what wonderful tips, and so comprehensive. You can tell you’ve done a lot of painting! I wish I’d had some of your tips years ago when I first started painting. Would’ve shared lots of aggravation ;)
Rebecca
Wow, you’re great for offering so much information! That was a lot of work, Thank you.
I just bought the greatest little book called Colours For Your Home , 300 designer favorites. (house Beautiful) Most of the paints were Benjamin Moore.
I think there’s definitely a need for more books like this one. How to pick a colour with samples of real rooms AND the brand and name of the paint.
Making it Lovely
Yes, I love seeing actual rooms with the paint colors listed too. I’ll have to go check out that book!
Jennifer
Thank you so much for the bible on painting!! We will definitely be putting your guide to use soon!
But, I really have an off topic question about your floors. How do you feel about the color of your floors? We are thinking about putting dark hardwood in our house and I’m concerned about every single speck of dust, lint, cat hair, and fuzz showing. How do you keep them clean? If you had to do it all over again, would you pick the same floors?
Making it Lovely
Um, yes. Every little thing shows. It’s not too bad since the rooms we have dark flooring in are upstairs with less traffic, but they do take more cleaning. I usually just use a vacuum with a bare floor attachment to pick up all of the dust/lint/hair, fuzz. Or I learn to ignore it. ;)
That said, the dark floors are beautiful, so I’d probably pick them again.
Joanne
I used to paint walls first and then trim, but often I’d procrastinate doing the trim for weeks and weeks because I dreaded it so much. With my textured walls, taping didn’t work and so I painted the trim freehand and found it very hard to get a nice clean trim line, especially when my wall colors were darker (my trim is always cream).
Now I paint trim first and walls last, and have found this method is much quicker (less taping and no procrastination!), less painstaking, and it produces a razor sharp trim line every time. I paint the trim first, overlapping onto the wall a little bit. At this time I only need to tape off my tile floor. I wait a week for the trim to cure, then I tape along the top of the trim and create with the tape the exact line I want between trim and wall. Then I cut in the ceiling and windows and wall corners (two coats), roll on both wall coats while getting within an inch or two of the taped-off trim (which still hasn’t been cut in). Then after the walls dry to the touch (an hour or so), I run my finger along the tape to make sure there’s a tight seal, then I use the brush to quickly go around the room painting the inch or two between the wall paint and taped trim, overlapping onto the tape. This step goes very fast. I wait 30 minutes or so (Benjamin Moore Aura dries very fast) and do it a second time, again going around the room very fast. Then 20 or 30 minutes later, I remove the tape. Beautiful results every time.
Making it Lovely
Thanks, that’s great advice!
Shoshana
You’re so awesome! How long does it take to paint one room (say a living room dining room) from beginning to end? I’m asking so I can work out what to do with my kids. Should I break it up into several days and paint while they’re out or try to go for it in one day?
Making it Lovely
These days I’ve been breaking it up into small steps over several days… and it’s taking forever! Of course, I’m doing a million other things too. I can knock out a room from start to finish in one long day if uninterrupted. I think it’s more satisfying and less daunting if you can just devote a day to it!
Rachael
Hey Nicole! Thanks for all the advise! I have a few qs…
-I heard that if you’re keeping paint on your brush in between painting days you’re supposed to cover it up with plastic and stick it in the fridge/freezer. Have you ever done this or heard of this? I’ve never done it myself so I’m curious.
-When you say “cut in” does that mean you paint the trim and then paint into the open wall space?
-When you say paint “dry to wet” does that mean if you have previous paint on the wall you start where its dry?
-You said you’ve painted apartments. Did you always ask your landlord about painting or did you just do it? Did you paint over it before you left or just took the hit out of your deposit?
Thanks for all the help!
Making it Lovely
I haven’t heard the fridge/freezer tip, though I have heard of people storing nail polish in there which seems kind of similar.
“Cutting in” just means painting all of the edges of the room.
Painting dry to wet… Let’s say you start on the right side of the room, where the wall meets trim or another wall. Once you’ve begun, you want to move slightly to the left (where the wall is dry) with your next paint stroke and then feather into the wet paint. Does that make more sense?
And yes, I’ve painted apartments. We’ve always asked permission first. Some landlords are fine with it, and some are OK but they want the walls painted back to white afterward.
Emily
This is one of the best paint guides I’ve ever read. Thank you for sharing! I also like the zero/low VOC paints but didn’t realize I could maybe get them in better colors!
Alice
This is so timely for me! We just bought a 1940 cottage and are currently debating paint colors and DIY vs. professional painters. I’m just wondering: do you have a favorite “white” for crown moulding, trim, etc.?
Making it Lovely
Swiss Coffee by Behr.
Sara Moriarty
This is great Nicole. Definitely something to print for future reference. Thanks.
Ashley Brown
My husband and I are in the process of buying our first house (yay!) and we are definitely going to have to paint EVERY single room in the house – there’s currently a RedSkins football themed room… can we say PRIMER! haha
Anyway, we are also getting the hardwood floors refinished. So my question is should we paint before or after the floors are refinished? I realize that refinishing is super messy so I’m kind of torn on when to paint. Thanks so much!
Making it Lovely
I would paint after. Refinishing floors is very dusty and messy, and you’ll probably have to wash your walls afterward (use water with very diluted dish soap). Might as well just do so once!
Cindy
Before we moved into our house, we had the floors refinished. The baseboards got stained everywhere, but we never did anything about it. It’s been 3.5 years, and it’s driving me crazy! I may just have to tackle the job myself after reading your super detailed guide. :)
My walls also got really dusty when the floors were refinished. Do you just use a rag to wipe them down?
Comments are closed.