

Bathroom Design Plans
"This will be quick and easy," she thought. I went into this project thinking that this wouldn't be too difficult.…March 11, 2021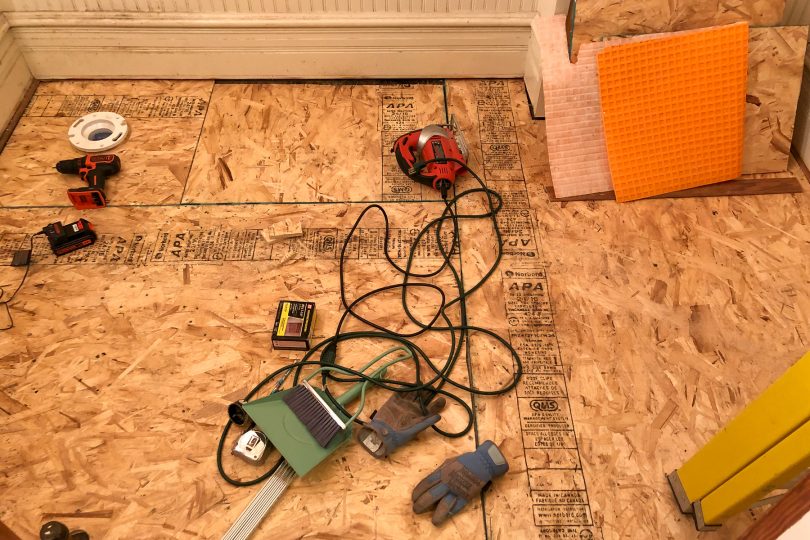
Tiling with Cement Board Instead of Ditra
I want my bathroom tile to have longevity. I’m using porcelain (wonderfully durable), and taking the time to do the…August 29, 2019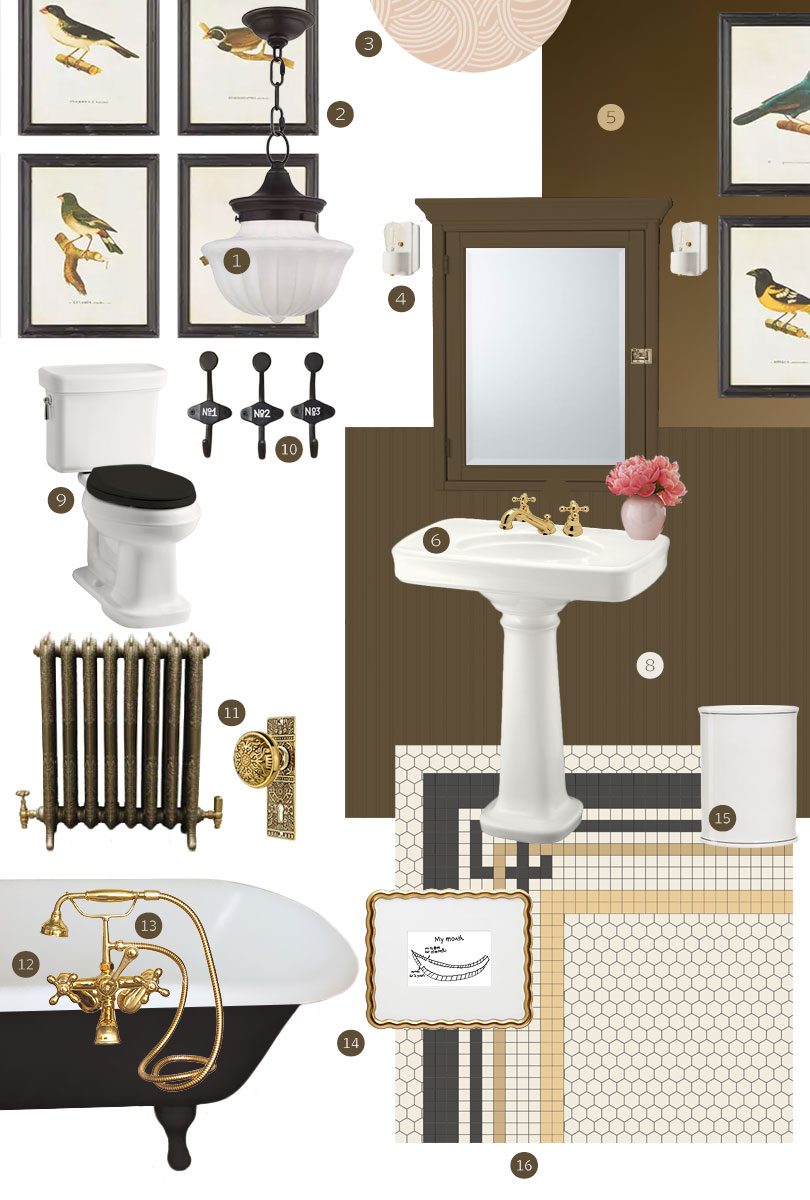
The Bathroom Design Plan
This bathroom renovation is sponsored by Lowe’s. Thank you for making this project possible! I've been working away on our second…June 26, 2019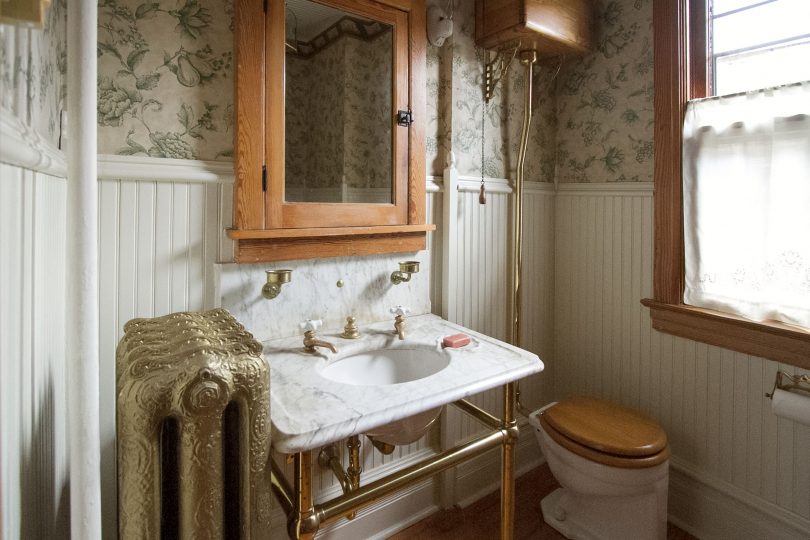
The Bathroom Renovation Begins
This bathroom renovation is sponsored by Lowe's. Thank you for making this project possible! Oh, the plumbing issues we've had.…June 17, 2019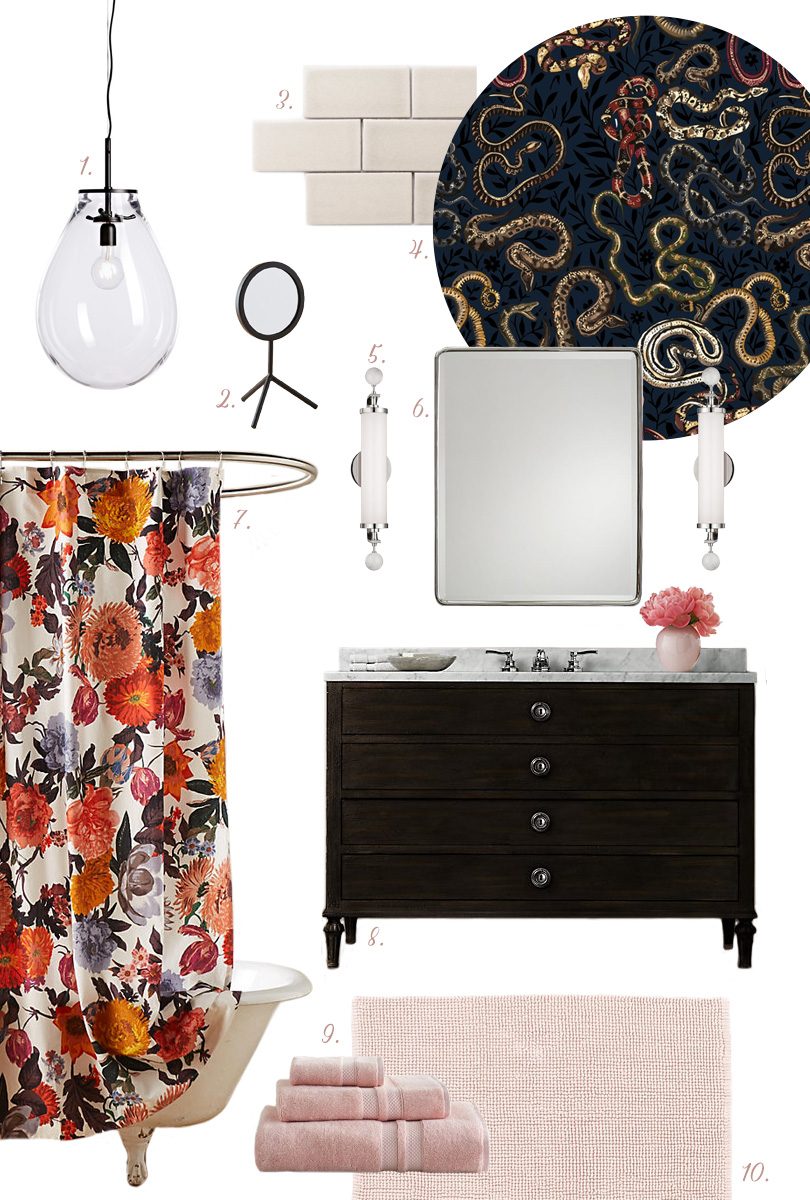
A Serpentine Bathroom
I'm fully embracing my witchy goth past today, you guys. Mix that with my present love of pink, and I've…October 31, 2017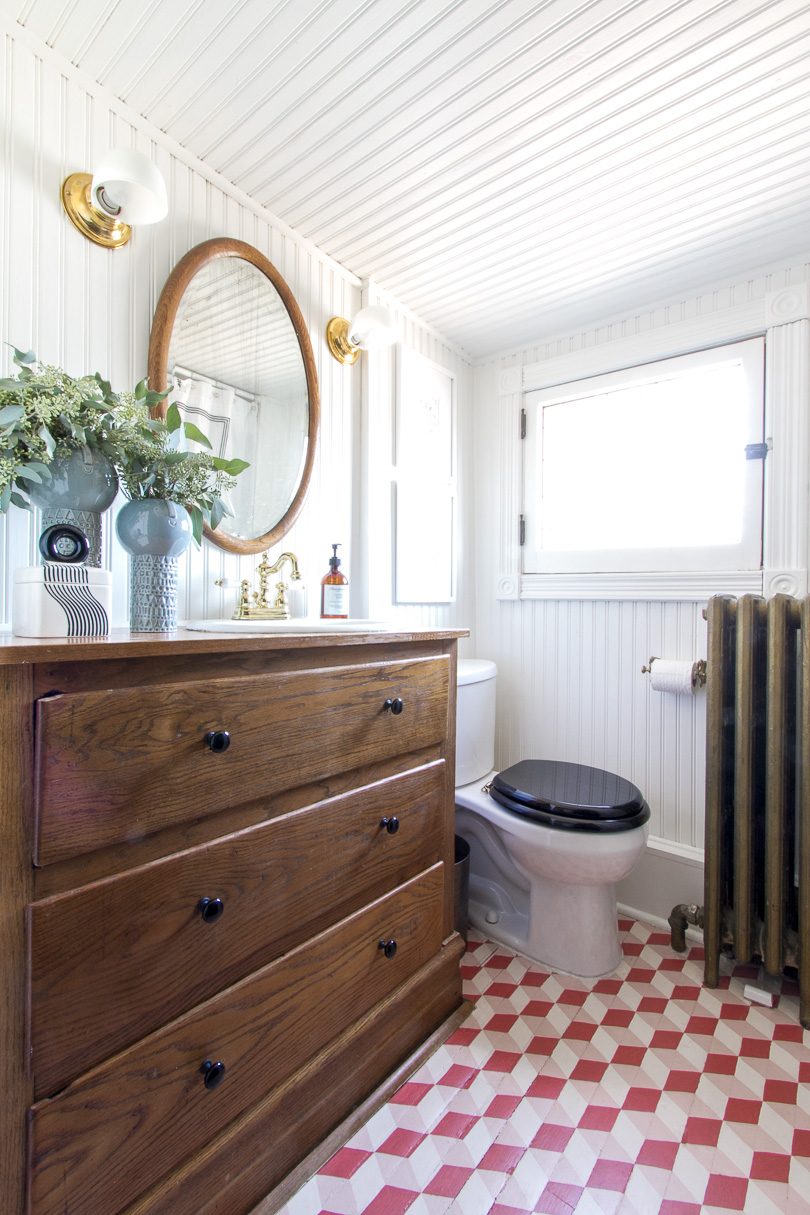
Our Bathroom with the Hand-Painted Floor
Paint went a very long way in the bathroom on the third floor. The biggest change was the tumbling blocks…September 13, 2017
Bathroom Design Plans
“This will be quick and easy,” she thought. I went into this project thinking that this wouldn’t be too difficult. New wallpaper, a fresh coat…
Tiling with Cement Board Instead of Ditra
I want my bathroom tile to have longevity. I’m using porcelain (wonderfully durable), and taking the time to do the job right from the prep…
The Bathroom Design Plan
This bathroom renovation is sponsored by Lowe’s. Thank you for making this project possible! I’ve been working away on our second floor bathroom, clearing everything out…
The Bathroom Renovation Begins
This bathroom renovation is sponsored by Lowe’s. Thank you for making this project possible! Oh, the plumbing issues we’ve had. At first, we thought that…
A Serpentine Bathroom
I’m fully embracing my witchy goth past today, you guys. Mix that with my present love of pink, and I’ve got a good bathroom design…
Our Bathroom with the Hand-Painted Floor
Paint went a very long way in the bathroom on the third floor. The biggest change was the tumbling blocks pattern that I painted onto…