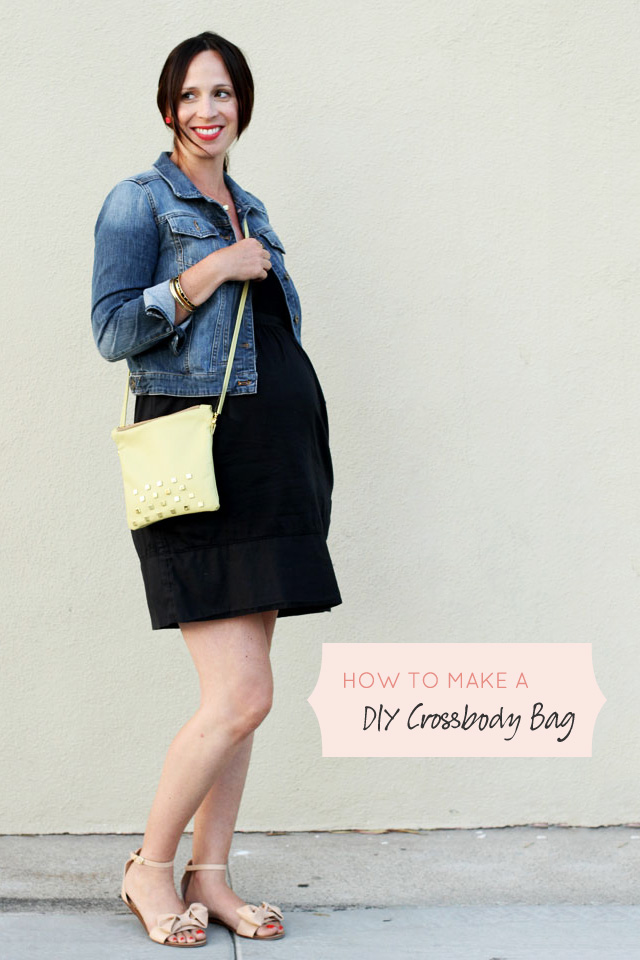
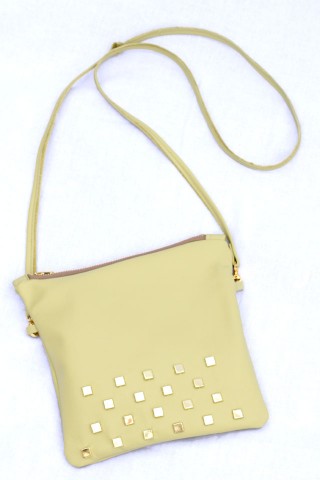
They say necessity is the mother of invention, and I’d have to agree with them when it comes to most of my DIY projects.
I really love my simple leather pouch from American Apparel, so much so that my friend and I figured out how to make our own last year. But I kept running into the same problem when using it to go out for casual events like concerts and picnics, and that was where to put it and how to hold it when running around after kids or when the dining table was too full. So I decided to blend the functionality of a crossbody bag and the simplicity of the leather pouch into one great leather purse I could use all summer long.
This project does involve sewing, but since it’s primarily straight line sewing, someone with intermediate sewing skills should be able to tackle this project.
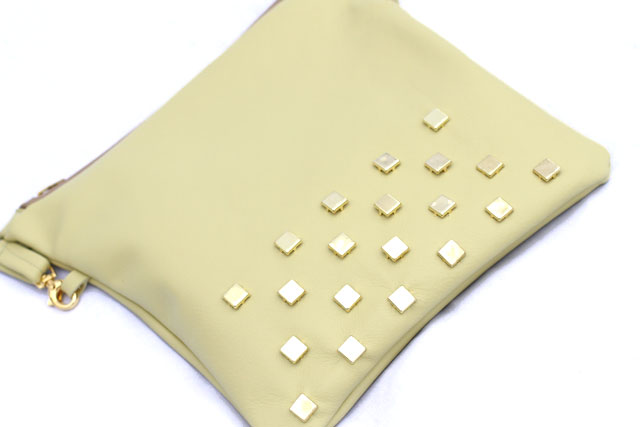
You’ll need leather, cut into several different dimensions; my bag measures 8″x9″ when complete, so I cut 2 pieces 9″x10″, 2 pieces 1.25″x1.5″, 2 pieces 3″x3/4″ and 2 pieces 46″x1″. I will explain where to use which pieces below. You’ll also need a zipper (I used a 7″ denim zipper because I like the look of the brass teeth, but you could use a standard zipper), a leather needle for your machine, and 2 brass toggle clips found in the purse making section of any craft store like Joann’s or Michael’s. Completely optional, but if you would like to add some studs to your bag, then I recommend a soft rubber jewelry mallet for hammering the studs in. I’ve added studs to leather before without the mallet and it’s a bit of a pain, so the $6 rubber mallet found in the jewelry section of any craft store is an immense help. Studs can be found online at hundreds of places, or at more specialty jewelry/craft supply stores. Note that you can also use faux leather for this project, which can be readily found in fabric stores and even on Etsy.

If you’re applying studs, begin by laying them out in the pattern you want first, then gently hammer them in with your rubber mallet, laying down a spare piece of leather or cloth underneath to protect your surface. On the back side, make sure to bend the prongs down flat. Once your studs are in place, take your two 1.25″x1.5″ leather pieces and wrap them around each side of the zipper ends and sew in place, making sure to always back stitch to lock in place. This is a trick my friend taught me and it really lends to a clean and finished look on the zipper. Once your two leather ends are sewn in place on your zipper, lay your zipper face down onto the right side of 1 large leather piece as pictured. Pin/clip in place and sew a single straight line down the length of your zipper. I use binder clips to avoid putting holes in my leather.
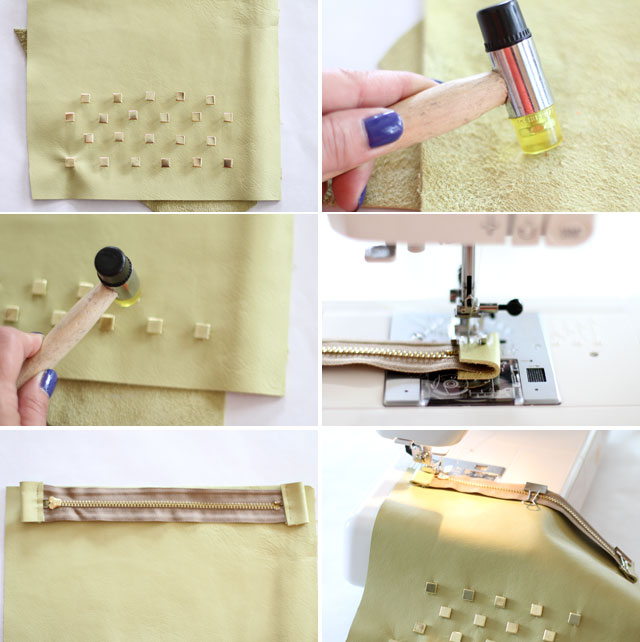
Once your first zipper is sewn in place, take your other large leather piece and align it to the other end of the zipper as pictured, and again sew along the zipper, making sure to always back stitch to lock in place. The top portion of your bag is now sewn in place and it’s on to the rest of the bag. Take your skinny pieces of leather measuring 3″x3/4″ and pin/mark in place on each side of your bag. I pinned mine about 3″ down from the top. You want to fold them in half and sandwich the right sides of the strips in between the right sides of the leather pieces. These will serve as the little pieces for your toggle handle to snap onto once your bag is done. You can trim the excess hanging off once your bag is sewn in place. Pin/clip the pieces together and sew all around the square pouch, making sure to give a slightly rounded edge to the corners. Also make sure to leave your zipper partially open so you can turn the bag right side out when complete! Once your bag is sewn all around the edges, trim off excess and turn right side out. Using your fingers, poke the seams out and in place to give the bag the correct shape.
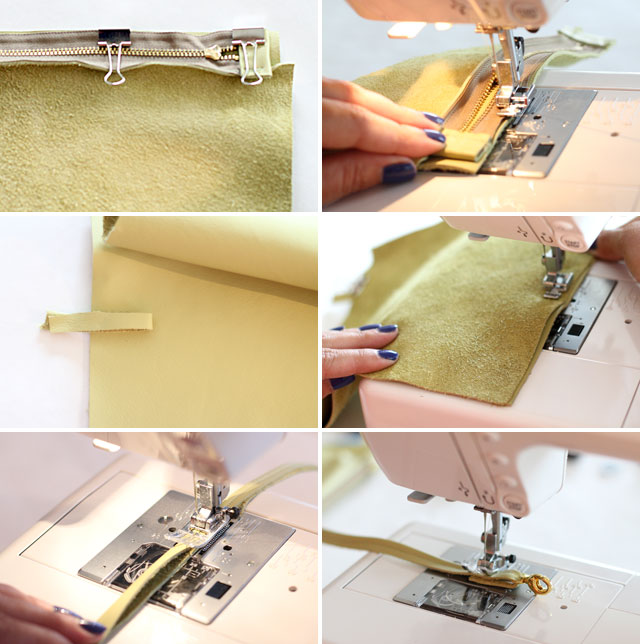
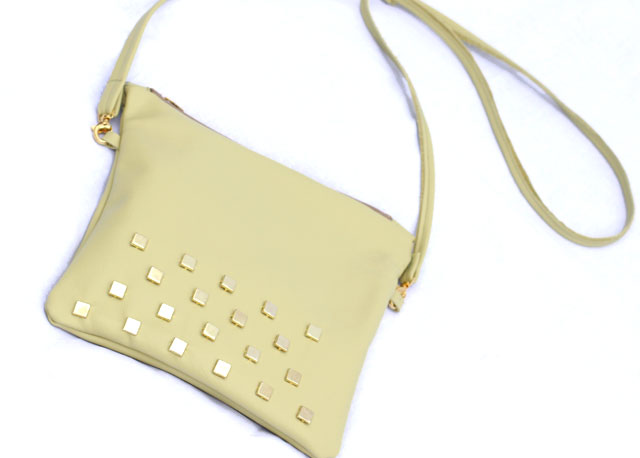
To complete your bag take your long strip of leather measuring 44″ long and just sew a line down the edge to make your strap. At either end, fold the strap over the toggle closure and sew in place. Clip your strap onto your bag and you’re set! I love that the strap is removable so that if I ever want to go without it, I can. Working with leather can be a bit tricky at first, but if you can sew, you can tackle it so don’t let it intimidate you. If you don’t have a super heavy duty machine (mine is a bottom of the line Janome Magnolia), then I do suggest using a thinner leather over a thicker leather. If you have any questions, please don’t hesitate to ask!




Kaylynn
June 6, 2012 at 10:47 amholy adorable! looks like i’ve got myself a weekend project
mandie
June 6, 2012 at 10:49 amLOVE this!! I started sewing with vinyl earlier this year, so I’m close to being ready for leather. Honestly, I think it’s just the cost that’s holding me back, but I do love the look of this. :)
sarah
June 6, 2012 at 10:53 amCheck the goodwill for an old skirt / jacket etc.. repurposed leather is much cheaper than a new hide!
Andrea Howe
June 6, 2012 at 11:02 pmExcellent suggestion! Thanks for bringing it up, as I know a few friends that have great luck with that!
robin
July 18, 2012 at 4:06 pmAndrea,
I love this purse and I am going to give it a try soon. What does the top look like where the zipper meets the seamed edges when it is complete? When I sew the side seems, what to I do at the end of the zipper? Is there a small gap where you just tuck in the covered edge of the zipper?
Thank you, Robin
Valerie
June 6, 2012 at 2:15 pmBeautiful work! Do tell, where are those shoes from?
Megan
June 6, 2012 at 10:43 pmYes, please do tell where the shoes are from! :)
Andrea Howe
June 6, 2012 at 11:02 pmThey are Red Valentino (their diffusion line) and I got them at Nordstrom for 40% off – yay!
Nuit
June 6, 2012 at 4:21 pmi love it!!!!
Beth
June 6, 2012 at 6:56 pmI love this. I really want to try doing studs on something. Great tutorial!
blog.lulalouise.com
kim @ oh, sweet joy!
June 6, 2012 at 7:38 pmthis looks so fab! love it, andrea :) ps when are you due?
Andrea Howe
June 6, 2012 at 11:04 pmAugust 30th :) Thanks!
jwt
June 6, 2012 at 8:23 pmlove this! i’m definitely going to try it — i’ve been looking for a good cross-body!
Eva
June 7, 2012 at 7:24 amThis looks lovely (as do you ~ rockin the sweet matching, lip, toes and button earring!) and the tutorial is great. I too adore my American Apparel clutch AND I have a leather jacket ready for recycling, I’m going to give it a whirl!
Miss B.
June 7, 2012 at 8:25 amGah! You make these projects looks so easy when I know I would be sewing my fingers to the bag. Great project!
Miss B.
June 7, 2012 at 8:29 amAndrea, maybe I missed it but what type of needle did you use and do you need to put in a specific foot (besides the zipper foot when doing the zipper)? Is that too many questions, am I being a dunce?
Andrea Howe
June 9, 2012 at 2:31 pmHi Tristan – yes, you must use a standard leather needle, but besides the zipper foot, no other fancy foot is required ;)
Adriane
June 7, 2012 at 8:48 amSuch a great project!!!! I will have to give this a try :)
Ashley
June 7, 2012 at 1:14 pmWhere did you get the leather? I want to try this, but am having trouble finding leather pieces big enough in colors that I like… Thanks!
Mary Beth
June 7, 2012 at 1:23 pmGreat post! What is the source of the shoes?
Stacey
June 7, 2012 at 2:12 pmThe binder clips are genius! Looking forward to trying this!
Miranda
June 7, 2012 at 11:42 pmThis turned out great!! Love the size, I want one.
Have a Fabulous Friday | Little Blog of Wonders
June 8, 2012 at 12:51 pm[…] How to Make a Little Leather Crossbody (yourself!) […]
shelley
June 8, 2012 at 3:13 pmThat lipstick color is to die for. Would you mind sharing?
Leslie
June 9, 2012 at 2:23 pmWhere do you get your leather fabric?
Andrea Howe
June 9, 2012 at 2:32 pmI actually got mine from a friend, but most fabric stores (aside from some place like Joann’s) carries leather, plus there are online resources. Let me take a peek and get back to you…
Sharon
July 5, 2012 at 9:12 pmBeautiful!! What kind/size needle did you use on the machine?
julissa
July 20, 2012 at 7:29 amhai, i really love this cross body bag, and was really hoping to make one at home, but i was wondering besides the needle leather, is it a specific sewing machine (for leather sewing)? because my sister once used my sewing machine for jeans and she jammed it. -_-
nmcguire
September 27, 2012 at 6:12 amfantastic !
making this on the weekend for sure ! :D
YOU ARE SO CREATIVE
JC
October 3, 2012 at 1:36 pmBag is cute, but where did you get those SHOES?!
sheetal
February 12, 2013 at 12:29 amlovely.. i just live it.. n its very easy..
Richard Rosas
February 27, 2013 at 1:06 pmI love the bag! I would love to make one myself!
I just wanted to know how long it took you to make one?
Link-spiration
May 2, 2013 at 8:33 pm[…] Love this! How to Make a DIY Cross Body Leather Bag […]
DIY : Petit sac en cuir | Linette & Staël
July 8, 2013 at 8:27 am[…] suis tombée il y a maintenant quelque temps sur un DIY (en anglais) pour réaliser ce joli petit sac, et depuis je n’attendais qu’une seule […]
cost-free info.
July 29, 2013 at 6:48 amon this day time and age, I undoubtedly can’t believe which i am truly creating something such as this in a really review, however it could possibly be the reality. Flight Tracker Thanks to this app, one can track every aspect of domestic and international flights with real-time updates and zoomable maps. Google Maps is one of the best free Android apps available to all users of Android phones.
Sandra
May 10, 2017 at 6:33 pmHi I,m Sandra, I really liked your bag. I have a half yard of leather fabric and i have a regular standard machine, I want to know will it break my needle or what can you suggest with my machine.
Stylish DIY Cross-Body Bags
June 18, 2018 at 6:56 am[…] Making It Lovely. […]
Finding Practicality in Style: DIY Cross-Body Bags - Best Diy Crafts
March 20, 2019 at 2:36 am[…] When you think of studded accessories you probably think about really edgy, punk-rock pieces, but the reality can be very different. Studs and elegance do go hand in hand. Choosing a material in a serene and gentle color goes a long way! Check out the beautiful and gentle studded cross-body bag by Making It Lovely. […]