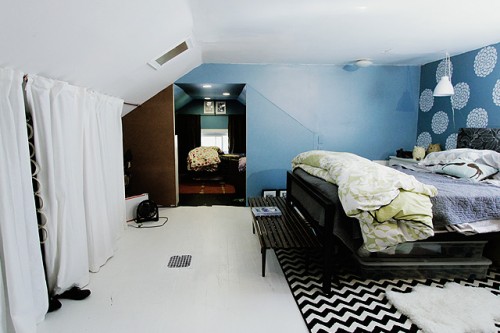
Remember Kathryn’s bedroom? She and I have been joking that I actually made it look better in pictures than it did in real life. This is what Kathryn had to say about her space when she applied to have it redone.
Our bedroom is a disaster. Our upstairs is open plan, no doors, few walls and all four of us are up there. Which was great during the toddler/co-sleeping stage, but now that we’re rapidly approaching tween-dom its just not working. And it’s the last place we have to really fix, we have an addition on our someday/eventually list […] but that someday is farther and farther off. We really need some help figuring out an attractive and practical solution for this crazy space. And did I mention there are no closets? We’d love for this space to feel cozy and relaxing instead of constantly trying to block out all the things we need to fix as we try to fall asleep.
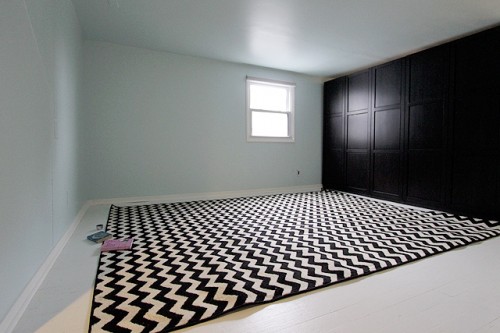
I had Kathryn and her husband, Finn, paint the room and add white trim. I chose Enamelware from the Martha Stewart paint line for the walls and ceiling, but had them color match it to Benjamin Moore paint. Gone are the decals. “But I loved those,” I hear you saying. I know, me too. But we are going for something different, and I think you’ll love the new design too.
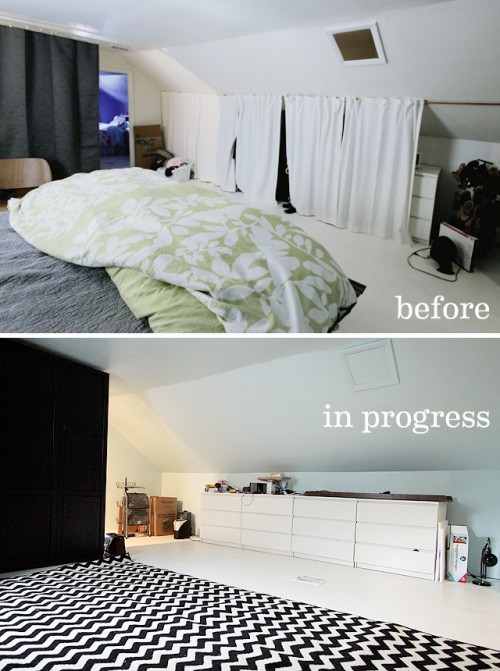
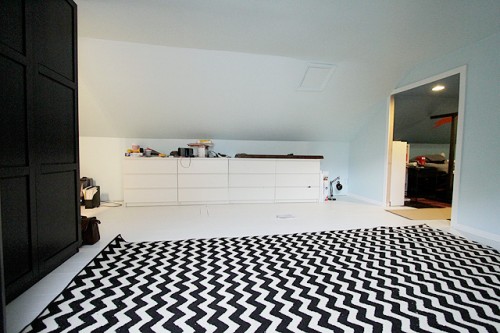
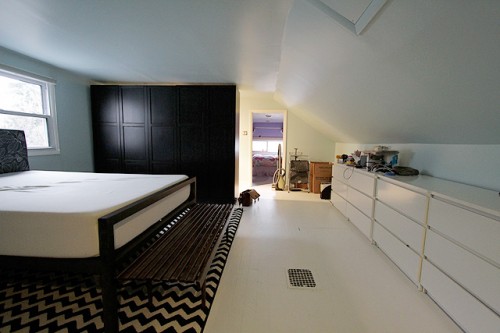
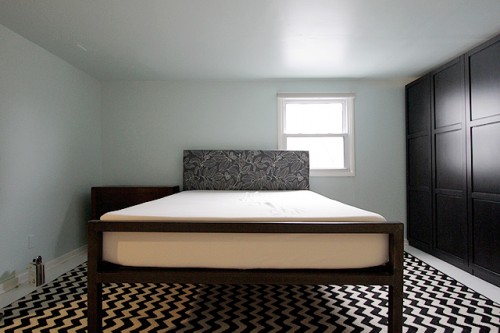
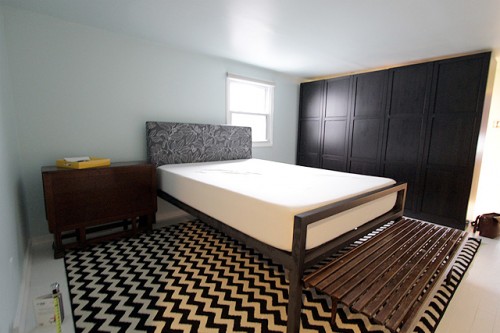
I’ve addressed the lack of closets with a freestanding wardrobe, which combined with the zigzag rug that they already had, will make the bedroom feel more enclosed. More like its own room, rather than one big open space between the two kids’ rooms. Adding the wardrobe also allowed us to do away with the curtains along the pitched side of the room that concealed clothes hanging from pipe rods. There were already two dressers behind those curtains and another two matching dressers bedside, but now all four have been lined up along that sloped wall. With a little styling they’re going to look fantastic.
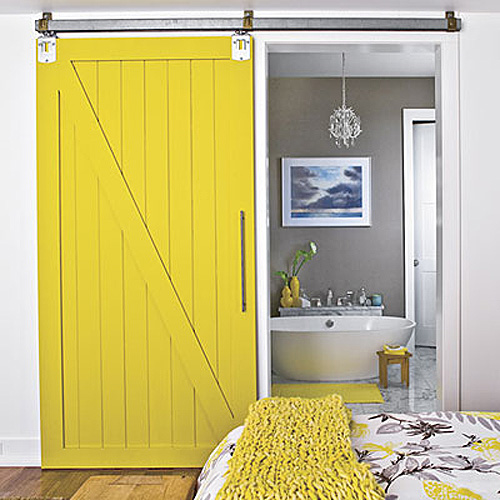
Kathryn and I would both love to add a sliding barn door (in yellow, no less) to the entryway of her little boy’s room. If you’re on Pinterest at all, you’ve seen this photo from Southern Living. Heck, you’ve probably pinned this photo.
Unfortunately, the hardware alone is pricey, and we’ve already spent half of our budget just on the wardrobe. I knew the closet would be pricey, and I think the result is worth it (both in terms of form and function), but it kills me that I can’t give her that awesome barn door. I think she and her husband, Finn, and still trying to figure out a way to make it work though, so maybe it can be something that they add at a later date. (psst: Check out Housetweaking for some DIY barn door inspiration.)
Speaking of budget, American Express has provided us with $1500 for the room, and I’ve been using their new prepaid card to keep track of expenses. As I mentioned, the closet took up half of our funds right away. Paint and trim took another big chunk. By the time it came to choosing the fun stuff (i.e. everything else), we were down to about $550. I’ve been obsessively logging in to my account to check the balance on the card to make sure we’re still on track.
We were also able to repurpose a gateleg table that had belonged to Kathryn’s grandmother. It’s now standing in as a very nice bedside table.
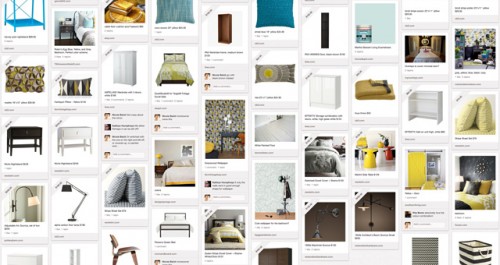
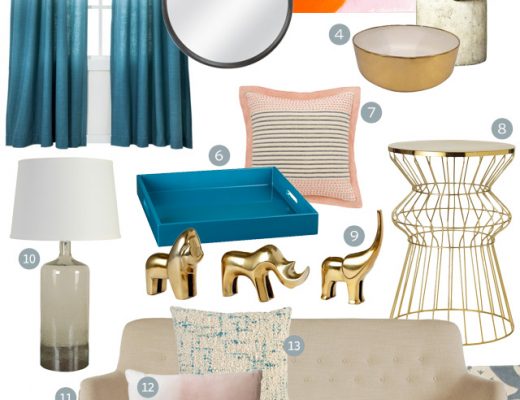
I’ve been gathering things for the room (sheets, lighting, an additional bedside table), but there’s still a lot to do, and not a whole lot left now on the American Express card. The room needs more bedding, curtains, lighting, knobs on the closet doors, art, and all of the pretty decorative touches that finish off a space. I’ve also tasked Kathryn with sewing a matching slipcover for the foot of her bed. I’m not giving it all away (I want the finished room to be a surprise to Kathryn and her family too!), but you can check out my Pinterest board for the room to see what I’ve had my eye on.
I think it’s all going to come together quickly, and I’ll be able to share the finished room with you next week!



Melissa
November 23, 2011 at 1:28 pmLooks fantastic, nicole!! That space would be perfect for a barn door. Too bad. Can’t wait to see the finished room!
Heather
November 23, 2011 at 1:46 pmWOW! What a transformation! I can’t wait to see the finished room. I love how graphic the rug is!
tracy
November 23, 2011 at 1:47 pmLooking fab! That black closet is TO DIE FOR. I can’t wait to see what linens you pick!
NicoleD
November 23, 2011 at 1:48 pmLooking good! Very excited to see the room come together :)
Megan
November 23, 2011 at 2:02 pmThe room already looks a billion times better. I’m super excited to see it all finished up. I love the clean lines of the dressers lined up and that closet! Oh the spaciousness, loveliness, fabulousness of that closet. Don’t you have IKEA cupboards in your room? I would love to add storage to my small bedroom with them but I don’t have anyway of squishing them in.
Making it Lovely
November 23, 2011 at 3:07 pmYes, I have the same IKEA closet (PAX) in my bedroom too, just in a different color and with sliding doors. They’re fantastic if you have the room for them!
Jill Seidner | Interior Design
November 23, 2011 at 2:10 pmLOVE the progress – and love the closets too, absolutely love the black glossy doors!
Sarah
November 23, 2011 at 2:11 pmI have one big pet peeve with the room – I hate that the headboard blocks part of the window. It would be so MUCH better if they moved the bed over, got a smaller night table for the side the night stand is on, and switch that one to over by the window – just my opinion! – otherwise, good work!
Kathryn Humphreys
November 23, 2011 at 3:02 pmThat poor window is all of ten feet away from my neighbors bathroom, we both want as much of it blocked as possible :)
Making it Lovely
November 23, 2011 at 3:08 pmPlus the room would look really lopsided if we tried to allow that much space for the window, and that’s the best wall for the bed to be on.
Sarah
December 1, 2011 at 11:07 amI still disagree with this – I think the asymmetry of having the bed more on one side of the room actually gives a larger open floor space near the window, and would not seem lopsided at all. The larger nightstand could be placed perfectly under the window (a better fit). Finally, with proper shades and curtains, that still allow sunlight thru during the day, the view of the neighbors bathroom can still be hidden.
Jill Seidner | Interior Design
November 23, 2011 at 2:12 pmLOVE the progress – and love the closets too, absolutely love the black glossy doors!
Molly the Waffler
November 23, 2011 at 2:13 pmLove the freestanding closet — was it custom? Also love all the yellow accents on your Pinterest page for this project. I think the room would look great with yellow and white bedding. I recently started a pinterest page filled with ideas for my daughter’s bedroom. It’s such a great way to keep track of everything and see all the ideas in one space.
Making it Lovely
November 23, 2011 at 3:09 pmSome yellow will be coming in, yes! And the closet is PAX from IKEA.
Robyn
November 23, 2011 at 3:11 pmI can’t wait to see the finished product. The folks at this blog
http://www.maillardvillemanor.com/
are working on a barn door as well. Hopefully they will put up their “how-to build it” post soon
Melissa
November 23, 2011 at 3:11 pmlooking really, really good!! Can’t wait to see more!
Yvonne
November 23, 2011 at 3:31 pmYou have to help me out Nicole because I’ve been wondering about this for a long time now. It seems that a lot of American designers (and home owners) always place a bed in front of a window. Why is that? It’s something that’s not done over here in Europe. It’s also bad for your shui, if you believe in that. How do you do that with opening your windows at night time and doesn’t it bother you that the architectural feature of the windows are blocked by a big bed? I really need an answer as it keeps me awake at night :P I really love the colour of the walls and the idea of the sliding door is brilliant. Good luck on the project.
Jeanne
November 23, 2011 at 5:11 pmThis is so fun to watch! My bedroom is also the upstairs room with the slanted ceiling (except I have lots of knotty pine). I have the same zig zag rug and two white malm dressers just like Kathryn (but I also have a Broyhill Brasilia set). So I’m really enjoying seeing your selections. So far so good!
Charlene
November 23, 2011 at 6:49 pmLoving it so far!!! Have you checked a local large hardware store for more affordable barn door hardware? We put a large barn door in a couple years ago and were shocked by the hardware prices until we went to our local Meeks hardware. It’s a more industrial looking track system, not fancy but it works!
Kathryn Humphreys
November 23, 2011 at 8:17 pmWe’ve found a couple potential options that are looking much more reasonable. Still not within this budget, but perhaps more within ours then I had previously thought.
em
November 23, 2011 at 8:44 pmLove the color! Can’t wait to see the final result! :)
Brooke
November 23, 2011 at 10:29 pmThe hardware for a barn door doesn’t always have to be expensive. My handy hubs figured out you can use a trolley rail and kit from Lowe’s for just $50. Here’s the barn door we made with it http://www.killerbdesigns.com/blue-barn-door-how-to/
Evelyn
November 24, 2011 at 11:40 pmUm…WOW. HUGE difference! Love the smart, deliberate moves. Can’t wait to see it next week!
Svea
November 25, 2011 at 3:08 pmIt’s coming together! The barn door idea is lovely and it reminded me of something: http://www.ikeahackers.net/2011/10/turn-pax-rails-into-sliding-doors.html
You might have seen it already, but maybe it helps anyway! Can’t wait for the final reveal!
lawn care peachtree city
November 28, 2011 at 12:00 pmThat looks so nice!
I love the black and white style!
Sonchia
November 28, 2011 at 3:45 pmJust to add to the barn door conversation…my boyfriend’s step-dad is a welder (among many other things) and created a sliding door system with a rail and some old roller blade wheels (the rubber and the bearing within the wheels help the door move quietly). Then he used an old door they found as the “door” – all in all it was a cheap project. Oh – and the wheels got covered with a decorative metal piece – cause who wants to look at old roller blade wheels?
See bottom image (poor, but you get the idea hopefully)
http://dreamwithinreach.blogspot.com/2011/04/steamboat-studio-such.html
Anyway, maybe a local handy person can help you if you gather all of the materials beforehand. Just another way to cut costs.
Good luck – can’t wait to see the final results.
emily@boxwoodclippings
November 29, 2011 at 5:20 pmLooking fantastic so far, and so dramatic, i love it. Can’t wait to see the finished result.
Kate
November 29, 2011 at 5:28 pmWhat a fun and quirky space. Looking forward to seeing the final design!
Terese
November 30, 2011 at 11:26 amlove the new wall color…looks great with the rug!
Kathryn’s Finished Bedroom | Making it Lovely
November 30, 2011 at 2:29 pm[…] but their kids came first and the bedroom kept getting pushed back. I showed the space to you, in progress, last week. Now the room is finished though, and I love the way it turned out! American Express had […]
Bedroom Inspiration 2012
July 27, 2018 at 9:51 am[…] a look at this post on Making it Lovely about redecorating a reader’s bedroom as our room upstairs is almost identical in terms of layout…mainly the sloped ceiling wall […]