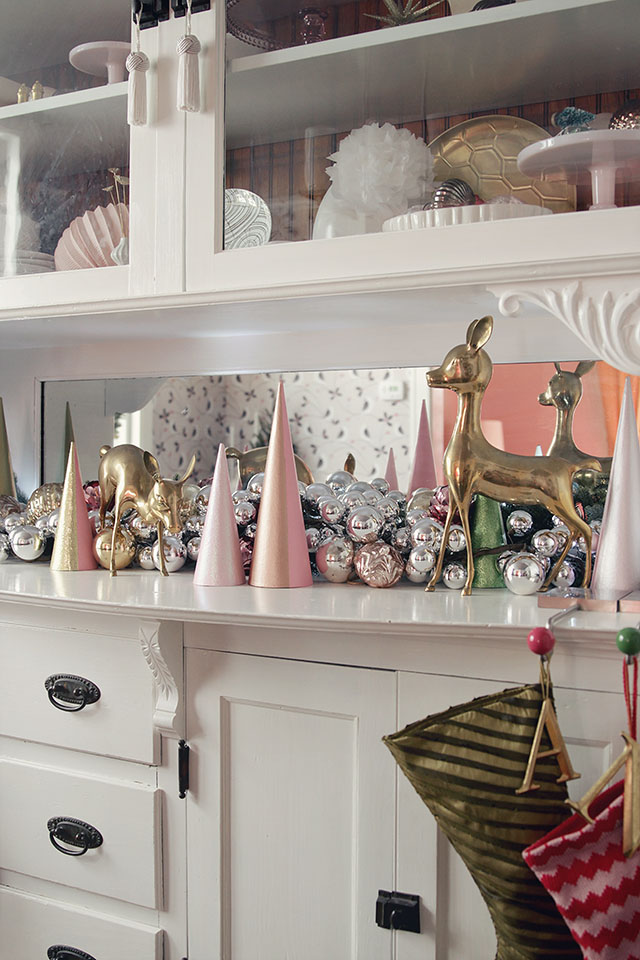
Here’s a cute DIY project to add a little sparkle and shine to your holiday! These colorblock Christmas trees took a few hours to create, but if you simplified the palette (and skipped the glitter paint), you could finish them in about an hour. Here’s what you’ll need.
Supplies
- Kraft Paper Cones
- ScotchBlue Painter’s Tape
- Paint Brush
- Martha Stewart Crafts Paint
- Light Pink Trees: Pink Carnation (Satin), Rose Chrome (Metallic), Sugar Cube (Glitter)
- Dark Pink Trees: Peppermint Bark (Satin), Rose Copper (Metallic), Florentine Gold (Glitter)
- Green Trees: Artichoke (Satin), Citrine Gold (Metallic), Peridot (Glitter)
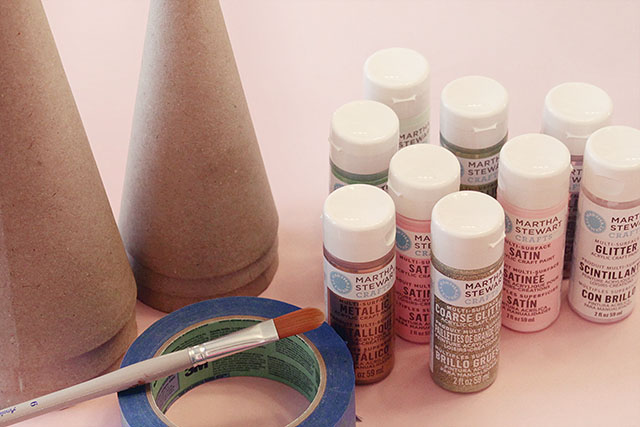
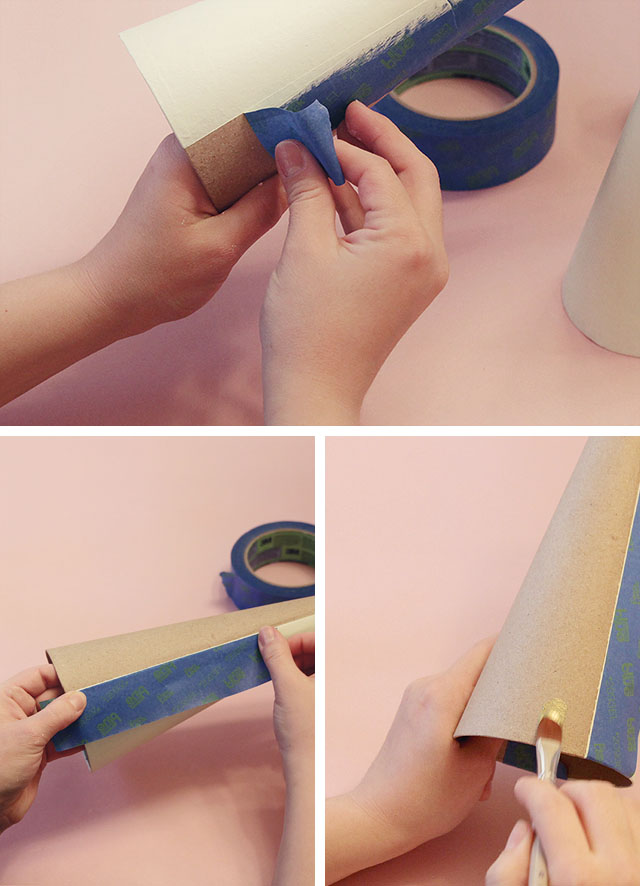
The smaller cones were to be glittered on one side, so I first painted the entire cone in a solid color. The larger cones were each going to be painted one one side with metallic paint (which I knew to have good coverage), so I started by taping them off and painting just half in a solid color. It’s easier to tape a cone vertically, though I’m sure these would look fantastic done horizontally if you’re up for the challenge.

Acrylic paint dries quickly. I found that by the time I was done painting the last of my six cones, the first would be ready for another coat (I did three on each). After the last coat had dried, I removed the old tape from the larger cones and retaped them to paint the other sides. The metallic paints I used looked good after just one coat, but I still did three — because I am weird and like to keep things even.
Adding the glitter… there went the whole ‘keeping things even’ idea. I lost count of how many coats of glitter paint I used! I knew they would take a while to build coverage, and I think I may have put 10-12 coats of paint on each cone. Early on in the process, I considered ditching the paint and just using glitter, but it was my hope that by using the glitter paint, each Christmas tree would be less likely to flake and leave a sparkly trail wherever she may go.
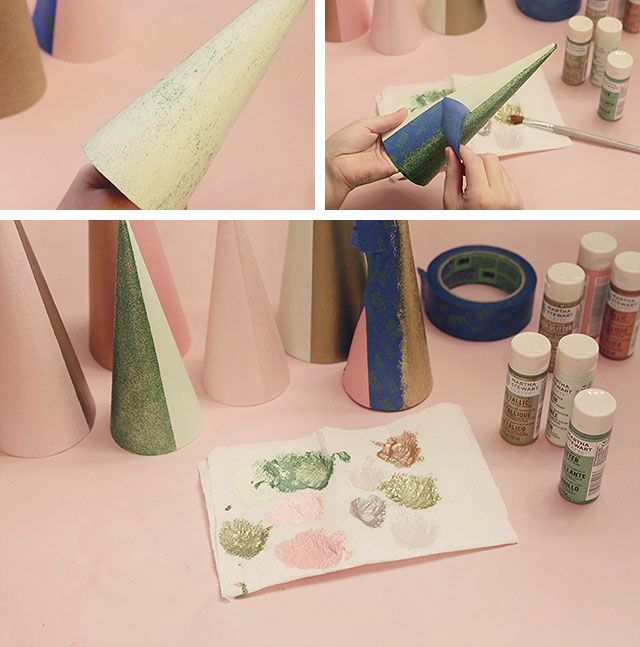
So far, so good. The glitter is staying put, and I love the two-tone effect.
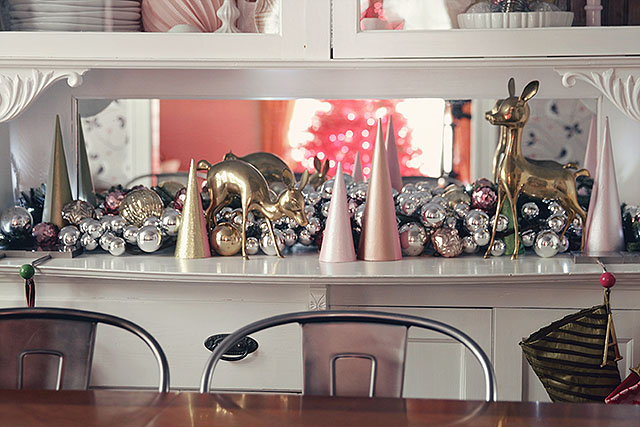
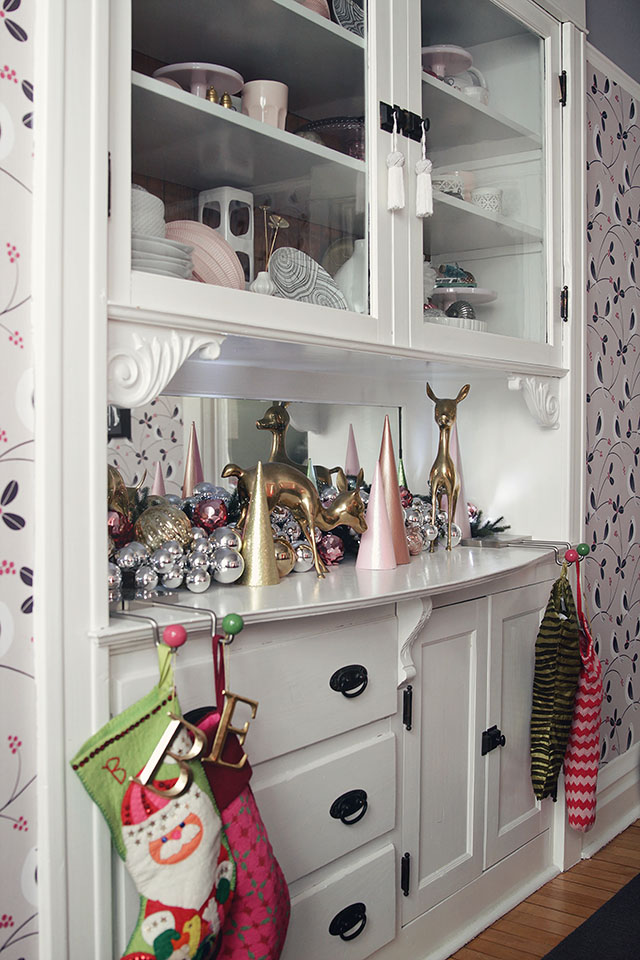
I’m not sure if I’ve found the perfect place for these yet though. I like the effect of the mirror, doubling them and showing off both sides, but there’s already a lot going on in the hutch above, and with the stockings below. What do you think?
![]()
This post is a collaboration with ScotchBlue™ Painter’s Tape. To join the creative community, visit www.facebook.com/ScotchBlue.



Chloe Moon
December 18, 2012 at 12:52 pmOh this is perfect!! I’m still decorating my place and these trees would look great!! Thank you!
Hege
December 18, 2012 at 12:58 pmwow they look great! Hege x
Christina
December 18, 2012 at 1:07 pmI have long loved those deer thanks to you and Emily Henderson. I just bought them on eBay, but the set looks to be tarnished. How do you recommend keeping them so shiny?
Making it Lovely
December 18, 2012 at 3:52 pmI haven’t done anything but wipe them down with a damp cloth. Mine were (luckily) in pretty good shape already.
Kory
December 18, 2012 at 1:15 pmWhat a cute idea! I’m totally making these this weekend!
Ashley @GirlyObsessions
December 18, 2012 at 1:15 pmI love these! So simple and they make such a statement!
Laurén
December 18, 2012 at 1:30 pmWhere are the stocking hangers from? I’ve been looking for simple, attractive stocking holders for FOREVER!
Making it Lovely
December 18, 2012 at 3:54 pmThey were from Hold Everything (remember their catalog?), maybe 8 or 9 years ago. They were designed by Jonathan Adler.
Kimberly
December 18, 2012 at 1:34 pmI love these! I don’t have any Christmas decorations, besides a Christmas “tree” I made from branches and my daughter’s popsicle stick ornament. I like how these are so simple and don’t cost much.. I may have to go get materials right now!
Making it Lovely
December 18, 2012 at 4:05 pmYour “tree” sounds sweet.
Emma
December 18, 2012 at 1:45 pmI don’t think there’s such a thing as “too much going on” when it comes to Christmas decorations! I think they look fantastic and you’ve chosen a great spot for them.
Making it Lovely
December 18, 2012 at 4:06 pmEven Christmas decorations could use a little editing down though! I think I may have found a better spot for them, in the living room.
Danielle
December 18, 2012 at 2:05 pmLove this!! They look store bought and less handmade!
I have a question, where did you get your stocking hooks? They are adorable!
Making it Lovely
December 18, 2012 at 4:07 pmThey were from Hold Everything, but that company has been out of business for many years now.
AnnW
December 18, 2012 at 2:10 pmAn elegant idea. Thanks!
Sophie
December 18, 2012 at 2:22 pmI just did the same but with foam cones. They didn’t turn out as I hoped. These Krfat ones look much better. I’ll pop out to the shop today :) Thanks for the tip.
Angela
December 18, 2012 at 2:22 pmHi Nicole,
These are so beautiful – They look great on your built in – I have to echo a couple of posters above – please share where you got the stocking hooks – they are so simple and modern! Thanks –
Making it Lovely
December 18, 2012 at 4:08 pmI wish they were still available! If we ever have any more children, I’ll have to find another somehow, or forgo my own stocking. ;) The hooks were designed by Jonathan Adler for Hold Everything, many years ago.
Jill Seidner | Interior Design
December 18, 2012 at 2:48 pmThese are so pretty – love the simplicity!
Sarah
December 18, 2012 at 2:53 pmThese look great! I love the glitter paint (and the lack of glitter everywhere that comes with it)!
I also LOVE LOVE LOVE those stocking holders! They’re perfect for your house.
Sarah
Making it Lovely
December 19, 2012 at 12:35 amI think I’m a glitter paint convert. No mess!
Kristina
December 18, 2012 at 3:36 pmSo pretty, love these! I’m anti- loose glitter and pro- glitter paint, the extra coats are worth it!
Kristina
jbhat
December 18, 2012 at 4:50 pmLove love this project. Also–have to tell you I got a sparkly pillow from Land of Nod after seeing yours here and I am in LOVE with it. It’s so beautiful.
jbhat
Making it Lovely
December 19, 2012 at 12:37 amOh, yay! I love that pillow.
Jennifer Harrup
December 18, 2012 at 9:09 pmI made some abstract looking Christmas trees too this year. I was inspired by the confetti system ones I saw at west elm
http://jenniferlaura.squarespace.com/blog/2012/12/13/diy-christmas-fringe-trees.html
Making it Lovely
December 19, 2012 at 12:39 amThey look fantastic! I was considering making a few too, but I went with the cones instead. Maybe I’ll revisit the idea next year — I have scissors that cut fringe that are just waiting to find their purpose!
Jennifer Harrup
December 19, 2012 at 12:17 pmNo way! Fringe scissors? Must find me some of those- I do heart the cones tho!!
Sydney
December 18, 2012 at 10:17 pmCute! I just posted something about DIY Christmas trees but never even thought about color-block painting them.
Cottage katie
December 19, 2012 at 9:05 amWhat an adorable DIY project for the holidays. I love the glitter, it adds a nice sparkle to the vignette.
Dacia @ Lemon Drop Life
December 19, 2012 at 12:30 pmThey look great! And I agree with you, they might be able to really shine in a different spot!!
Kim @ Yellow Brick Home
December 19, 2012 at 2:00 pmCutie, cute, cute!
Jen
December 19, 2012 at 3:25 pmYour stockings are all so unique- where are they from?
Yelle
December 19, 2012 at 8:24 pmAbsolutely adorable! I love that they are surrounded by ball ornaments!
Lidy
December 20, 2012 at 12:04 amThis is a fantastic idea! The colors you picked are gorgeous!
XOXO
Lidy
Elizabeth
December 20, 2012 at 5:48 pmWhere did you find those great letters on your stockings? I have been looking everywhere for something similar! Thanks, E
Christmas Decorations (Part 2: Downstairs) | Making it Lovely
December 21, 2012 at 6:38 pm[…] did find a better place for my DIY Colorblock Christmas trees than the dining room hutch. I split them into two groups and put half on a side table, along with a […]
Diane
January 16, 2013 at 8:47 pmI really like the two tones, but the link for the paper I guess it is you used for the cones, isn’t a trusted link. Can you tell do they come that way, or do you make them up.
ms clearwa
November 5, 2013 at 11:53 amto prevent flaking from regular glitter you can mix glitter and modpodge… i saw a woman glitter an entire chair this way on youtube… i wish i had bookmarked it, but you probably could google “how to glitter a chair”. Gosh she’s just a nut, really quirky gal… anyways, thought i’d let ya know for future glittering projects. nothing worse than glitter trails, on your face, in your scalp, in the car… its amazing… makes you understand how coughs and colds spread…
Our Home, Featured in HGTV Magazine’s Christmas Issue | Making it Lovely
December 18, 2015 at 1:31 pm[…] room looks pretty much like it always looks, with the addition of three DIY Christmas trees that I made a few years back. And the ‘e’ is balanced on her headboard but is usually […]