This post is sponsored by Dunkin’ Donuts.
The painted floor in the bathroom is done! It only took a million hours!
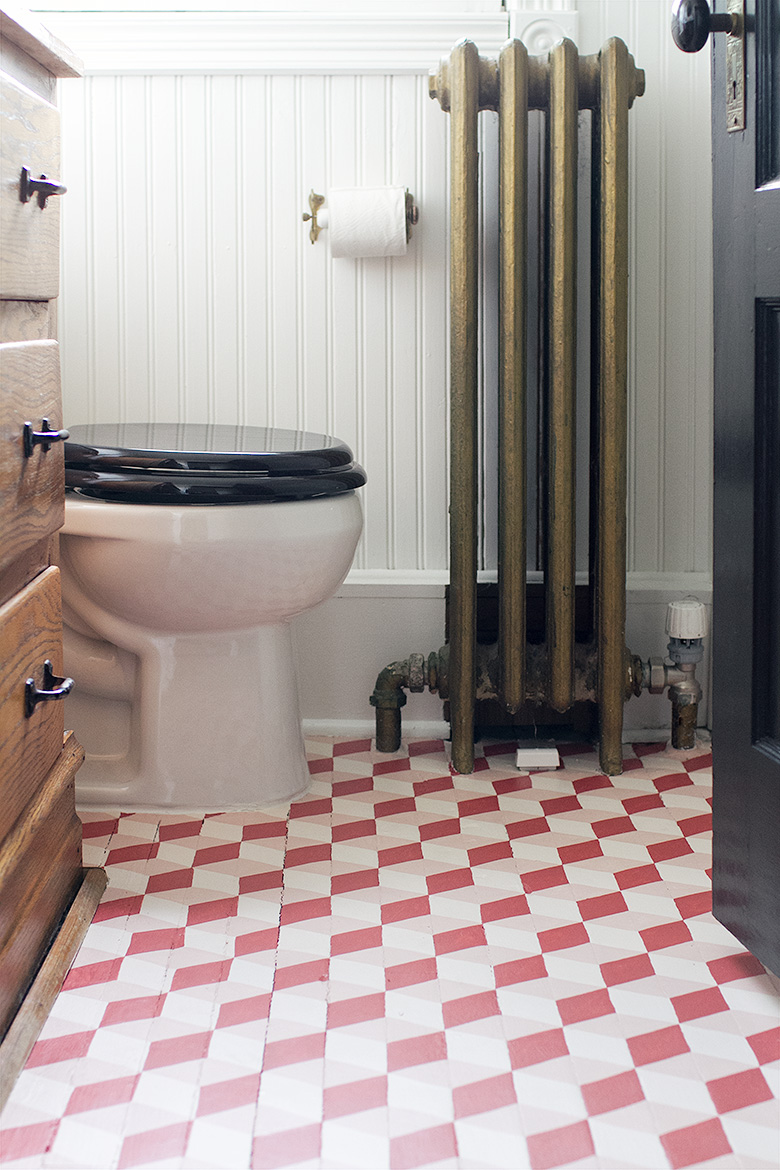
‘Tumbling blocks’ is a classic pattern that has been trending for a few years now. I think of it as a quilting pattern from the 1800s, but decorative rhombille tiling goes back centuries. If I were doing a full renovation of my bathroom, I would lay tile like this, but this project is more of a refresh. The wood floor was already painted and in need of a fresh coat, so I figured why not go for something interesting? And of course, I have painted a floor before. I know it takes time and I know I am sore by the end of it, but I also know it’s worth it.
I’ve seen people take on this particular pattern before, or a variation of it. Here are a few examples.
- How to Paint Concrete Floors: Geometric Style, Wills Casa
- DIY Geometric Cube Painted Floor, Little Green Notebook
- A Brooklyn Rental Makeover, Megan Pflug
- A DIY Painted Patterned Floor, Apartment Therapy
I found a free template, and I played around with the colors and scale in Photoshop. I was torn between black and white or pink and red, and I decided to go with the more colorful scheme inspired by this encaustic cement tile from Mosaic House.
I looked through my paint fan decks and chose three colors. I wanted pink and red, yes, but not too bright or candy-colored. The pale pink is Puppy Paws, the medium is Odessa Pink, and the red is Crimson — a quart of each in floor and patio low sheen enamel, stopping on the way at Dunkin’ Donuts for an Iced Macchiato.
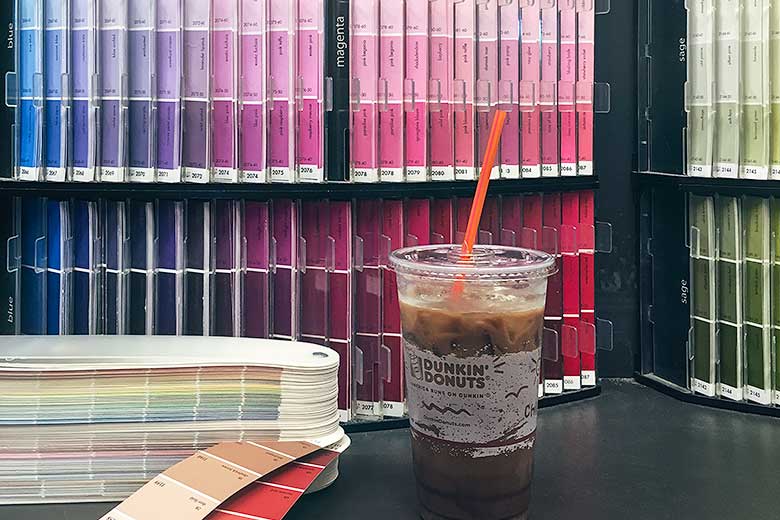
I used to be more of a latte fan, but the macchiato has become my new favorite. When I was at the Dunkin’ Donuts headquarters last month, we were able to learn about the different hot and iced espresso drinks they offer and then make our own. Both drinks are made with milk and espresso, but a latte only has one shot of espresso and a macchiato has two, giving it a stronger coffee flavor and more caffeine (which was definitely needed as I worked on this project!). I like to order mine with a Mocha Swirl because: chocolate. Delicious.
So, coffee and paint in hand, I was ready to get started.
I started at the far end and worked my way towards the door. Luckily it worked out and my pattern stayed aligned with the floor boards (for the most part). If I were doing it again though, I would have started at the doorway where the pattern is most visible. That’s the recommendation when working with tile too. You want to start your pattern where you are most likely to be looking at it, and if it’s going to go wonky, you want that hidden toward the back.
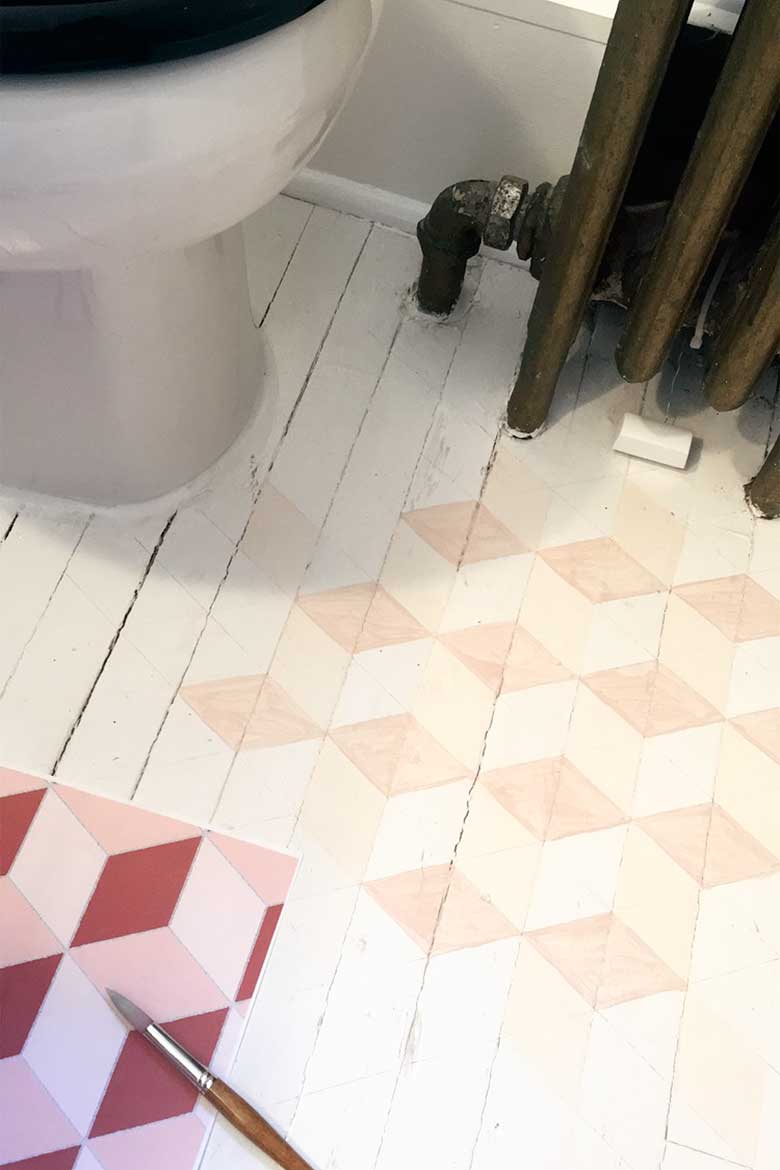
I only drew out the pattern on the far side because I figured I would smudge/erase it as I worked if I did the whole floor. Again, if I were doing it again, I would have started at the doorway, but alas. I drew a portion of the pattern, painted some of the lighter areas, drew more of the pattern, painted some more, repeat.
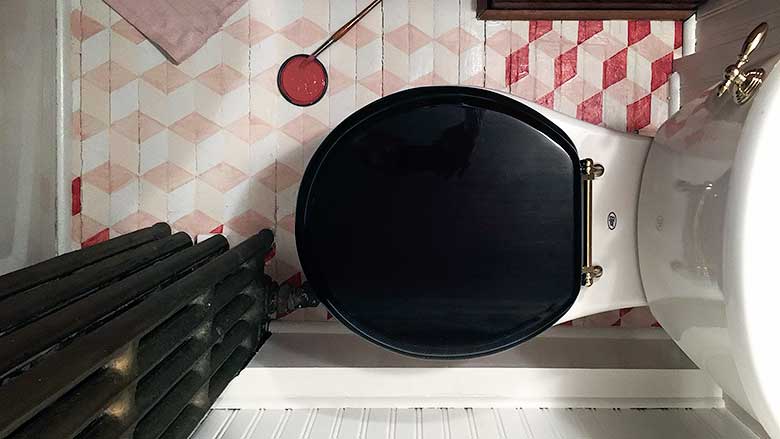
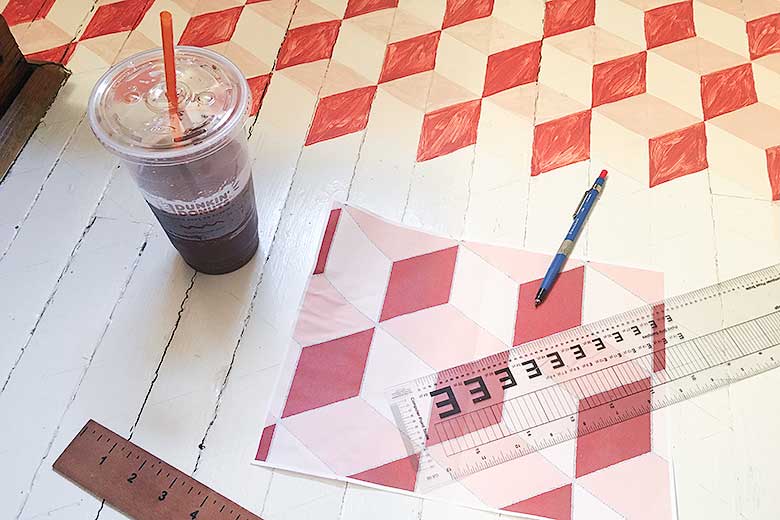
I have a pretty steady hand, so I painted the whole thing freehand with a pointed artist’s paintbrush (round, size 16). You can create a stencil or tape off the pattern too, but neither really seemed easier to me than just going ahead and painting it with a brush.
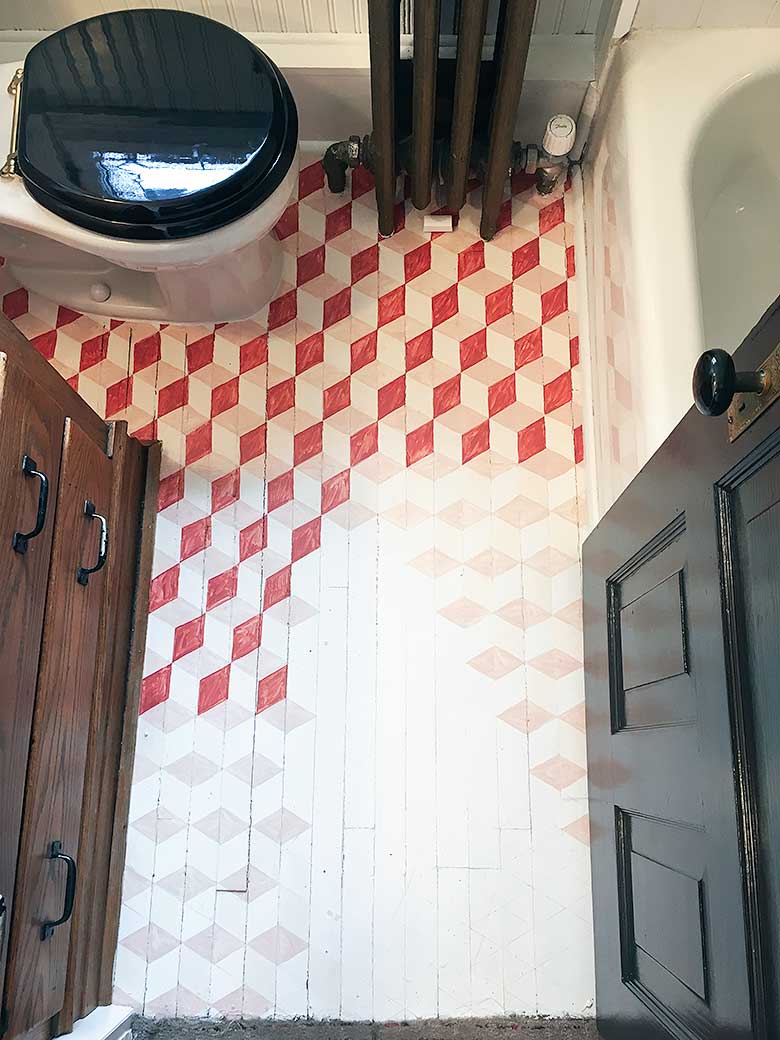
It took three full days of work, and three coats of paint for each color, but it’s done. Hooray! And now you can pretend to play Q*bert in my bathroom.
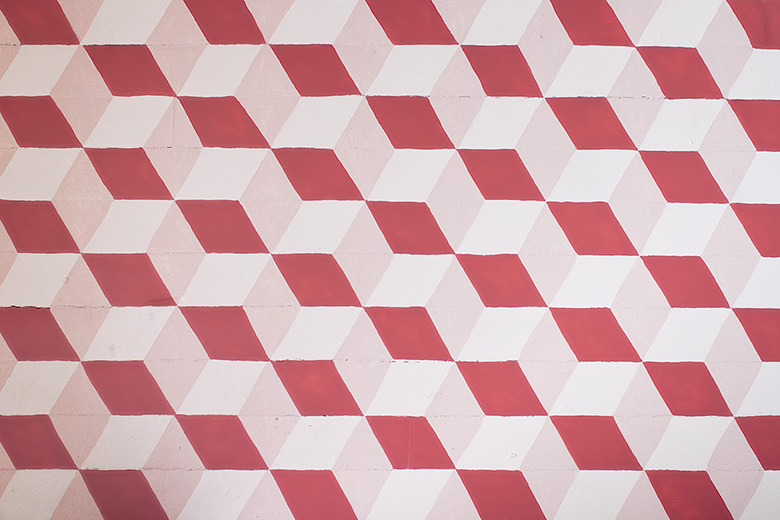
I just have a couple of details to get to, and the whole space will be finished!



Kristin
July 7, 2016 at 12:27 pmWOW! It looks fantastic. Great job!
nic
July 21, 2016 at 4:13 pmDid I miss the brand and type of paint that you used? My local Home Depot only has “cement paint” not “floor paint”? Is that what you used? I moved into a house with painted stair treads (WHYYYYY did they do this??) and it chips all the time, but I think they used regular wall paint, so if there is a more durable floor paint out there I’d sure love to have it!
Danielle
July 7, 2016 at 12:53 pmSo great! I love it!
Alana
July 7, 2016 at 1:15 pmThat. Is. Gorgeous. On a scale of 1-10, how sore were your hands when you finished?
Really beautiful work. I’m loving that you’re getting into these personally-created additions to the house.
Making it Lovely
July 7, 2016 at 1:17 pmMy hands? A 3. My knees and back? 4. My elbows, oddly enough? 7. But just for a day or so!
judy
July 7, 2016 at 2:11 pmI love this,very pretty,I wonder if you sanded it a little if it wouldn’t have a more aged look like the house. I am not a designer so what do I know. Oh-and the pattern keeps changing from diamonds to blocks—makes me a little woozy.
Theresa
July 7, 2016 at 3:50 pmWow! You are amazing! The patience and skill you have is so impressive. Well done!
karen
July 7, 2016 at 4:21 pmYou’re the man! er woman!
Making it Lovely
July 8, 2016 at 10:10 amHa!
Mary
July 7, 2016 at 5:04 pmFor your house, this is perfect. And kudos to you for doing it in fun colors instead of what I see all the time on the big Web.
Making it Lovely
July 8, 2016 at 10:10 amBlack, white, and gray would look amazing too though.
Gardenella
July 7, 2016 at 6:16 pmThe project [took three full days of work, three coats of paint] ; and how many DD coffees??
Making it Lovely
July 8, 2016 at 10:11 amAnd the answer is: 2. But only because I didn’t leave the house at all for one of those days! ;)
Debbie
July 7, 2016 at 6:41 pmGreat job!!! Well done!
Ann
July 7, 2016 at 6:49 pmReally, really pretty! You mentioned you wish you’d started at the door and worked toward the radiator. Would you have painted yourself into the corner? How would you have done that w/o messing anything up or getting trapped??
Curious Reader
July 7, 2016 at 7:00 pmIs this a sponsor post? You seem to talk about Dunkin’ Donuts throughout the post but don’t disclose that it’s #sponsored.
Making it Lovely
July 8, 2016 at 10:12 amYes, I’ll be working with Dunkin’ Donuts on several posts through the year. My disclosures are always clearly stated at the top, before the beginning of the post.
tamara
July 7, 2016 at 10:05 pmNeat! I really like the pop of color. Curious, how do you clean a painted floor like this? Are there special products or do you just sweep and vaccum?
Making it Lovely
July 8, 2016 at 10:16 amFloor paint is pretty heavy-duty stuff — I would clean it like any other wood floor.
I love lists - Shutterbean
July 8, 2016 at 3:00 am[…] What a cool DIY Hand Painted Floor Project! […]
kimbie05
July 8, 2016 at 9:21 amThe red and pink are perfection. Selfishly happy you went that route so I could see it – but it’s also SO you. Bravo, lady!
Making it Lovely
July 8, 2016 at 10:16 amGlad to provide. :)
Celia Landry
July 8, 2016 at 9:39 amThere is one hack which could speed up your job, If you used masking tape that job would be much faster, they come in various dimensions so you can choose size of rhombus.
Ursula Ellis
July 8, 2016 at 11:11 amSo, so amazing. I have nothing intelligent to say except that I love it, envy you your free-hand abilities, and wish it were in my bathroom.
Judith
July 8, 2016 at 7:19 pmCan I please see a shot of the whole floor finished, like the fourth picture, but done? My heart needs it. I feel incomplete. Pretty please!
Great job – it looks wonderful and fun!
That is not a godda** macchiato
July 10, 2016 at 1:44 amI like your floors but if you order a macchiato in any country around the world apart from america you’re in for a rude shock. A macchiato is a single shot of coffee with a small (think half or full teaspoon) of milk or foam added in. Why do these awful chains do this? just call it what it is – long black sugary coffee with chocolate syrup.
Ari Baker
July 10, 2016 at 3:44 amIt looks amazing, great job!
Val
July 10, 2016 at 10:55 amWhat tile would you put in if you were doing a redo? The link is not working?
Shannan
July 10, 2016 at 12:27 pmWOW! So I’m breaking my never comment rule to say that for reals looks amazing! And you threw a QBert reference in there! WHAT! Seriously, you did a great frickin job and should be so proud!
Jason McCoy
July 11, 2016 at 8:16 amI can say that I newer saw better solution for refreshing bathroom tiles. Great advice, can you share which paint did you used? I am thinking to do similar thing but bit afraid that paint would come of by walking over it. Do you have experience with it?
grumpy
July 11, 2016 at 11:34 pmthat is not a macchiato. nice job on the bathroom though.
Lydia
July 22, 2016 at 4:36 pmhah, as a former barista I came here to say the same thing- that’s definitely NOT a macchiato.
Värde Cabinets for the Craft Room (Former Kitchen) – Making it Lovely
July 12, 2016 at 11:59 am[…] all started because I needed to hem a shower curtain for the bathroom and as I cleared off some space to work, I thought, ‘eh, I should make this space […]
Peggi
July 13, 2016 at 11:22 pmWowza! That is the shiz!! I hope you added a shot of something else to that coffee to celebrate your hard work & genius. Now you’ll just be running to the third floor to use the loo all the time! Lovely, indeed.
joanna // jojotastic
July 18, 2016 at 12:54 pmNICOLE! this looks AMAZING!
Sugar and Charm
July 27, 2016 at 6:29 pmLove this! It tuned out great!!
Sara
September 13, 2016 at 6:30 pmMy son is studying Barry McGee in school & wonderng if your pattern is inspired by his wrong? https://www.google.com/search?q=barry+mcgee+pattern&source=lnms&tbm=isch&sa=X&ved=0ahUKEwjKpJf1korPAhUByT4KHdWQBCcQ_AUICCgB&biw=1139&bih=590
One Room Challenge: Week 5 (When it Rains, it Pours) – Making it Lovely
November 2, 2016 at 8:34 am[…] rip everything apart eventually when we are ready to find and fix the leak. Good thing I lovingly hand-painted that floor, huh? I had to switch to cleaning up the mess in the bathroom instead of cleaning the stairs, but […]
One Room Challenge: Week 6 (Front and Back Entry, Stairs, and Hallways – Final Reveal!) – Making it Lovely
November 9, 2016 at 2:26 pm[…] went with a simple brass sconce and I tried my hand at a gallery wall outside of the bathroom with my hand-painted floor. The art is a mix of old and new, mostly from South Loop Loft and Artfully […]
A Look Back at 2016 – Making it Lovely
January 5, 2017 at 2:36 pm[…] DIY Tumbling Blocks Hand-Painted Floor […]
Dianne Pickersgill
March 8, 2021 at 9:47 amNicole – Your post inspired me to paint my powder room floor in my 19th Century house a tumbling blocks pattern, using almost the same colors as you used, and I absolutely love it! I had always known I wanted to paint that floor but until your blog post didn’t have any good ideas. I taped it off instead of doing it freehand (don’t know how you did that). It took me over a month of weekends to get it done, because of needing to let the paint dry for each color/row before taping off the next. Question for you – how did you reach the area to the right of your toilet? I have a similar layout (minus the radiator), and I’m stumped. I’d love to share photos of my floor with you, but I don’t see any way to do that here. Thank you for your inspiration!
Making it Lovely
March 11, 2021 at 8:18 amI would absolutely love to see! You can email me (nicole@makingitlovely.com) or connect on social media (I’m @makingitlovely everywhere).
I did it freehand for the reason you found out, which is that it would take forever to let the paint dry enough to tape off and do the next color! I do have a pretty steady hand for painting, so freehand was fine for me. But I did have to get into some weird angles and positions to paint certain areas. I think I basically draped myself over the toilet to get behind it. I cleaned that bathroom REALLY well before spending a lot of time in there. ;)