
Today, I grout! But first, let’s take a look at the tiling progress I’ve made.
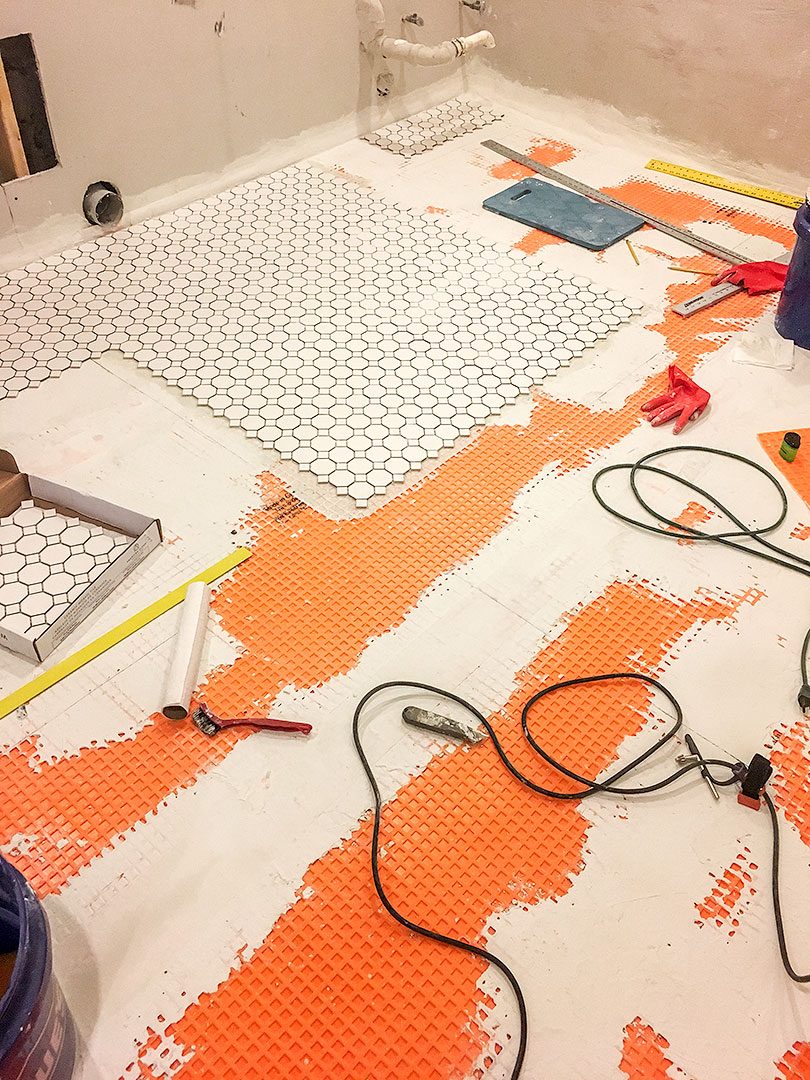
I started by finding the center of the room, then going out from there to see how square (or not) the room was. The laundry room is 10’x14’ and surprisingly not too wonky, at least as far as right angles go! Next, I dry laid sheets of tile to see how they lined up with the edges of the room. I don’t think this step is as important with small mosaic tiles as it would be with a larger format, but I felt better seeing some of the flooring in place before continuing.
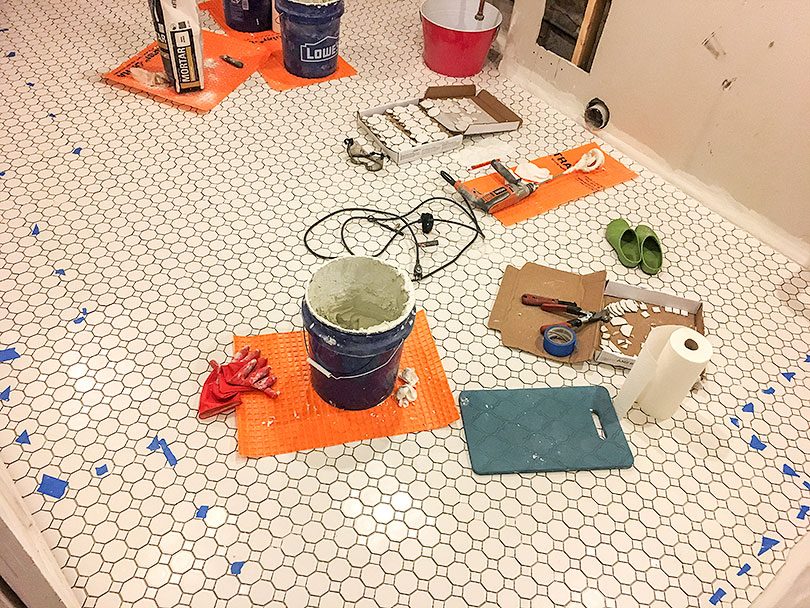
I mixed my mortar to the consistency of peanut butter and was ready to affix the tile. (Tip: add powder to water when you start, not the other way around. It’s easier to mix without forming a dry clump at the bottom that way.) You can prefill the little waffle squares in a Ditra underlay (more about why I used Schluter Ditra right here) so that’s why you see some patches already filled in and dry — I was using up whatever mortar was in the bucket after adding the KerdiBand strips to waterproof the floor.
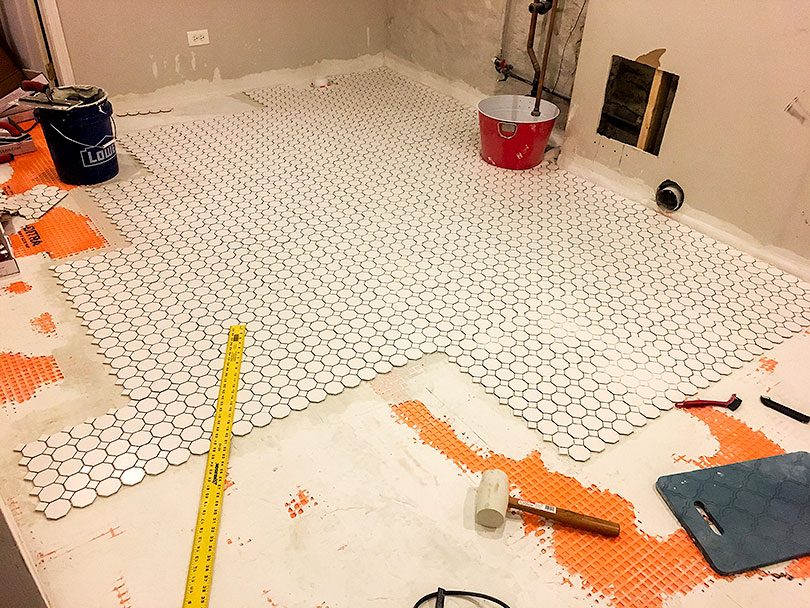
I started in the center and worked my way toward the wall where the water heater goes. I want to get that thing back in place! (Hot water, I miss you. So much.) By the end of day 1, I had made it to the wall and close to two corners.

Day 2, I started back at the center and worked my way toward the opposite wall. Then, leaving a path around the perimeter, I went back and got the two corners I had almost made it to the previous day. I didn’t want to start in one corner and work all the way from there because the tile sheets give a little, and you can get really out of square really quickly over longer distances. If I would radiate out from the center, I figured I had a fighting chance at doing this well.
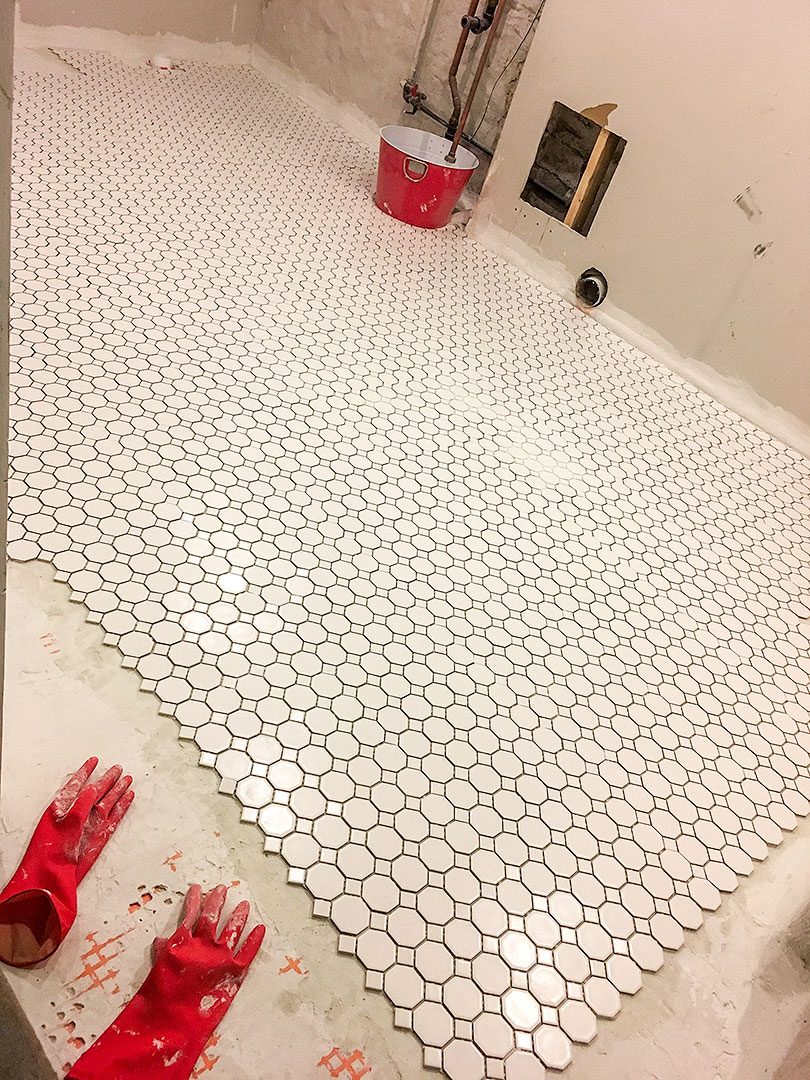
I ended the day with staggered seams. I’ve seen mosaic tile installations where the seams between tile sheets is super noticeable, and I would be pretty mad at myself if I did that. There are a handful of spots where I feel like the spacing is slightly off, but I don’t think they’ll be very visible once everything is in place. I’m also looking at it far more critically than most would. Such is my way! My next tiling job is going to be the bathroom, also with a small mosaic tile, so I’m glad to have this space as my learning experience. Obviously I want this room to look good, but the stakes are ever so slightly lower.
Day 3! I had left all of the hardest cuts for the end, so I got all of my little tile pieces in place before mixing up my mortar again.
I experimented with a few different techniques for cutting tile. A snap cutter is difficult because the scoring wheel stops at every individual tile. It works, but you have to scoot it along, piece by piece. I found it easier to use a scoring knife and tile nippers. Best of all though was the wet saw! Mine has a laser line that I found very helpful (I didn’t use the optional guide rail), and the guard kept most of the water from splashing me. I wore leather gloves and safety goggles to protect my hands and eyes from the little shards of tile that would fling off occasionally, but I found the wet saw easy to use and great for precise cuts.
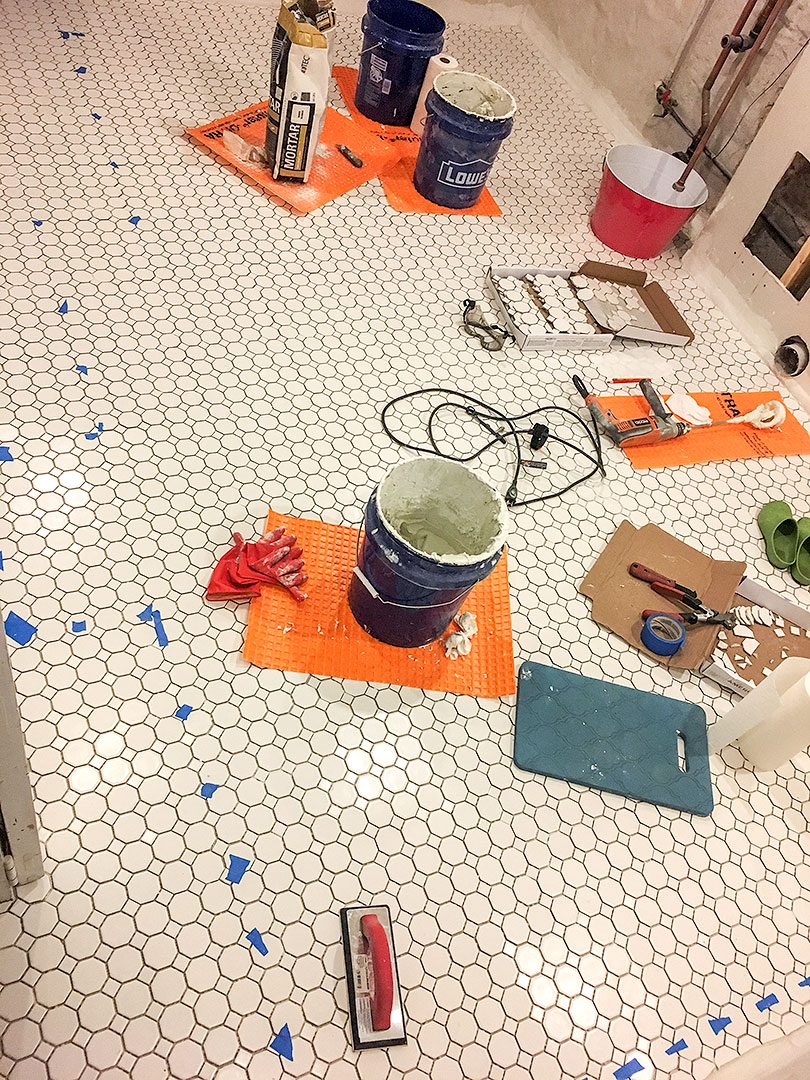
I added blue tape to mark the perimeter of previously laid tile that were safe to walk/stand/sit on. You don’t want to put pressure on the freshly laid tiles because they’ll shift around or mortar will squeeze up through the gaps. If you look for the patch of flooring that looks whiter than the rest, you’ll see where I was using too much mortar in the beginning. It oozed up through the gaps and I had to scrape it out of there after it dried with a grout saw, razor blades, and a stiff-bristled brush. It will be fine once I grout the floor, but it was a mistake I wish I hadn’t made.
There’s still a lot to do before I can call the room finished, but this tiling job was the most time-consuming part of it. I’ll grout today and let that dry overnight. Tomorrow, I’ll clean the floor with haze remover and then I’ll need to use a grout sealer before I can call the floor done. But the finish line is in sight! Hot water, ahoy!


Maggie
July 11, 2018 at 10:58 pmImpressive!
Robert Thornton
July 12, 2018 at 6:21 amGreat job. And you explained why you did things the way you did very well.
Dana
July 12, 2018 at 9:58 amWhat tile are you using? I love it!
Peggi
July 12, 2018 at 10:03 amAmazing! Your attention to detail is admirable!! I hope you reward yourself with more than a hot shower when this is done!!
Shelly
July 12, 2018 at 1:55 pmLovely tile, lovely job. One question, are you seeing little circles now? Just kidding. Good luck getting it finished.
infinitequery
July 12, 2018 at 5:33 pmLooks great! I want to retile our foyer-80s funny looking dirty tan squares with black grout. Yuck. I will have to have someone do it and I was leaning toward these large rectangles in porcelain in grey. Are there problems with the larger tiles? Do they crack or become irregular?
Five Easy Pieces: My Current Wardrobe Staples - Making it Lovely
July 13, 2018 at 11:22 am[…] of dressing in these and taking photos so you could see them on, but I have mostly been waking up, tiling the laundry room in grubby work clothes, taking a cold shower, and going to bed (but we finally got the hot water […]
Vanessa Bailey
July 13, 2018 at 8:24 pmWell done Nicole, that looks like really hard work. I did it once years ago and I remember I was so stressed out (and nine months pregnant). I wanted it to be perfect and of course it was my first time too. It was actually fine, not perfect, but after that I deferred to others.
Colleen
July 14, 2018 at 11:12 pmI paid bozo contractors to tile my bathroom and there is a big gap between one of the tile sheets — yours looks a million times better. It’ll be worth it.
Laundry Room Progress - Making it Lovely
July 17, 2018 at 1:51 pm[…] Tiling the floor took far longer than I had anticipated, but having hot water again makes this whole project far more bearable. Those two weeks of working until I exhausted followed by a cold shower before bed were no fun. Every night I would dread cleaning up! I was so looking forward to having hot water again and then when I finally did, I tried to take a nice steamy shower and it felt gross and oppressive. I switched to tepid water instead and it was wonderful! I’ve been ruined. […]