
I wanted to do a little refresh of the bathroom on the first floor. The shower is fine. The antique console sink with separate hot and cold taps, paired with an antique toilet complete with wooden tank? Sure, stay as you are! The plan was to put up some new wallpaper, change out the lights, and do a fresh coat of paint on everything. Coming up with the plan was easy! Executing it has not been fun.
Why Not Just Paper Over the Old Wallpaper?
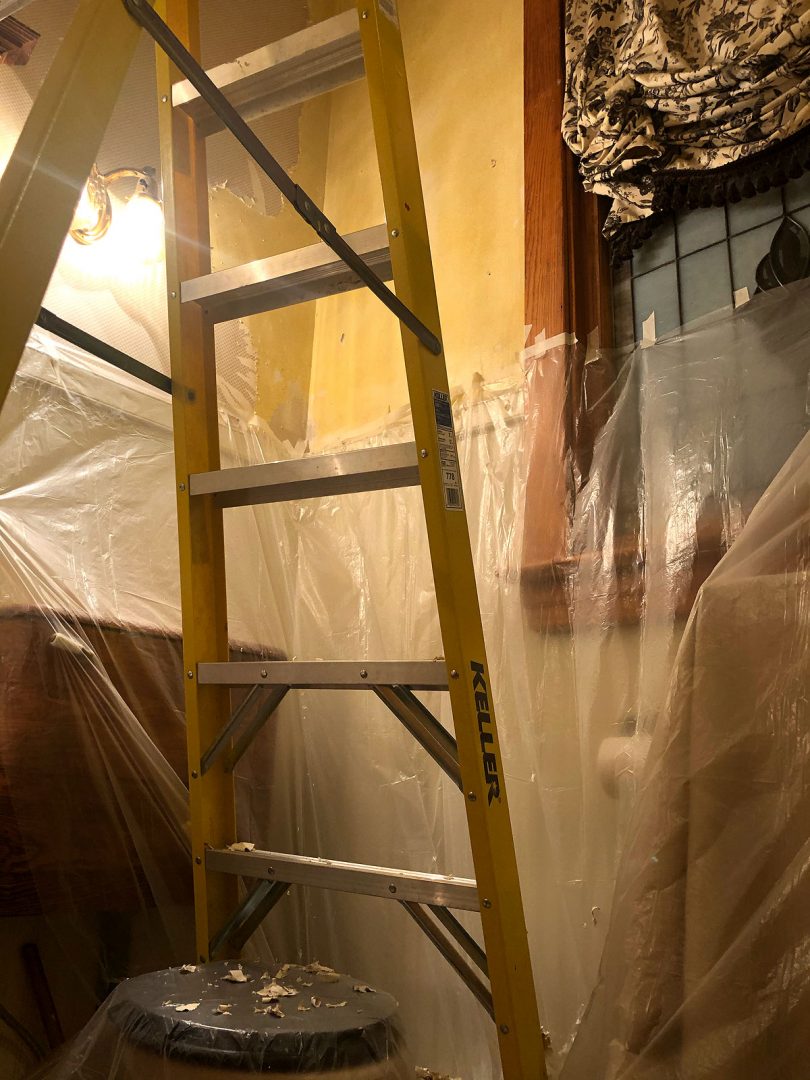
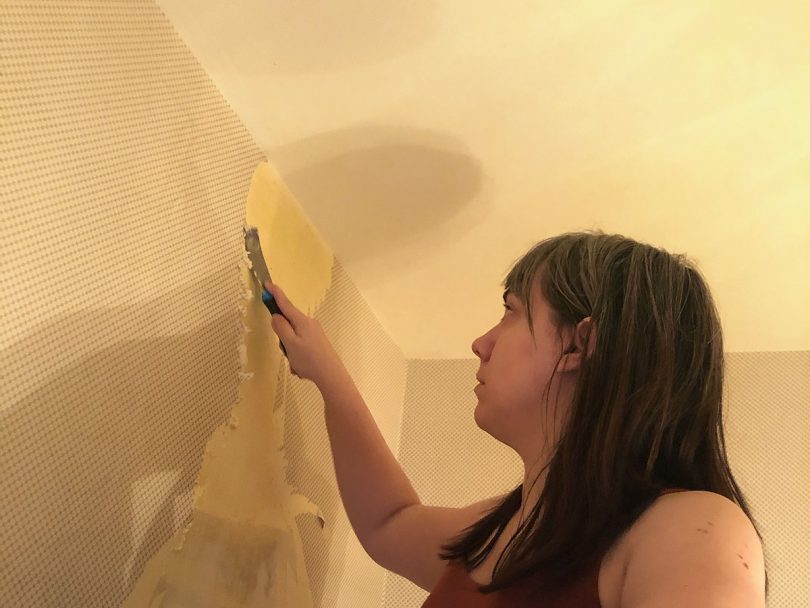
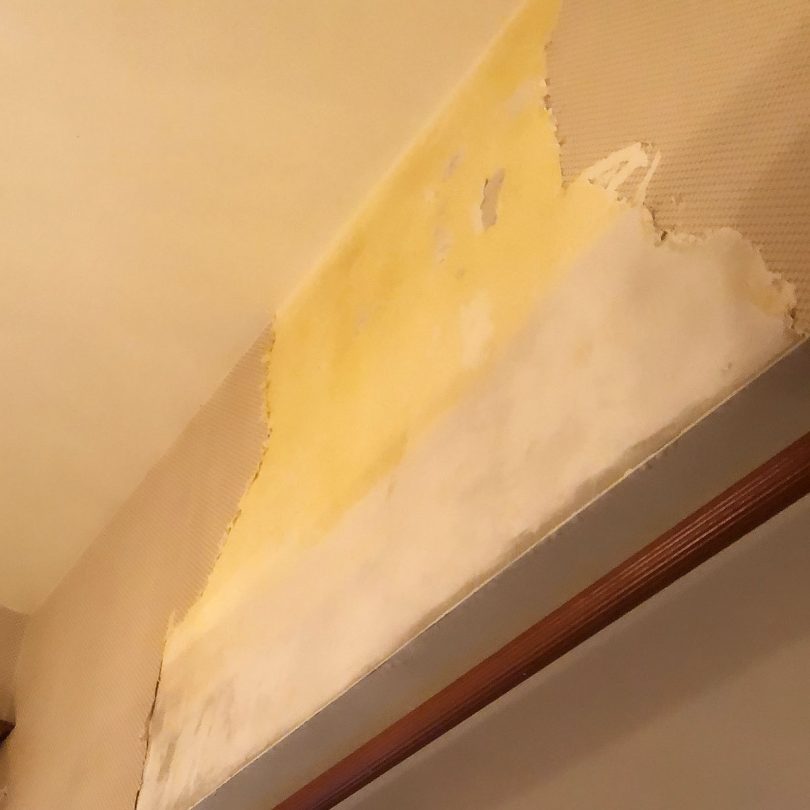
The bathroom gets pretty steamy during showers, so I had concerns about the longevity of wallpapering over the existing paper’s slick surface. I’ve removed wallpaper before — in this very house even — and while I knew it would take some time, I truly did not think it would be all that bad. I spent at least 40 hours stripping the old wallpaper! Ridiculous. The wallpaper had been applied directly to unpainted drywall and bare patched spots, so it came off in teeny tiny pieces (sometimes taking the drywall’s paper backing with it and softening the mudded areas).
As I shared the process in real time in Instagram Stories, people reached out to ask why I didn’t just drywall over it all once I realized how bad the job would be. I suspect the wall with the medicine cabinet actually is a layer of drywall over the original plaster. But why not do it over the existing paper? Putting up new drywall, taping, and mudding would take nearly as much time and effort while losing some of the depth of the room and trim profile. There may be a slight benefit of time saved, but at the expense of architectural details. So I continued on with the tedious job of stripping the wallpaper as neatly as I could.
Wallpaper Removal Methods
I tried scoring. Steaming. Soaking. Applying DIF wallpaper remover (with no noticeable difference between the liquid concentrate and the gel version, and no improvement over very hot water from a good spray bottle). There was no magic solution to make it go faster, though the wallpaper scoring tool did make the biggest difference. I tried a wallpaper removing tool, but preferred a small putty knife.
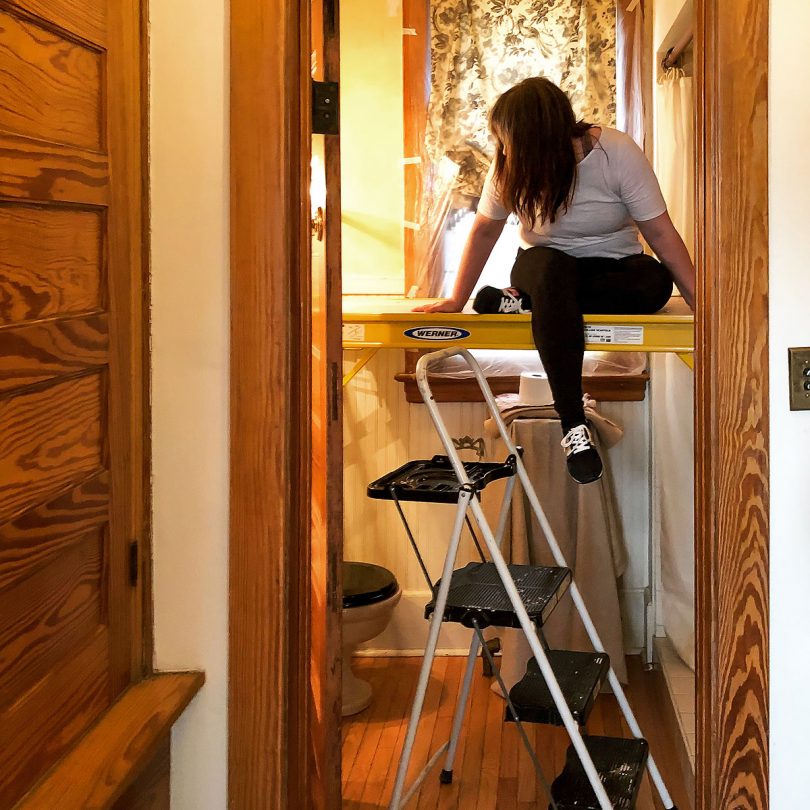
I did the work in batches. Three hours here, four hours there. There were a few long days too, but I learned my lesson early on when I kept pressing and did 12 hours of scraping and then couldn’t sleep because my shoulder hurt too much. I’m not as good at scraping with my non-dominant hand, so most of the work was all repetitive motion with the same arm.
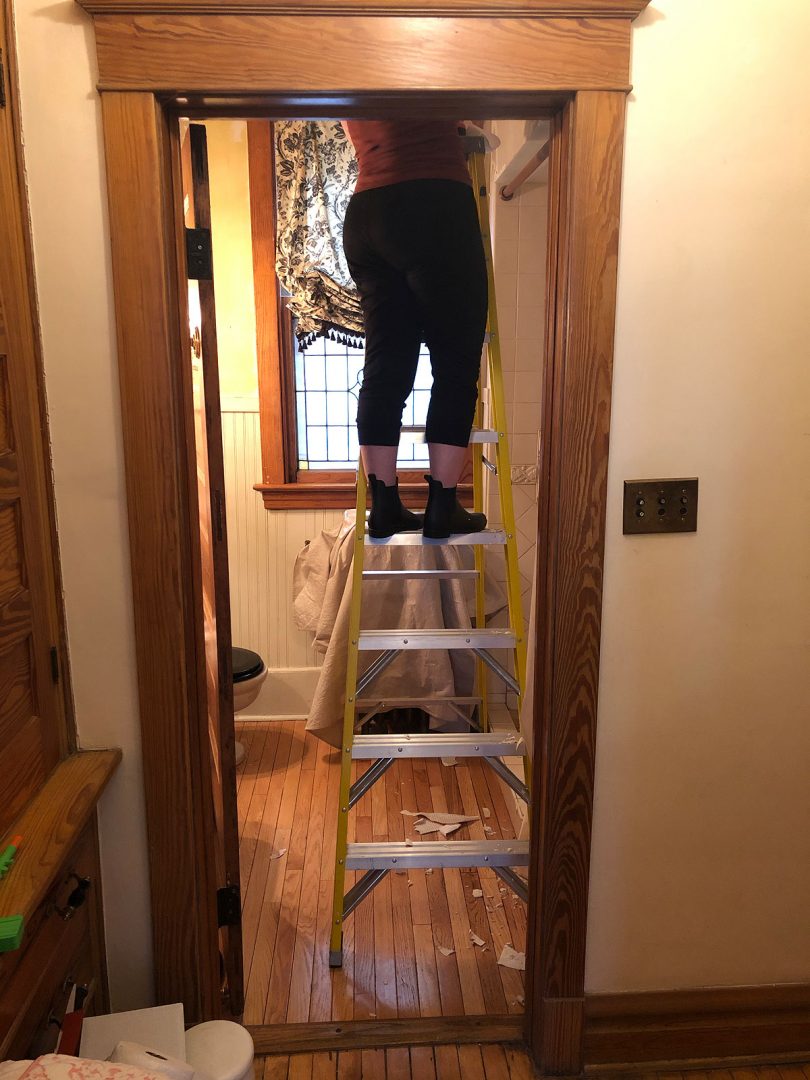
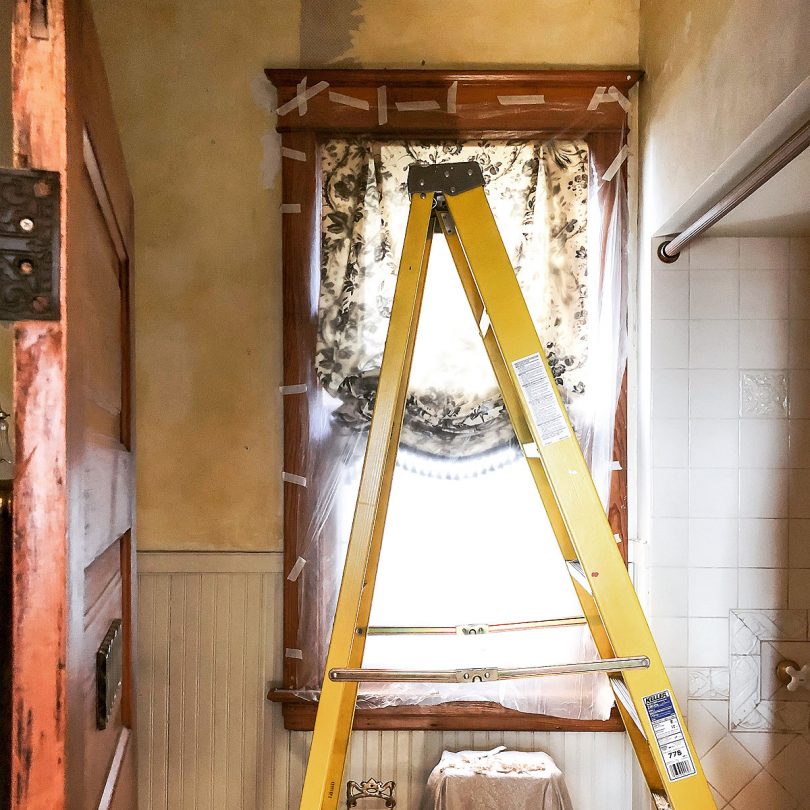
I did finally get a scaffold after trying to reach various parts of the wall 10′ up with A-frame and multi-position ladders. I’m nervous about heights, so being four feet up is a stupid big deal to me. Any clanking noise or slight feeling of movement startled me! A truly unenjoyable experience all around.
Repairing the Walls and Preparing to Wallpaper Again
The job is done! Well, the wallpaper removal part is. Now I need to repair the damage left behind and get the walls in shape for new wallpaper to come. I’ll start by scrubbing the walls with DIF (vinegar is good too, but I already have the DIF on hand) to clean off any glue residue left behind. I’ll let it dry and then put a coat of Gardz on the walls before making my repairs (there will be many). So much Durabond to apply! I don’t think I’ll need to do a full skim coat though, just fill in areas here and there. Then it will be time to sand smooth and spot-prime with Gardz again. Following that up with Shieldz to prime for the new wallpaper.
Priming for Wallpaper
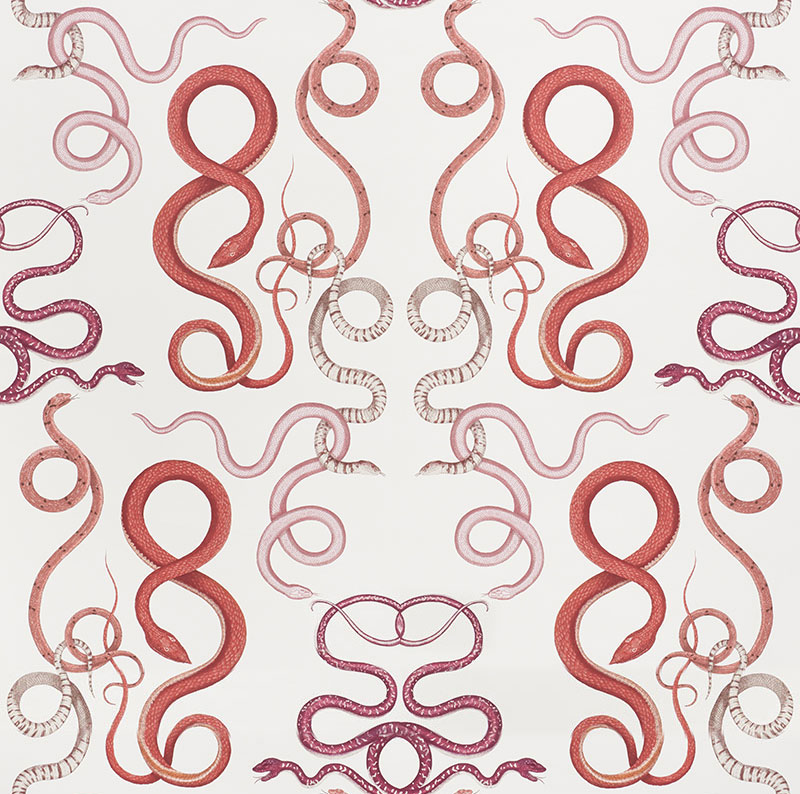
Why does one need to use wallpaper primer? One, it is opaque and will even out the wall color so no splotchiness shows through my new paper. Two, it gives you a little more wiggle room to slide the wallpaper into place before it dries. And three, it makes for easier future removal. I’m putting intertwined snakes up (Schumacher Giove wallpaper in ruby/garnet) — I imagine future homeowners may want to make a change at some point.
Prep Work and Painting the Rest of the Bathroom
All of that work so far and to come was just for the top half of the walls! The lower half of our bathroom has headboard wainscoting. I like it and want to keep it, so I’ll give it a light sanding, clean it, and paint it. One coat? Who am I kidding, I know it will be two.
The window, medicine cabinet, and doorway will all be sanded, cleaned, primed, and painted the same color and finish as the beadboard. Two or three coats on everything. The door will be done too, but in black, and the ceiling to match the woodwork in a flat finish. The ceiling needs some repair attention too — it was patched when we had to rip it open to repair leaking pipes in the bathroom above. I like a flat look on the ceiling, so I’ll be using Benjamin Moore Aura Bath and Spa paint in a matte finish.
A lot of work and I’m only halfway done, if that. But continuing on! It will be worth it in the end.


14 comments
Judy
On Domino’s website today they mentioned that tiger wallpaper is out and snake wallpaper is in. You are often ahead of the curve!
Although, I could still not have the snakes at my house. :)
Making it Lovely
I’m glad to see it! Snakes have definitely been coming up in popularity. There will be a rise and fall to the trend, but I love my wallpaper so much that does not bother me.
Cat
Ugh ugh ugh it’s a rotten experience and do you silently but constantly cuss out the former owners as you flake away? I did, both times I’ve encountered similar. (The second time was grasscloth glued to drywall AND painted over for goodness’ sake.) Doing it right will make you happiest in the end, once it’s all in the rearview mirror. and I LOOOOOOOOOOOOOOVE the new wallpaper!
Beth
I’ve always chosen to cover wallpaper with a textured mud from Home Depot precisely because I can’t imagine going through all that work. Kudos to you!
Nicole
We live in a 120 year old house in France and I think the painter (who prepared all the walls before paint or wallpaper went up) must have been here every day for 6 months- the stairwell alone took 5 weeks to prepare. He removed most wallpaper because this house had been rented for 60 years and they just kept putting lining paper up over the top of the last layer so we had one room with 6 layers to remove! After the walls were cleaned up, he put up a new layer of lining paper in several of the rooms although the majority were simply plastered- once with heavy plaster to patch and then a second layer of fine finishing plaster. Did you consider going the lining paper route (over old paper)? I have the impression that here, its the most common way to handle walls in an old house. I have never renovated a house in the States so I am curious how common this is.
Judy
Wow, what a difficult job! I have the same problem in my kitchen. I started removing the wallpaper but it took the paper-facing of the drywall with it. If you were going to paint, rather than wallpaper, would you do the same wall prep? I think that I’ll paint once I’m able to remove it all.
Can’t wait to see your finished bathroom!
Marcee
Great job. Nicole ,,,, giant project. I could never do it. You sure are relentless! Talented lady. However, THAT new wallpaper is weird. Couldn’t live with it more than 5 minutes. Nothing against snakes, worms or bugs ,,,,,, just not in my bathroom!!
((ferns would be nice))
Well, I’m anxious to see the completed project!
Carole H.
LOVE the wallpaper. I am in the midst of a similar but easier project. The prior homeowner painted the powder room walls without priming so it has been peeling off. They also did a very sloppy job on patching holes in the plaster – there are lots of big bumps. . I am going to use Durabond for the patching. Would you mind providing the source for your wallpaper too? Thank you and I love to see you posting again!!
Making it Lovely
Oh, I meant to link to it in the post! I’ll add it there, and it’s Schumacher’s Giove wallpaper in ruby/garnet.
Danielle
Congrats on finishing the wallpaper removal! I know there’s a lot more to do, but you gotta celebrate the small victories, too!
Brenda
It’s going to be gorgeous! Cheering you on from the comfort of my recliner. :)
Jacqui Bennetts
Oh, your poor arm, thank goodness that is over. On to the fun bits, well nearly. I can not wait to see that wall paper up. I love it.
Lyndsey
I’m excited to see this! I love what you do. We have bathroom re-dos on the horizon and since they are such small spaces, I’m thinking about interesting wallpaper–not QUITE as interesting as yours though (it wouldn’t go with my house or husband ).
Comments are closed.