

How To Make A Succulent Sea Terrarium
by Andrea My daughter turned seven last week and requested a mermaid themed pool party. While color schemes, garland and…April 25, 2012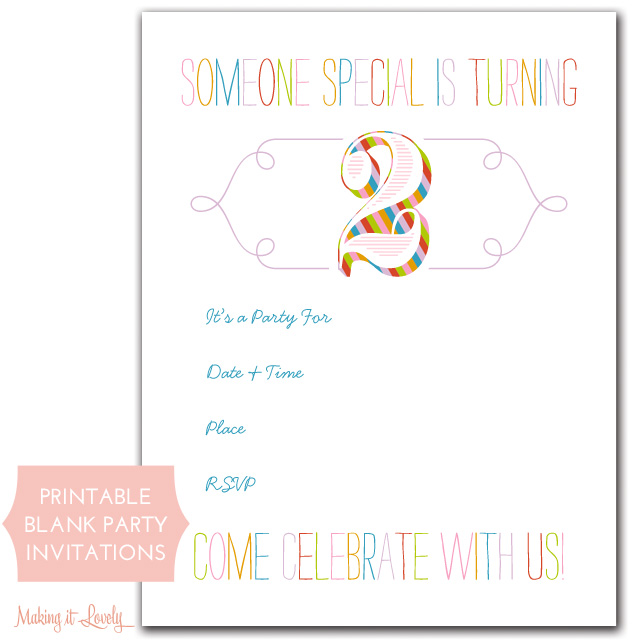
Rainbow Birthday Party Invitations (Free Printable)
We had a rainbow party last year for Eleanor's birthday, and I made really cute invitations for it. At the…April 23, 2012
Train Party Invitations (Free Printable)
We're having a party for Eleanor's third birthday soon. She loves trains, and while searching google images for "Little Golden…April 19, 2012
The Lighting Guide: How to Put it All Together
A reader had asked me a seemingly simple question about how to choose lighting fixtures that work well from room…April 18, 2012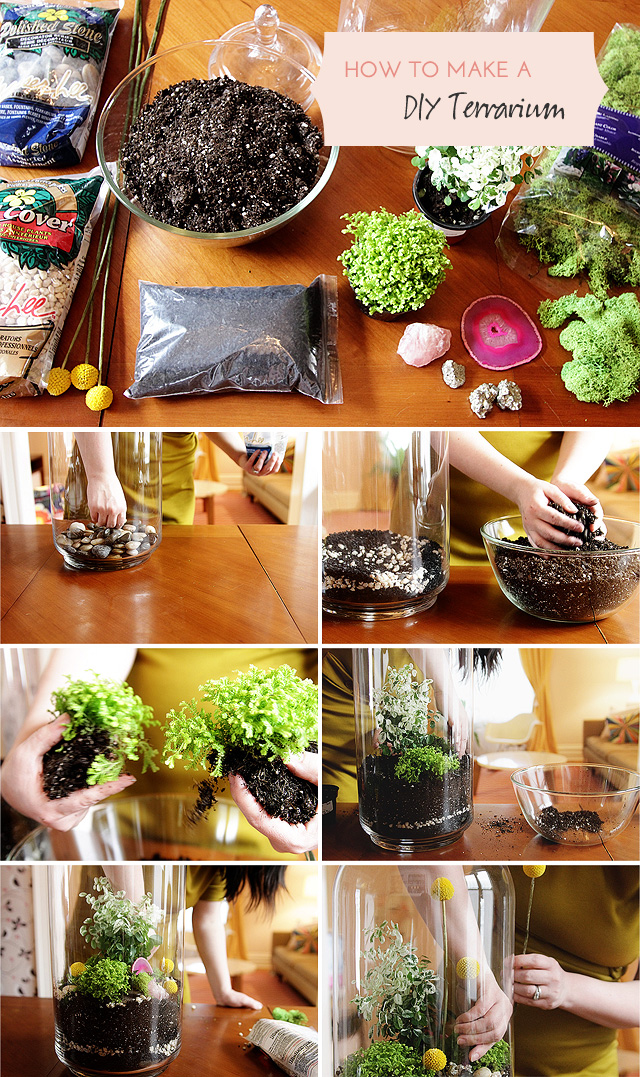
How to Make a DIY Terrarium
I had been meaning to make a terrarium for a while now, but I finally got to it last week.…April 17, 2012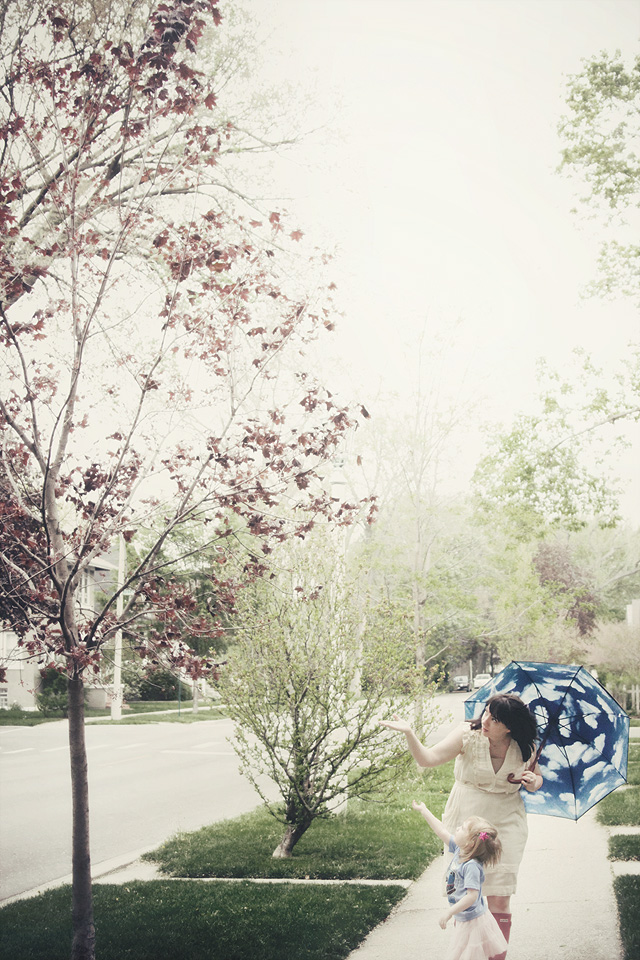
Sky Umbrella
Sky Umbrella Tibor Kalman’s Sky Umbrella is 20 years old. I remember seeing it in the MoMA catalog for the…April 17, 2012
How To Make A Succulent Sea Terrarium
by Andrea My daughter turned seven last week and requested a mermaid themed pool party. While color schemes, garland and paper pom poms are an…
Rainbow Birthday Party Invitations (Free Printable)
We had a rainbow party last year for Eleanor’s birthday, and I made really cute invitations for it. At the time, I didn’t offer a…
Train Party Invitations (Free Printable)
We’re having a party for Eleanor’s third birthday soon. She loves trains, and while searching google images for “Little Golden Books Trains”, I came across…
The Lighting Guide: How to Put it All Together
A reader had asked me a seemingly simple question about how to choose lighting fixtures that work well from room to room, and I was…
How to Make a DIY Terrarium
I had been meaning to make a terrarium for a while now, but I finally got to it last week. I put together a post…
Sky Umbrella
Sky Umbrella Tibor Kalman’s Sky Umbrella is 20 years old. I remember seeing it in the MoMA catalog for the first time when I was…